
Installation Guide for Bold Bundles
Bold Bundles must be properly installed on your theme in order to run correctly. The installation ensures that your bundles and pricing appear on your product pages, and your customer's selections appear correctly in both the cart and checkout page.
Note: This article has installation instructions for all three versions of Bold Bundles. It's best to determine which version is installed on your store before proceeding.
Manual install instructions (via app block)
V3 install instructions (Online Store 2.0 themes)
Step 1: Enable the Bold Bundles app embeds
From your Shopify admin, navigate to Online Store > Themes.
Click on the Customize button next to the theme you would like to install Bundles on.
Click the App embeds icon in the left sidebar.
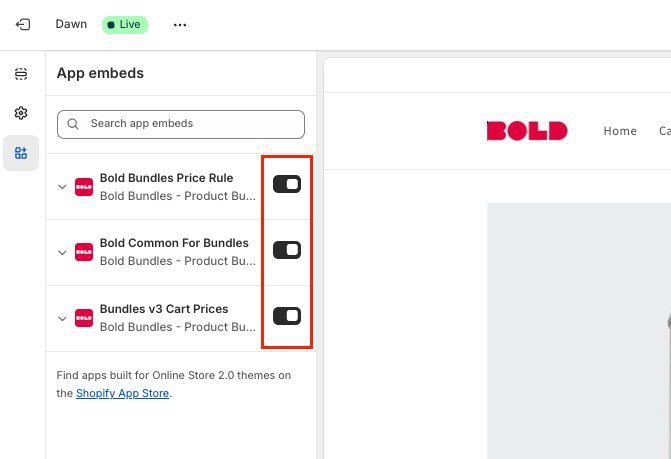
Enable the following three app embeds by moving their toggles to the right:
Bold Bundles Price Rule
Bold Common For Bundles
Bundles v3 Cart Prices
Click Save in the top right corner.

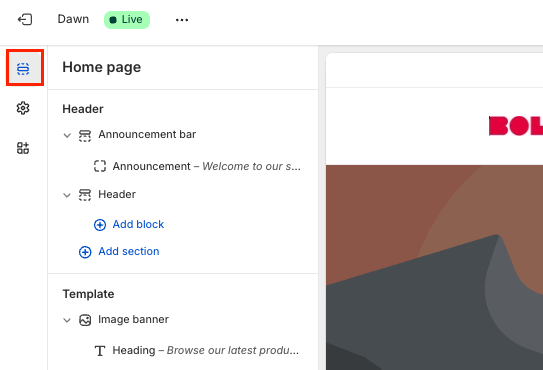
Step 2: Install the Bundles widget app block
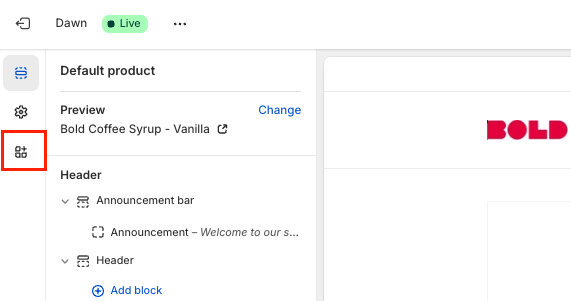
Click the Sections icon in the left sidebar.
In the template menu at the top of the page, select Products, then select the product template you want to edit.
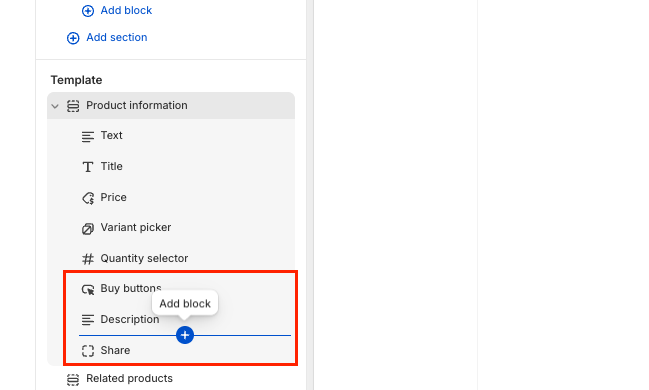
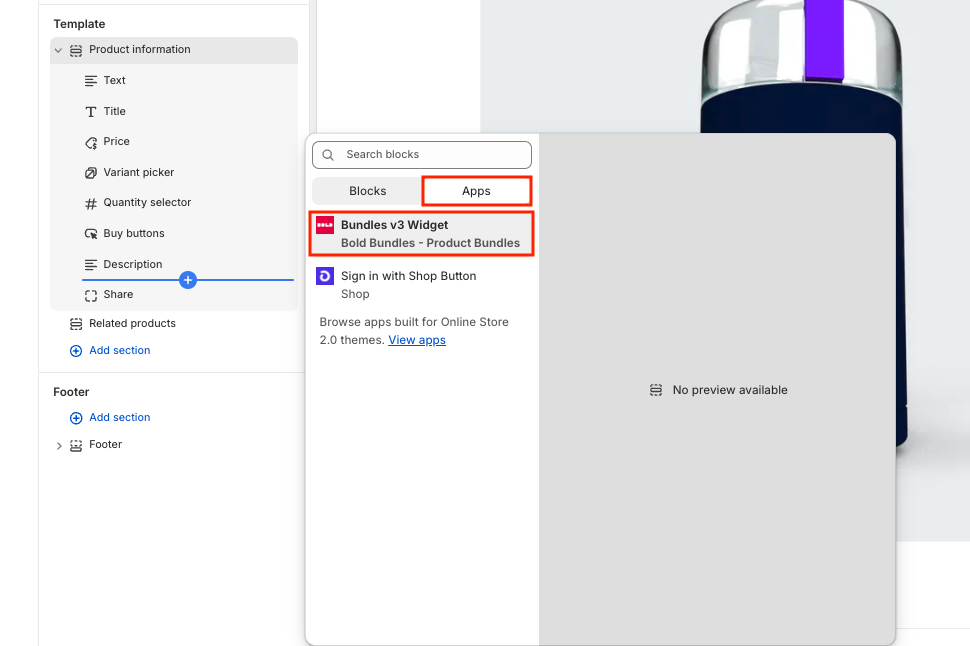
In the left menu under the Template section, hover your curser between menu items until the Add block pop-up appears.
Click on the blue plus-sign.
Click on Apps, then Bundles v3 Widget.
Optional: To see a live preview of the storefront Bundles widget, switch your Default product to one that belongs to an active Bundles group. In the top left corner of the theme customizer, next to Preview, click Change and select a Bundles product.
Move the Bundles widget to your preferred location on the page by dragging and dropping the Bundles v3 Widget app block to a new location in the left menu.
Click Save.
Step 3: Adjust the app embed settings (as needed)
Click the App embeds icon in the left sidebar.
Click on the Bold Bundles Price Rule app embed to expand the settings, and adjust the following settings as needed:
To show a compare-at-price on your Bundle products, move the toggle to the right next to Enable compare at price.
If you are using Bold Custom Pricing V3, move the toggle to the right next to Skip PRE JS file load.
Click on the Bold Common For Bundles app embed and adjust the following settings as needed:
Load All Collections - This attempts to load all data for your products and variants in collections to improve price calculation. If you are seeing incorrect pricing on your collection page, enabling this setting may help.
Delay Loading of Collection Data - This delay should only be increased if you are seeing a large increase in your collection page load times. An increased delay can reduce page load times. Use the slider to increase or decrease the delay (in milliseconds).
Note: Increasing the time delay can result in inaccurate pricing as Custom Pricing may not be able to display the correct prices on time.
Click on the Bundles V3 Cart Prices app embed and adjust the following settings as needed:
Note: By default, these settings contain information relevant to the Dawn theme.
Cart Item List Locator (Query Selector) - Enter the CSS query selector for the list/table element cart items.
Cart Total Value Locator (Query Selector) - Enter the CSS query selector for names for the total cart value element.
Cart Item Locator (Query Selector) - Enter the CSS query selector for the cart items.
Cart Item Price Locator (Query Selector) - Enter the CSS query selector for the price element of the line item.
Cart Line Item Price Locator (Query Selector) - Enter the CSS query selector for the total line item value.
Checkout Button (Query Selector) - Enter the CSS query selector for the checkout button element.
Check For Cart Change - Use the slider to define the interval (in milliseconds) between the checks Bundles makes to listen for cart updates.
Note: Smaller intervals can add additional load on browsers, longer intervals can cause a delay between price updates.
SC Product Options Integration (Beta) - Enable this setting to integrate Bold Bundles with SC Product Options by Shop Circle.
Delay after cart change - Use the slider to define the interval (in milliseconds) that Bundles will wait to display updated pricing in your cart drawer (AJAX cart).
Click Save.
Automatic install
Note: The automatic install is not compatible with Online Store 2.0 themes. If you are using an Online Store 2.0 theme with Bundles V3, please use the above instructions under Manual install instructions (via app block) or follow the steps under Request a Bundles install below.
When you install the Bold Bundles app to your store, you are able to navigate to our Liquid install area within the app. This can be found within the side bar, Need Help? > Liquid Installation section.
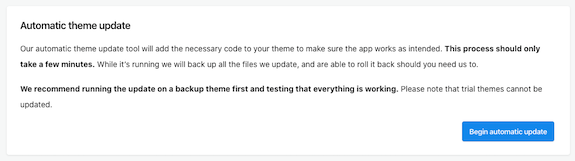
Selecting the Begin automatic update option will allow you to choose the theme on your store that you would like to complete the automatic code installation on for Bold Bundles.
When selecting which theme to update, there will be a check box that says, "I have created a backup of this theme".
We recommend creating a duplicate version of your Shopify theme to ensure you have a copy without the Bold code installed.
Once the checkbox is selected to confirm you have a back up version of your theme, you will be able to proceed with the code installation.
Note: Some themes are too complex for the installation tool, which may cause it to attempt the installation indefinitely. Should this occur, please request a Bundles install as shown below.
Request a Bundles install
Alert: To maintain the security of your Shopify account, we ask that you do not proactively send us a Staff Account invite for access to your shop. Instead, our team will request Collaborator access to your shop.
This option creates a ticket with our installation team, and schedules your store for a manual installation completed by our experts. By selecting this option, you will be asked to confirm which theme you would like this code installation to be completed on.
All of these requests are completed manually on a rotational basis and will be completed as soon as possible.
From within Bold Bundles, navigate to Help > Liquid Installation.
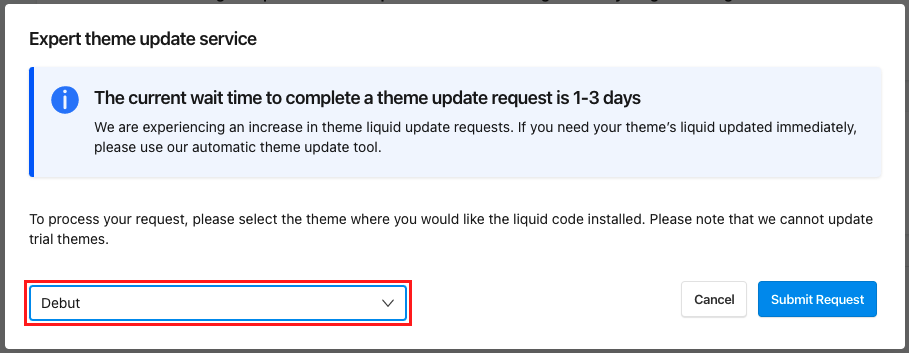
Under the Expert theme update service, select Begin update.
On the bottom left corner, select which theme you would like the installation completed on.
Select Submit Request.
Manual Liquid code install
Note: Before installing Liquid code, it is recommended to create a duplicate version of your Shopify theme to ensure you have a copy without our code installation.
V1 & V2 Liquid code install instructions (vintage themes)
Alert: This installation will not work for themes using render tags. You must use a theme that works with include tags or upgrade to Version 3 of Bold Bundles.
This installation allows the bundles to appear on the product page and discount correctly on the product, cart and checkout page.
Step 1: Add Snippet files
Duplicate themes to create a backup copy.
From the Shopify admin, select Online Store.
Select Actions.
Select Edit code.
Under Snippets, find these files:
bold-common.liquid
bold-includes.liquid
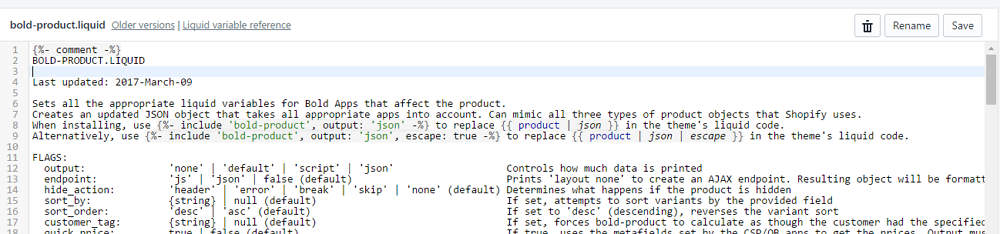
bold-product.liquid
bold-variant.liquid
shappify-bdl-load-bundle.liquid
bold-bundles.css
For any that don't exist:
Select Add a new snippet.
Enter the correct snippet name.
Select Create snippet.
Copy and paste the code found in each of these links into their respective files:
{%- comment -%}
BOLD-COMMON.LIQUID
Last updated: 2018-Aug-9
--------------------------- WARNING ---------------------------
This file is auto-generated by BOLD and should not be modified.
It may be overwritten and any customizations would be lost.
--------------------------- WARNING ---------------------------
{%- endcomment -%}
<script>
{%- comment -%} common data {%- endcomment -%}
window.BOLD = window.BOLD || {};
window.BOLD.common = window.BOLD.common || {};
window.BOLD.common.Shopify = window.BOLD.common.Shopify || {};
window.BOLD.common.Shopify.shop = {
domain: '{{ shop.domain }}',
permanent_domain: '{{ shop.permanent_domain }}',
url: '{{ shop.url }}',
secure_url: '{{ shop.secure_url }}',
money_format: {{ shop.money_format | json }},
currency: {{ shop.currency | json }}
};
window.BOLD.common.Shopify.customer = {
id: {{ customer.id | json }},
tags: {{ customer.tags | json }},
};
window.BOLD.common.Shopify.cart = {{ cart | json }};
window.BOLD.common.template = '{{ template | split: "." | first }}';
{%- comment -%} common functions {%- endcomment -%}
window.BOLD.common.Shopify.formatMoney = function(money, format) {
function n(t, e) {
return "undefined" == typeof t ? e : t
}
function r(t, e, r, i) {
if (e = n(e, 2),
r = n(r, ","),
i = n(i, "."),
isNaN(t) || null == t)
return 0;
t = (t / 100).toFixed(e);
var o = t.split(".")
, a = o[0].replace(/(\d)(?=(\d\d\d)+(?!\d))/g, "$1" + r)
, s = o[1] ? i + o[1] : "";
return a + s
}
"string" == typeof money && (money = money.replace(".", ""));
var i = ""
, o = /\{\{\s*(\w+)\s*\}\}/
, a = format || window.BOLD.common.Shopify.shop.money_format || window.Shopify.money_format || "$ {% raw %}{{ amount }}{% endraw %}";
switch (a.match(o)[1]) {
case "amount":
i = r(money, 2, ",", ".");
break;
case "amount_no_decimals":
i = r(money, 0, ",", ".");
break;
case "amount_with_comma_separator":
i = r(money, 2, ".", ",");
break;
case "amount_no_decimals_with_comma_separator":
i = r(money, 0, ".", ",");
break;
case "amount_with_space_separator":
i = r(money, 2, " ", ",");
break;
case "amount_no_decimals_with_space_separator":
i = r(money, 0, " ", ",");
break;
case "amount_with_apostrophe_separator":
i = r(money, 2, "'", ".");
break;
}
return a.replace(o, i);
};
window.BOLD.common.Shopify.saveProduct = function (handle, product) {
if (typeof handle === 'string' && typeof window.BOLD.common.Shopify.products[handle] === 'undefined') {
if (typeof product === 'number') {
window.BOLD.common.Shopify.handles[product] = handle;
product = { id: product };
}
window.BOLD.common.Shopify.products[handle] = product;
}
};
window.BOLD.common.Shopify.saveVariant = function (variant_id, variant) {
if (typeof variant_id === 'number' && typeof window.BOLD.common.Shopify.variants[variant_id] === 'undefined') {
window.BOLD.common.Shopify.variants[variant_id] = variant;
}
};
{%- comment -%} product data {%- endcomment -%}
window.BOLD.common.Shopify.products = window.BOLD.common.Shopify.products || {};
window.BOLD.common.Shopify.variants = window.BOLD.common.Shopify.variants || {};
window.BOLD.common.Shopify.handles = window.BOLD.common.Shopify.handles || {};
{%- if template == 'product' -%}
window.BOLD.common.Shopify.handle = {{ product.handle | json }}
{%- endif -%}
{%- comment -%} product page {%- endcomment -%}
window.BOLD.common.Shopify.saveProduct({{ product.handle | json }}, {{ product.id | json }});
{%- for variant in product.variants -%}{%- assign csp_metafield_namespace = variant.id | prepend: "csp" -%}window.BOLD.common.Shopify.saveVariant({{ variant.id | json }}, { product_id: {{ product.id | json }}, product_handle: {{ product.handle | json }}, price: {{ variant.price | json }}, group_id: '{{variant.metafields.bold_rp.rp_group_id}}', csp_metafield: {{ product.metafields[csp_metafield_namespace] | json }}});{%- endfor -%}
{%- comment -%} BOLD APPS INSTALLED {%- endcomment -%}
{%- assign bold_apps_installed = shop | map: 'metafields' | map: 'bold_apps_installed' | first -%}
window.BOLD.apps_installed = {{ bold_apps_installed | json }} || {};
{%- unless bold_apps_installed contains 'Customer Pricing' or bold_apps_installed contains 'Product Bundles' or bold_apps_installed contains 'Product Discount' or bold_apps_installed contains 'Quantity Breaks' or bold_apps_installed contains 'Custom Order' or bold_apps_installed contains 'Order Manager' or bold_apps_installed contains 'The Motivator'-%}
{%- comment -%} collection page {%- endcomment -%}
{%- for product in collection.products -%}
window.BOLD.common.Shopify.saveProduct({{ product.handle | json }}, {{ product.id | json }});
{%- for variant in product.variants -%}{%- assign csp_metafield_namespace = variant.id | prepend: "csp" -%}window.BOLD.common.Shopify.saveVariant({{ variant.id | json }}, { product_id: {{ product.id | json }}, product_handle: {{ product.handle | json }}, price: {{ variant.price | json }}, group_id: '{{variant.metafields.bold_rp.rp_group_id}}', csp_metafield: {{ product.metafields[csp_metafield_namespace] | json }}});{%- endfor -%}
{%- endfor -%}
{%- comment -%} search page {%- endcomment -%}
{%- for product in search.results -%}
window.BOLD.common.Shopify.saveProduct({{ product.handle | json }}, {{ product.id | json }});
{%- for variant in product.variants -%}{%- assign csp_metafield_namespace = variant.id | prepend: "csp" -%}window.BOLD.common.Shopify.saveVariant({{ variant.id | json }}, { product_id: {{ product.id | json }}, product_handle: {{ product.handle | json }}, price: {{ variant.price | json }}, group_id: '{{variant.metafields.bold_rp.rp_group_id}}', csp_metafield: {{ product.metafields[csp_metafield_namespace] | json }}});{%- endfor -%}
{%- endfor -%}
{%- endunless -%}
{%- comment -%} cart page {%- endcomment -%}
{%- for item in cart.items -%}{%- assign csp_metafield_namespace = item.variant_id | prepend: "csp" -%}window.BOLD.common.Shopify.saveVariant({{ item.variant_id | json }}, { product_id: {{ item.product.id | json }}, product_handle: {{ item.product.handle | json }}, price: {{ item.variant.price | json }}, group_id: '{{item.variant.metafields.bold_rp.rp_group_id}}', csp_metafield: {{ item.product.metafields[csp_metafield_namespace] | json }}});{%- endfor -%}
{%- comment -%} metafields {%- endcomment -%}
window.BOLD.common.Shopify.metafields = window.BOLD.common.Shopify.metafields || {};
{%- assign metafield_namespaces_to_load = 'bold_rp,bold_csp_defaults' | split: ',' -%}
{%- for namespace in metafield_namespaces_to_load -%}
window.BOLD.common.Shopify.metafields[{{ namespace | json }}] = {{ shop.metafields[namespace] | json }};
{%- endfor -%}
window.BOLD.common.cacheParams = window.BOLD.common.cacheParams || {};
</script>

{%- comment -%} INCLUDE APP SCRIPTS BELOW {%- endcomment -%}
{%- comment -%} BOLD-INCLUDES.LIQUID --------------------------- WARNING --------------------------- THIS IS A GENERATED ASSET OF INCLUDES FOR INSTALLED BOL APPLICATIONS SO NOT MODIFY --------------------------- WARNING --------------------------- {%- endcomment -%}{%- comment -%} BOLD-PRODUCT.LIQUID Last updated: 2018-Oct-16 Sets all the appropriate liquid variables for Bold Apps that affect the product. Creates an updated JSON object that takes all appropriate apps into account. Can mimic all three types of product objects that Shopify uses. When installing, use {%- include 'bold-product', output: 'json' -%} to replace {{ product | json }} in the theme's liquid code. Alternatively, use {%- include 'bold-product', output: 'json', escape: true -%} to replace {{ product | json | escape }} in the theme's liquid code. FLAGS: output: 'none' | 'default' | 'script' | 'json' Controls how much data is printed endpoint: 'js' | 'json' | false (default) Prints 'layout none' to create an AJAX endpoint. Resulting object will be formatted to match either the '.js' or '.json' style of output. If set to a truth-y value other than 'json' will act like a '.js' endpoint. hide_action: 'header' | 'error' | 'break' | 'skip' | 'none' (default) Determines what happens if the product is hidden sort_by: {string} | null (default) If set, attempts to sort variants by the provided field sort_order: 'desc' | 'asc' (default) If set to 'desc' (descending), reverses the variant sort customer_tag: {string} | null (default) If set, forces bold-product to calculate as though the customer had the specified tag quick_price: true | false (default) If true, uses the metafields set by the CSP/QB apps to get the prices. Output must be 'none' to be allowed additional_includes: {string} | null (default) If set, includes the additional products after setting the initial bold_product liquid variables variant_includes: {string} | null (default) Additional include files to be passed on to bold-variant (comma-delimited) escape: {bool} | false (default) If set, forces bold-product to escape its json output REQUIRED: bold-variant.liquid is needed for full product handling. OPTIONAL: bold-product-error.liquid - If this snippet exists, it will be used to display content other than 'Product not available' to the customer if the hide_action is either 'break' or 'error'. A bold-product-error snippet can access: product: The liquid variable representing the product that is hidden reason: Why the product is hidden. Possible values are: 'customer-hide-tag' | 'motivator-hidden-product' | 'options-hidden-product' | 'duplicate-and-hide' | 'other' {%- endcomment -%} {%- comment -%} ============================================================================================================ ASSIGN LIQUID VARIABLES ============================================================================================================ {%- endcomment -%} {%- assign bold_product = bold-product | default: product -%} {%- assign bold_price = bold_product.price -%} {%- assign bold_price_min = bold_product.price_min -%} {%- assign bold_price_max = bold_product.price_max -%} {%- assign bold_price_varies = bold_product.price_varies -%} {%- assign bold_compare_at_price = bold_product.compare_at_price -%} {%- assign bold_compare_at_price_min = bold_product.compare_at_price_min -%} {%- assign bold_compare_at_price_max = bold_product.compare_at_price_max -%} {%- assign bold_compare_at_price_varies = bold_product.compare_at_price_varies -%} {%- assign bold_selected_or_first_available_variant = bold_product.selected_or_first_available_variant | default: bold_product.variants.first | default: bold_product.variants[0] -%} {%- if product or bold-product -%} {%- assign bold_apps_installed = shop | map: 'metafields' | map: 'bold_apps_installed' | first -%} {%- comment -%}Assign flags to their default values if not set {%- endcomment -%} {%- assign escape_output = escape | default: false -%} {%- assign bold_product_output = output | default: 'default' -%} {%- assign bold_product_endpoint = endpoint | default: false -%} {%- if bold_product_endpoint -%}{%- assign bold_product_output = 'json' -%}{%- endif -%} {%- assign bold_product_hide_action = hide_action | default: 'none' -%} {%- assign bold_product_sort_by = sort_by | default: nil -%} {%- assign bold_product_sort_order = sort_order | default: 'asc' -%} {%- assign bold_product_quick_price = quick_price | default: false -%} {%- if bold_product_hide_action == 'skip' and output == blank -%} {%- assign product_metafield_check = bold_product.variants | map: 'metafields' | map: 'shappify_csp' | map: 'csp_tag' | uniq -%} {%- if product_metafield_check.size > 1 or product_metafield_check.first != blank -%} {%- assign has_csp = true -%} {%- else -%} {%- assign has_csp = false -%} {%- endif -%} {%- if quick_price == blank and shop.metafields.shop_csp_tag_group.shop_csp_tag and has_csp -%} {%- assign bold_product_quick_price = true -%} {%- endif -%} {%- endif -%} {%- if bold_apps_installed contains 'Quantity Breaks' or bold_apps_installed contains 'Customer Pricing' or bold_apps_installed contains 'Product Bundles' or bold_apps_installed contains 'The Motivator' -%} {%- unless csp_customer_tag -%} {%- if customer.tags and shop.metafields.shop_csp_tag_group.shop_csp_tag -%} {%- assign all_shop_tags = shop.metafields.shop_csp_tag_group.shop_csp_tag | append: ',default' | split: ',' -%} {%- for customer_tag in customer.tags -%} {%- if all_shop_tags contains customer_tag -%} {%- assign csp_customer_tag = customer_tag -%} {%- endif -%} {%- endfor -%} {%- endif -%} {%- assign bold_product_customer_tag = customer_tag | default: csp_customer_tag | default: 'default' -%} {%- endunless -%} {%- if bold_product_output == 'json' and bold_product_endpoint -%}{%- layout none -%}{%- endif -%} {%- assign variant_list = bold_product.variants -%} {%- if bold_product_sort_by != blank -%}{%- assign variant_list = variant_list | sort: bold_product_sort_by -%}{%- endif -%} {%- if bold_product_sort_order == 'desc' or bold_product_sort_order == 'descending' -%}{%- assign variant_list = variant_list | reverse -%}{%- endif -%} {%- assign variant_list = variant_list | default: bold_product.variants -%} {%- if bold_product_output == 'json' -%} {%- assign requires_variant_loop = true -%} {%- elsif bold_product_quick_price and bold_product_output == 'none' -%} {%- assign requires_variant_loop = false -%} {%- else -%} {%- assign requires_variant_loop = bold_product.metafields.shappify_bundle | default: bold_product.metafields.shappify_csp | default: bold_product.metafields.shappify_qb | default: shop.metafields.shop_csp_tag_group | default: shop.metafields.bold_measurement | default: shop.metafields.bold_rp | default: false -%} {%- endif -%} {%- capture bold_bundles_widget -%} <div class="bold-bundle" data-product-id="{{ product.id }}"></div> {%- endcapture -%} {%- assign product_has_btm = false -%} {%- assign product_has_csp = false -%} {%- assign product_has_qb = false -%} {%- assign product_has_ro = false -%} {%- assign product_has_bdl = false -%} {%- assign bold_hidden_product = false -%} {%- assign bold_trigger_break = false -%} {%- if requires_variant_loop -%} {%- comment -%}INTIALIZE VARIABLES, CLEAR OLD VALUES {%- endcomment -%} {%- assign bold_price_min = 1000000000000000000 -%} {%- comment -%}Starting the count at Shopify's max allowed value {%- endcomment -%} {%- assign bold_price_max = 0 -%} {%- assign bold_price = bold_price_min -%} {%- assign bold_price_varies = false -%} {%- assign bold_compare_at_price_min = 1000000000000000000 -%} {%- comment -%}Starting the count at Shopify's max allowed value {%- endcomment -%} {%- assign bold_compare_at_price_max = 0 -%} {%- assign bold_compare_at_price = bold_compare_at_price_min -%} {%- assign bold_compare_at_price_varies = false -%} {%- assign bold_selected_or_first_available_variant = "" -%} {%- assign bold_variants_size = 0 -%} {%- assign options1 = nil -%} {%- assign options2 = nil -%} {%- assign options3 = nil -%} {%- assign bold_product_available = false -%} {%- comment -%}SET LIQUID PRODUCT VARIABLES DERIVED FROM VARIANT VALUES {%- endcomment -%} {%- assign variant_output_json = '' -%} {%- for variant in variant_list -%} {%- capture bold_variant_check -%} {%- include 'bold-variant' with variant, output: 'json', hide_action: 'skip', base_product: bold_product, customer_tag: bold_product_customer_tag, price_style: bold_product_endpoint -%} {%- endcapture -%} {%- unless bold_product_output == 'none' -%} {%- if bold_variant_check contains 'Liquid error' -%} {%- assign variant_output_json = variant_list | json -%} {%- break -%} {%- endif -%} {%- endunless -%} {%- if variant_output_json.size > 1 -%}{%- assign variant_output_json = variant_output_json | append: ',' -%}{%- endif -%} {%- assign variant_output_json = variant_output_json | append: bold_variant_check -%} {%- if bold_variant_price < bold_price_min -%}{%- assign bold_price_min = bold_variant_price -%}{%- endif -%} {%- if bold_variant_price > bold_price_max -%}{%- assign bold_price_max = bold_variant_price -%}{%- endif -%} {%- if bold_price_max != bold_price_min -%}{%- assign bold_price_varies = true -%}{%- endif -%} {%- assign bold_price = bold_price_min -%} {%- if variant.compare_at_price < bold_compare_at_price_min -%}{%- assign bold_compare_at_price_min = variant.compare_at_price -%}{%- endif -%} {%- if variant.compare_at_price > bold_compare_at_price_max -%}{%- assign bold_compare_at_price_max = variant.compare_at_price -%}{%- endif -%} {%- if bold_compare_at_price_max != bold_compare_at_price_min -%}{%- assign bold_compare_at_price_varies = true -%}{%- endif -%} {%- assign bold_compare_at_price = bold_compare_at_price_min -%} {%- if variant.id == bold_product.selected_or_first_available_variant.id -%}{%- assign bold_selected_or_first_available_variant = variant -%}{%- endif -%} {%- if bold_selected_or_first_available_variant == "" -%}{%- assign bold_selected_or_first_available_variant = variant -%}{%- endif -%} {%- if bold_selected_or_first_available_variant.available == false and variant.available == true -%}{%- assign bold_selected_or_first_available_variant = variant -%}{%- endif -%} {%- assign bold_variants_size = bold_variants_size | plus: 1 -%} {%- unless options1 contains option1_clean_name or option1_clean_name == blank -%} {%- unless options1 == blank -%}{%- assign options1 = options1 | join: '~~' | append: '~~' -%}{%- endunless -%} {%- assign options1 = options1 | append: option1_clean_name | split: '~~' -%} {%- endunless -%} {%- unless options2 contains option2_clean_name or option2_clean_name == blank -%} {%- unless options2 == blank -%}{%- assign options2 = options2 | join: '~~' | append: '~~' -%}{%- endunless -%} {%- assign options2 = options2 | append: option2_clean_name | split: '~~' -%} {%- endunless -%} {%- unless options3 contains option3_clean_name or option3_clean_name == blank -%} {%- unless options3 == blank -%}{%- assign options3 = options3 | join: '~~' | append: '~~' -%}{%- endunless -%} {%- assign options3 = options3 | append: option3_clean_name | split: '~~' -%} {%- endunless -%} {%- assign bold_product_available = bold_product_available | default: bold_variant_available -%} {%- assign product_has_btm = variant_has_btm | default: product_has_btm -%} {%- assign product_has_csp = variant_has_csp | default: product_has_csp -%} {%- assign product_has_qb = variant_has_qb | default: product_has_qb -%} {%- assign product_has_ro = variant_has_ro | default: product_has_ro -%} {%- assign product_has_bdl = variant_has_bdl | default: product_has_bdl -%} {%- endfor -%} {%- if variant_output_json.first != '[' -%} {%- assign variant_output_json = '[' | append: variant_output_json | append: ']' -%} {%- endif -%} {%- comment -%}Failsafe: This will set all the Bold prices to "NaN" (Not A Number) in the unexpected case where all variants are supposed to be hidden from the customer {%- endcomment -%} {%- if bold_variants_size == 0 -%}{%- assign bold_price_min = "NaN" -%}{%- assign bold_price_max = "NaN" -%}{%- assign bold_price = "NaN" -%}{%- assign bold_compare_at_price_min = "NaN" -%}{%- assign bold_compare_at_price_max = "NaN" -%}{%- assign bold_compare_at_price = "NaN" -%}{%- endif -%} {%- comment -%}Failsafe: This will set all the Bold compare_at prices to the default compare_at_prices when 'compare_at' is not found {%- endcomment -%} {%- if bold_compare_at_price_min > bold_compare_at_price_max -%}{%- assign bold_compare_at_price_min = bold_product.compare_at_price_min -%}{%- assign bold_compare_at_price_max = bold_product.compare_at_price_max -%}{%- assign bold_compare_at_price = bold_product.compare_at_price -%}{%- endif -%} {%- comment -%}Failsafe: If no valid variants exist, fail back to product.selected_or_first_available_variant after all {%- endcomment -%} {%- if bold_selected_or_first_available_variant == "" -%}{%- assign bold_selected_or_first_available_variant = product.selected_or_first_available_variant -%}{%- endif -%} {%- else -%} {%- if bold_product_quick_price -%} {%- assign money_prefix = shop.money_format | split: '{{' | first -%} {%- assign money_suffix = shop.money_format | split: '}}' | last -%} {%- assign high_tag = bold_product_customer_tag | append: '_price_high' -%} {%- assign bold_price_min = bold_product.metafields.shappify_csp[bold_product_customer_tag] | default: bold_product.metafields.shappify_qb.qb_min | default: bold_product.price | remove: money_prefix | remove: money_suffix | remove: '.' | remove: ',' | remove: ' ' | times: 1 -%} {%- assign bold_price_max = bold_product.metafields.shappify_csp[high_tag] | default: bold_product.price_max | remove: money_prefix | remove: money_suffix | remove: '.' | remove: ',' | remove: ' ' | times: 1 -%} {%- assign bold_price = bold_price_min -%} {%- if bold_price_max == bold_price_min -%} {%- assign bold_price_varies = false -%} {%- else -%} {%- assign bold_price_varies = true -%} {%- endif -%} {%- else -%} {%- assign bold_price_min = bold_product.price_min -%} {%- assign bold_price_max = bold_product.price_max -%} {%- assign bold_price = bold_product.price -%} {%- assign bold_price_varies = bold_product.price_varies -%} {%- endif -%} {%- assign bold_compare_at_price_min = bold_product.compare_at_price_min -%} {%- assign bold_compare_at_price_max = bold_product.compare_at_price_max -%} {%- assign bold_compare_at_price = bold_product.compare_at_price -%} {%- assign bold_compare_at_price_varies = bold_product.compare_at_price_varies -%} {%- assign bold_selected_or_first_available_variant = bold_product.selected_or_first_available_variant -%} {%- assign bold_variants_size = bold_product.variants.size -%} {%- assign options1 = bold_product.options[0].values -%} {%- assign options2 = bold_product.options[1].values -%} {%- assign options3 = bold_product.options[2].values -%} {%- assign bold_product_available = false -%} {%- assign variant_output_json = variant_list | json -%} {%- endif -%} {%- if bold_product_endpoint == 'json' -%} {%- assign cents = bold_price | modulo: 100 | prepend: '00' | slice: -2, 2 -%} {%- assign dollars = bold_price | times: 0.01 | floor -%} {%- assign bold_price = dollars | append: '.' | append: cents -%} {%- assign cents = bold_price_min | modulo: 100 | prepend: '00' | slice: -2, 2 -%} {%- assign dollars = bold_price_min | times: 0.01 | floor -%} {%- assign bold_price_min = dollars | append: '.' | append: cents -%} {%- assign cents = bold_price_max | modulo: 100 | prepend: '00' | slice: -2, 2 -%} {%- assign dollars = bold_price_max | times: 0.01 | floor -%} {%- assign bold_price_max = dollars | append: '.' | append: cents -%} {%- assign cents = bold_compare_at_price | modulo: 100 | prepend: '00' | slice: -2, 2 -%} {%- assign dollars = bold_compare_at_price | times: 0.01 | floor -%} {%- assign bold_compare_at_price = dollars | append: '.' | append: cents -%} {%- assign cents = bold_compare_at_price_min | modulo: 100 | prepend: '00' | slice: -2, 2 -%} {%- assign dollars = bold_compare_at_price_min | times: 0.01 | floor -%} {%- assign bold_compare_at_price_min = dollars | append: '.' | append: cents -%} {%- assign cents = bold_compare_at_price_max | modulo: 100 | prepend: '00' | slice: -2, 2 -%} {%- assign dollars = bold_compare_at_price_max | times: 0.01 | floor -%} {%- assign bold_compare_at_price_max = dollars | append: '.' | append: cents -%} {%- endif -%} {%- endif -%} {%- comment -%} ============================================================================================================ HANDLE HIDDEN PRODUCTS ============================================================================================================ {%- endcomment -%} {%- comment -%}CHECK FOR CSP VISIBILITY {%- endcomment -%} {%- assign csp_hide_tag = false -%} {%- assign hide_check = bold_product_customer_tag | append: '-HIDE' -%} {%- if bold_product.tags contains hide_check -%}{%- assign csp_hide_tag = true -%}{%- endif -%} {%- comment -%}END OF CSP CHECK {%- endcomment -%} {%- unless bold_product.id == blank -%} {%- if csp_hide_tag == true or bold_product.type == 'OPTIONS_HIDDEN_PRODUCT' or bold_product.type == 'MOTIVATOR_HIDDEN_PRODUCT' or bold_product.metafields.inventory.ShappifyHidden == "true" -%} {%- assign bold_hidden_product = true -%} {%- comment -%}What is the reason for the hidden product? {%- endcomment -%} {%- if csp_hide_tag == true -%} {%- assign reason = 'customer-hide-tag' -%} {%- elsif bold_product.type == 'MOTIVATOR_HIDDEN_PRODUCT' -%} {%- assign reason = 'motivator-hidden-product' -%} {%- elsif bold_product.type == 'OPTIONS_HIDDEN_PRODUCT' -%} {%- assign reason = 'options-hidden-product' -%} {%- elsif bold_product.metafields.inventory.ShappifyHidden == "true" -%} {%- assign reason = 'duplicate-and-hide' -%} {%- else -%} {%- assign reason = 'other' -%} {%- endif -%} {%- capture hidden_product_output -%} {%- case bold_product_hide_action -%} {%- when 'break' -%} {%- capture error_page_check -%}{%- include 'bold-product-error' with reason, product: bold_product -%}{%- endcapture -%} {%- unless error_page_check contains 'Liquid error' -%} {{- error_page_check -}} {%- else -%} <p class='bold_not_available'>Product is not available</p> {%- endunless -%} {%- assign bold_trigger_break = true -%} {%- when 'error' -%} {%- include 'bold-product-error' with reason, product: bold_product -%} {%- assign bold_trigger_break = true -%} {%- when 'skip' -%} {%- continue -%} {%- when 'header' -%} {%- if template == 'product' -%}<meta name="robots" content="noindex">{%- endif -%} {%- endcase -%} {%- endcapture%} {%- endif -%} {%- endunless -%} {%- comment -%} ============================================================================================================ MIN/MAX QUANTITY ============================================================================================================ {%- endcomment -%} {%- if bold_apps_installed contains 'Customer Pricing' or bold_apps_installed contains 'Quantity Breaks' -%} {%- assign bold_product_min = false -%} {%- assign bold_product_max = false -%} {%- for tag in bold_product.tags -%} {%- assign lowercase_tag = tag | downcase | replace: 'min ', 'min_' | replace: 'min-', 'min_' | replace: 'max ', 'max_' | replace: 'max-', 'max_' -%} {%- assign lowercase_customer_tag = bold_product_customer_tag | downcase -%} {%- if lowercase_tag contains 'min_' -%} {%- assign tag_info = lowercase_tag | split: 'min_' -%} {%- assign cust_tag = tag_info.first | strip -%} {%- if tag_info.first == blank or cust_tag == lowercase_customer_tag -%} {%- assign bold_product_min = tag_info | last | times: 1 %} {%- endif -%} {%- elsif lowercase_tag contains 'max_' -%} {%- assign tag_info = lowercase_tag | split: 'max_' -%} {%- assign cust_tag = tag_info.first | strip -%} {%- if tag_info.first == blank or cust_tag == lowercase_customer_tag -%} {%- assign bold_product_max = tag_info | last | times: 1 %} {%- endif -%} {%- endif -%} {%- endfor -%} {%- endif -%} {%- comment -%} ============================================================================================================ BEGIN JSON OUTPUT ============================================================================================================ {%- endcomment -%} {%- unless no_quick_shop_buy == true -%} {%- assign variant_ids = product | map: 'variants' | map: 'id' -%} {%- assign bold_variant_ids = bold_product.variants | map: 'id' -%} {%- capture bold_product_json -%} {%- if bold_product_endpoint == 'json' -%} { "product": {%- endif -%} { "id": {{- bold_product_id | default: bold_product.id | json -}}, "title": {{- bold_product_title | default: bold_product.title | json -}}, {%- if bold_product_endpoint == 'json' -%} "body_html": {{- bold_product.description | json -}}, "template_suffix": {{- bold_product.template_suffix | json -}}, "images": [ {%- for image in bold_product.images -%} { "id": {{- image.id | json -}}, "product_id": {{- image.product_id | json -}}, "position": {{- image.position | json -}}, "src": {{- image.src | json -}}, "variant_ids": {{- variant_ids | json -}} } {%- unless forloop.last -%},{%- endunless -%} {%- endfor -%}], "image": { "id": {{- bold_product.featured_image.id | json -}}, "product_id": {{- bold_product.featured_image.product_id | json -}}, "position": {{- bold_product.featured_image.position | json -}}, "src": {{- bold_product.featured_image.src | json -}}, "variant_ids": {{- variant_ids | json -}} }, {%- endif -%} "handle": {{- bold_product_handle | default: bold_product.handle | json -}}, "description": {{- bold_product.description | json -}}, "published_at": {%- capture published_at -%}{{- bold_product.published_at | date: "%F" -}}T{{- bold_product.published_at | date: "%T" -}}{%- endcapture -%}{{- shop.timezone -}}{{- published_at | json -}}, "created_at": {%- capture created_at -%}{{- bold_product.created_at | date: "%F" -}}T{{- bold_product.created_at | date: "%T" -}}{%- endcapture -%}{{- shop.timezone -}}{{- created_at | json -}}, "vendor": {{- bold_product.vendor | json -}}, "{%- if bold_product_endpoint == 'json' -%}product_{%- endif -%}type": {{- bold_product.type | json -}}, "tags": {%- unless bold_product_endpoint == 'json' -%}{{- bold_product.tags | json -}}{%- else -%}{{- bold_product.tags | join: ',' | json -}}{%- endunless -%}, "price": {{- bold_price | default: bold_product.price | json -}}, "price_min": {{- bold_price_min | default: bold_product.price_min | json -}}, "price_max": {{- bold_price_max | default: bold_product.price_max | json -}}, "price_varies": {{- bold_price_varies | json -}}, "compare_at_price": {{- bold_compare_at_price | default: bold_product.compare_at_price | json -}}, "compare_at_price_min": {{- bold_compare_at_price_min | default: bold_product.compare_at_price_min | json -}}, "compare_at_price_max": {{- bold_compare_at_price_max | default: bold_product.compare_at_price_max | json -}}, "compare_at_price_varies": {{- bold_compare_at_price_varies | json -}}, "all_variant_ids": {{- bold_variant_ids | json -}}, "variants": {%- if variant_output_json -%}{{- variant_output_json -}}{%- else -%}{{- bold_product.variants | json -}}{%- endif -%}, "available": {{- bold_product_available | json -}}, {%- unless bold_product_endpoint == 'json' -%} "images": {{- bold_product.images | json -}}, {%- endunless -%} "featured_image": {{- bold_product.featured_image | json -}}, "options": {%- if bold_product_endpoint -%} [ {%- for opt in bold_product.options -%} {%- assign option_name = 'options' | append: forloop.index -%} { "name": {{- opt | json -}}, {%- if bold_product_endpoint == 'json' -%}"product_id":{{- bold_product.id | json -}},{%- endif -%} "position":{{- forloop.index | json -}}, "values":{{- [option_name] | json -}} } {%- unless forloop.last -%},{%- endunless -%} {%- endfor -%} ] {%- else -%} {{- bold_product.options | json -}} {%- endif -%}, "url": {{- bold_product.url | json -}} {%- comment -%}FLAGS TO INDICATE WHICH APPS ARE IN PLAY {%- endcomment -%} {%- if product_has_btm -%},"hasBTM": true{%- endif -%} {%- if product_has_csp -%},"hasCSP": true{%- endif -%} {%- if product_has_qb -%},"hasQB": true{%- endif -%} {%- if product_has_ro -%},"hasRO": true{%- endif -%} {%- if product_has_bdl -%},"hasBDL": true{%- endif -%} {%- comment -%}SET MINIMUM/MAXIMUM QUANTITIES{%- endcomment -%} {%- if bold_product_min -%},"min": {{ bold_product_min | json }}{%- endif -%} {%- if bold_product_max -%},"max": {{ bold_product_max | json }}{%- endif -%} } {%- if bold_product_endpoint == 'json' -%} } {%- endif -%} {%- endcapture -%} {%- unless bold_product_output == 'json' or bold_product_output == 'none'-%} <script> var currentScript = document.currentScript || document.scripts[document.scripts.length - 1]; var boldVariantIds = {{- bold_variant_ids | json -}}; var boldProductHandle = {{- bold_product.handle | json -}}; var BOLD = BOLD || {}; BOLD.products = BOLD.products || {}; BOLD.variant_lookup = BOLD.variant_lookup || {}; if (window.BOLD && !BOLD.common) { BOLD.common = BOLD.common || {}; BOLD.common.Shopify = BOLD.common.Shopify || {}; window.BOLD.common.Shopify.products = window.BOLD.common.Shopify.products || {}; window.BOLD.common.Shopify.variants = window.BOLD.common.Shopify.variants || {}; window.BOLD.common.Shopify.handles = window.BOLD.common.Shopify.handles || {}; window.BOLD.common.Shopify.saveProduct = function (handle, product) { if (typeof handle === 'string' && typeof window.BOLD.common.Shopify.products[handle] === 'undefined') { if (typeof product === 'number') { window.BOLD.common.Shopify.handles[product] = handle; product = { id: product }; } window.BOLD.common.Shopify.products[handle] = product; } }; window.BOLD.common.Shopify.saveVariant = function (variant_id, variant) { if (typeof variant_id === 'number' && typeof window.BOLD.common.Shopify.variants[variant_id] === 'undefined') { window.BOLD.common.Shopify.variants[variant_id] = variant; } }; } for (var boldIndex = 0; boldIndex < boldVariantIds.length; boldIndex = boldIndex + 1) { BOLD.variant_lookup[boldVariantIds[boldIndex]] = boldProductHandle; } BOLD.products[boldProductHandle] = {{- bold_product_json -}}; {%- if product_has_qb -%} {%- assign qb_pricing_html = bold_product | map: 'variants' | map: 'metafields' | map: 'shappify_qb' | map: 'pricing_html' -%}; {%- assign csp_pricing_html = bold_product | map: 'variants' | map: 'metafields' | map: 'shappify_csp' | map: 'pricing_html' -%}; var pricingHTML = {%- if qb_pricing_html[0] -%}{{- qb_pricing_html | json -}}{%- else -%}{{- csp_pricing_html | json -}}{%- endif -%}; for (var boldIndex = 0; boldIndex < pricingHTML.length; boldIndex = boldIndex + 1) { var element = document.createElement('DIV'); element.className = 'bold-hidden'; element.style.display = 'none'; element.id = 'variant_html_' + boldVariantIds[boldIndex]; element.innerHTML = pricingHTML[boldIndex]; if (document.body) { document.body.prepend(element); } else if (document.head) { document.head.prepend(element); } } {%- endif -%} {%- assign bold_rp = product | map: 'variants' | map: 'metafields' | map: 'bold_rp' -%} var boldCSPMetafields = { {%- if bold_apps_installed contains 'Customer Pricing' -%} {%- for variant in product.variants -%}{%- assign csp_metafield_namespace = variant.id | prepend: "csp" -%}{{variant.id}}:{{ product.metafields[csp_metafield_namespace] | json }}{%- unless forloop.last -%}, {%- endunless -%}{%- endfor -%} {%- endif -%} }; var boldTempProduct = {{- product | json -}}; var bold_rp = {{- bold_rp | json -}}; if(boldTempProduct){ window.BOLD.common.Shopify.saveProduct(boldTempProduct.handle, boldTempProduct.id); for (var boldIndex = 0; boldTempProduct && boldIndex < boldTempProduct.variants.length; boldIndex = boldIndex + 1){ var rp_group_id = bold_rp[boldIndex].rp_group_id ? '' + bold_rp[boldIndex].rp_group_id : ''; window.BOLD.common.Shopify.saveVariant( boldTempProduct.variants[boldIndex].id, { product_id: boldTempProduct.id, product_handle: boldTempProduct.handle, price: boldTempProduct.variants[boldIndex].price, group_id: rp_group_id, csp_metafield: boldCSPMetafields[boldTempProduct.variants[boldIndex].id] } ); } } currentScript.parentNode.removeChild(currentScript); </script> {%- endunless -%} {%- if bold_product_output == 'json' or bold_product_output == 'js' -%} {%- if escape_output -%} {{- bold_product_json | strip_newlines | escape -}} {%- else -%} {{- bold_product_json | strip_newlines -}} {%- endif -%} {%- endif -%} {%- if bold_hidden_product -%} {{- hidden_product_output -}} {%- endif -%} {%- endunless -%} {%- if bold_trigger_break -%} {%- break -%} {%- endif -%} {%- endif -%}{%- comment -%} BOLD-VARIANT.LIQUID Last updated: 2018-December-7 Sets all appropriate liquid variables for Bold Apps that affect the variant. Creates an updated JSON object that includes key information relating to our apps. Combines the functionality of bold-hidden-variants, bold-base-variant and bold-variant-inventory FLAGS: base_product: {product object} Base product object for the variant, used to check/set several properties. If not supplied, defaults to bold_product. If no bold_product is set, defaults to product line_item: {line item object} | null (default) If set, pass the line item to the included snippets - some apps may adjust prices differently depending on whether we're influencing the cart total or not output: 'json' | 'none' (default) Controls whether anything is printed to the DOM hide_action: 'skip' | 'none' (default) Forces a 'continue' to skip hidden variants when 'skip' is set customer_tag: {string} | null (default) If set, forces bold-variant to calculate as though the customer had the specified tag price_style: 'json' | null (default) If set, sets prices as '10.00' instead of 1000 custom_app_list: {string} | null (default) List of apps to apply to the price. Associated snippets will be automatically included. If not specified, will check for a shop metafield to get a list of all relevant apps that need to be included. third_party_check: false | true (default) If true, runs additional checks that we know about to be compatible with third-party apps additonal_includes: {string} | null (default) Additional snippets that need to be included after the initial liquid variable assignments (comma-delimited) {%- endcomment -%} {%- comment -%} ============================================================================================================ ASSIGN LIQUID VARIABLES ============================================================================================================ {%- endcomment -%} {%- comment -%} Assign flags to their default values if not set {%- endcomment -%} {%- assign bold_apps_installed = shop | map: 'metafields' | map: 'bold_apps_installed' | first -%} {%- assign bold_variant = bold-variant | default: variant -%} {%- assign bold_variant_line_item = line_item | default: false -%} {%- assign bold_variant_base_product = base_product | default: bold_product | default: bold_variant_line_item.product | default: product | default: item.product | default: item -%} {%- assign bold_variant_output = output | default: 'none' -%} {%- assign bold_variant_hide_action = hide_action | default: 'none' -%} {%- assign bold_variant_customer_tag = customer_tag | default: csp_customer_tag -%} {%- comment -%} Check for CSP visibility. Other 'hide' rules are based directly on metafields on the variants. {%- endcomment -%} {%- assign csp_hidden = false -%} {%- if bold_variant_hide_action == 'skip' and bold_apps_installed contains 'Customer Pricing' -%} {%- if shop.metafields.shop_csp_tag_group.shop_csp_tag or bold_variant.metafields.shappify_csp -%} {%- assign csp_flag_string = ' (' | append: bold_variant_customer_tag | append: ')' -%} {%- assign all_shop_tags = shop.metafields.shop_csp_tag_group.shop_csp_tag | append: ',default' | split: ',' -%} {%- unless bold_variant.metafields.shappify_csp.csp_tag == blank -%} {%- if bold_variant.metafields.shappify_csp.csp_tag == 'default' and bold_variant_customer_tag != 'default' -%} {%- if bold_variant_base_product -%} {%- assign found_csp_level = false -%} {%- assign csp_bases = bold_variant_base_product | map: 'variants' | map: 'metafields' | map: 'shappify_csp' | map: 'csp_base' -%} {%- assign csp_tags = bold_variant_base_product | map: 'variants' | map: 'metafields' | map: 'shappify_csp' | map: 'csp_tag' -%} {%- if csp_bases contains bold_variant.id and csp_tags contains bold_variant_customer_tag -%}{%- assign found_csp_level = true -%}{%- endif -%} {%- if found_csp_level -%}{%- continue -%}{%- endif -%} {%- endif -%} {%- elsif bold_variant_customer_tag != bold_variant.metafields.shappify_csp.csp_tag -%} {%- continue -%} {%- endif -%} {%- assign bold_variant_title = bold_variant.title | remove: csp_flag_string -%} {%- endunless -%} {%- endif -%} {%- endif -%} {%- assign app_list = '' -%} {%- if app_list != blank and custom_app_list != blank -%} {%- assign bold_variant_app_list = app_list | append: ',' | append: custom_app_list -%} {%- else -%} {%- assign bold_variant_app_list = app_list | default: custom_app_list | default: false -%} {%- endif -%} {%- assign bold_variant_price = bold_variant.price -%} {%- if bold_variant_app_list -%} {%- assign bold_variant_app_list = bold_variant_app_list | split: ',' -%} {%- for app in bold_variant_app_list -%} {%- assign snippet_title = 'bold-' | append: app | append: '-variant' -%} {%- capture silence_output -%} {%- include snippet_title with bold_variant, base_product: bold_variant_base_product, line_item: bold_variant_line_item, customer_tag: bold_variant_customer_tag -%} {%- endcapture -%} {%- endfor -%} {%- endif -%} {%- assign bold_variant_available = bold_variant.available -%} {% if bold_apps_installed contains 'Quantity Breaks' or bold_apps_installed contains 'Customer Pricing' or bold_apps_installed contains 'Product Bundles' %} {%- comment -%} Find the base variant and base variant's inventory {%- endcomment -%} {%- assign bold_base_variant_id = bold_variant.metafields.shappify_csp['csp_base'] | default: bold_variant.metafields.shappify_qb['qb_parent'] | default: bold_variant.metafields.shappify_bundle['bundle_parent'] | default: bold_variant.id -%} {%- comment -%} Make sure we can find the indicated base variant! {%- endcomment -%} {%- assign bold_is_base_variant = true -%} {%- assign bold_base_variant = bold_variant -%} {%- unless bold_base_variant_id == bold_variant.id -%} {%- for variant_check in bold_variant_base_product.variants -%} {%- if variant_check.id == bold_base_variant_id -%} {%- assign bold_base_variant = variant_check -%} {%- assign bold_is_base_variant = false -%} {%- break -%} {%- endif -%} {%- endfor -%} {%- endunless -%} {%- comment -%} Assign inventory variables (based on the base_variant, if different from the current variant) {%- endcomment -%} {%- assign target_variant_inventory_quantity = bold_base_variant.inventory_quantity -%} {%- assign target_variant_inventory_policy = bold_base_variant.inventory_policy -%} {%- assign bold_variant_cart_quantity = 0 -%} {%- for inv_check_item in cart.items -%} {%- assign cart_variant = inv_check_item.variant -%} {%- assign cart_base_variant_id = cart_variant.metafields.shappify_csp['csp_base'] | default: cart_variant.metafields.shappify_qb['qb_parent'] | default: cart_variant.metafields.shappify_bundle['bundle_parent'] | default: cart_variant.id -%} {%- if cart_base_variant_id == bold_base_variant_id -%} {%- assign bold_variant_cart_quantity = bold_variant_cart_quantity | plus: inv_check_item.quantity -%} {%- endif -%} {%- endfor -%} {%- assign bold_variant_inventory_quantity = bold_base_variant.inventory_quantity -%} {%- assign bold_variant_remaining_quantity = bold_variant_inventory_quantity | minus: bold_variant_cart_quantity -%} {%- assign bold_variant_inventory_policy = bold_base_variant.inventory_policy -%} {%- assign bold_variant_inventory_management = bold_base_variant.inventory_management -%} {%- comment -%} Now that we've established quantity, re-evaluate the variant's availablility {%- endcomment -%} {%- if bold_variant_remaining_quantity <= 0 and bold_variant_inventory_policy == 'deny' and bold_variant_inventory_management != blank -%} {%- assign bold_variant_available = false -%} {%- endif -%} {%- comment -%} If we're calling this from bold-cart-item, also set the max quantity the line item can go up to {%- endcomment -%} {%- if bold_item and bold_variant_inventory_management != blank and bold_variant_inventory_policy == 'deny' -%} {%- assign bold_item_max_quantity = bold_item.quantity | plus: bold_variant_remaining_quantity -%} {%- else -%} {%- assign bold_item_max_quantity = '' -%} {%- endif -%} {%- comment -%} Check for QB level, hide variant and update title as appropriate {%- endcomment -%} {%- if bold_apps_installed contains 'Quantity Breaks' or bold_apps_installed contains 'Customer Pricing' -%} {%- assign qb_hidden = false -%} {%- assign qb_level = bold_variant.metafields.shappify_qb.qb_qty | default: bold_variant.metafields.shappify_csp.csp_qty | times: 1 -%} {%- if qb_level > 1 -%}{%- assign qb_hidden = true -%}{%- endif -%} {%- if bold_variant.title == '1+' -%} {%- assign bold_variant_title = 'Default title' -%} {%- endif -%} {%- endif -%} {%- comment -%} If required, check for third-party Hide Rules as well {%- endcomment -%} {%- if third_party_check == blank -%}{%- assign third_party_check = true -%}{%- endif -%} {%- assign third_party_hidden = false -%} {%- if third_party_check -%} {%- if bold_variant.title contains '% Off' or bold_variant.metafields.brodev_scn.hide == "true" or bold_variant.metafields.secomapp.freegifts or bold_variant.title contains '(Bundle price)' -%}{%- assign third_party_hidden = true%}{%- endif -%} {%- endif -%} {%- if csp_hidden or qb_hidden or third_party_hidden or bold_variant.metafields.shappify_bundle.is_bundle == 'true' or third_party_hidden -%} {%- assign bold_hidden_variant = true -%} {%- else -%} {%- assign bold_hidden_variant = false -%} {%- endif -%} {%- comment -%} Check for presence of our apps {%- endcomment -%} {%- if bold_variant.metafields.bold_measurement.formula -%}{%- assign variant_has_btm = true -%}{%- else -%}{%- assign variant_has_btm = false -%}{%- endif -%} {%- if bold_variant.metafields.shappify_csp.csp_tag -%}{%- assign variant_has_csp = true -%}{%- else -%}{%- assign variant_has_csp = false -%}{%- endif -%} {%- if bold_variant.metafields.shappify_qb.pricing_html or bold_variant.metafields.shappify_csp.pricing_html -%}{%- assign variant_has_qb = true -%}{%- else -%}{%- assign variant_has_qb = false -%}{%- endif -%} {%- if bold_variant.metafields.bold_rp.rp_group_id -%}{%- assign variant_has_ro = true -%}{%- else -%}{%- assign variant_has_ro = false -%}{%- endif -%} {%- assign bdl_check = base_product.variants | map: 'metafields' | map: 'shappify_bundle' | map: 'bundle_parent' -%} {%- if bdl_check contains bold_variant.id -%}{%- assign variant_has_bdl = true -%}{%- else -%}{%- assign variant_has_bdl = false -%}{%- endif -%} {%- if bold_variant_hide_action == 'skip' and bold_hidden_variant -%}{%- continue -%}{%- endif -%} {% endif %} {%- assign option1_clean_name = variant.option1 | remove: csp_flag_string -%} {%- assign option2_clean_name = variant.option2 | remove: csp_flag_string -%} {%- assign option3_clean_name = variant.option3 | remove: csp_flag_string -%} {%- comment -%} ============================================================================================================ BEGIN JSON OUTPUT ============================================================================================================ {%- endcomment -%} {%- if bold_variant_output == 'json' -%} { "id":{{- bold_variant.id | json -}}, "product_id":{{- bold_variant_base_product.id | json -}}, "product_handle":{{- bold_variant_base_product.handle | json -}}, "title":{{- bold_variant_title | default: bold_variant.title | json -}}, "option1":{%- unless option1_clean_name == blank -%}{{- option1_clean_name | json -}}{%- else -%}null{%- endunless -%}, "option2":{%- unless option2_clean_name == blank -%}{{- option2_clean_name | json -}}{%- else -%}null{%- endunless -%}, "option3":{%- unless option3_clean_name == blank -%}{{- option3_clean_name | json -}}{%- else -%}null{%- endunless -%}, "sku":{{- bold_variant.sku | json -}}, "requires_shipping":{{- bold_variant.requires_shipping | json -}}, "taxable":{{- bold_variant.taxable | json -}}, "featured_image": {%- if bold_variant.featured_image == blank -%} {{bold_base_variant.featured_image | json}}, {%- else -%} { "created_at":{%- capture created_at -%}{{- bold_variant.featured_image.created_at -}}T{{- bold_variant.featured_image.created_at | date: "%T" -}}{%- endcapture -%}{{- shop.timezone -}}{{- created_at | json -}}, "id":{{- bold_variant.featured_image.id | json -}}, "position":{{- bold_variant.featured_image.position | json -}}, "product_id":{{- bold_variant.featured_image.product_id | json -}}, "src":{{- bold_variant.featured_image.src | json -}}, "updated_at":{%- capture updated_at -%}{{- bold_variant.featured_image.updated_at | date: "%F" -}}T{{- bold_variant.featured_image.updated_at | date: "%T" -}}{%- endcapture -%}{{- shop.timezone -}}{{- updated_at | json -}}, "width":{{- bold_variant.featured_image.width -}}, "height":{{- bold_variant.featured_image.height -}} }, {%- endif -%} "image_id":{{variant.featured_image.id | default: bold_base_variant.featured_image.id | json -}}, "available":{{- bold_variant_available | json -}}, "name":{{- bold_variant_base_product.title | append: " - " | append: bold_variant.title | remove: csp_flag_string | json -}}, "options":{{- bold_variant.options | json | remove: csp_flag_string -}}, "price":{%- unless price_style == 'json' -%}{{- bold_variant_price | default: bold_variant.price | json -}}{%- else -%}{%- assign cents = bold_variant_price | default: bold_variant.price | modulo: 100 | prepend: '00' | slice: -2, 2 -%}{%- assign dollars = bold_variant_price | default: bold_variant.price | times: 0.01 | floor -%}{{- dollars | append: '.' | append: cents | json -}}{%- endunless -%}, "weight":{{- bold_variant.weight | json -}}, "compare_at_price":{%- if bold_base_variant.compare_at_price == blank -%}null{% else %}{%- unless price_style == 'json' -%}{{- bold_variant_compare_at_price | default: bold_variant.compare_at_price | json -}}{%- else -%}{%- assign cents = bold_variant_compare_at_price | default: bold_variant.compare_at_price | modulo: 100 | prepend: '00' | slice: -2, 2 -%}{%- assign dollars = bold_variant_compare_at_price | default: bold_variant.compare_at_price | times: 0.01 | floor -%}{{- dollars | append: '.' | append: cents | json -}}{%- endunless -%}{%- endif -%}, "inventory_quantity":{{- bold_variant_inventory_quantity | default: variant.inventory_quantity | json -}}, "inventory_management":{{- bold_variant_inventory_management | default: variant.inventory_management | json -}}, "inventory_policy":{{- bold_variant_inventory_policy | default: variant.inventory_policy | json -}}, "inventory_in_cart": {{- bold_variant_cart_quantity | default: 0 | json -}}, "inventory_remaining":{{- bold_variant_remaining_quantity | default: bold_variant_inventory_quantity | default: bold_variant.inventory_quantity | json -}}, "incoming":{{- bold_variant.incoming | default: bold_base_variant.incoming | json -}}, "next_incoming_date":{{- bold_variant.next_incoming_date | default: bold_base_variant.next_incoming_date | date: "%Y-%m-%d" | json -}}, "taxable":{%- unless bold_variant_taxable == blank -%}{{- bold_variant_taxable | json -}}{%- else -%}{{- bold_variant.taxable | json -}}{%- endunless -%}, "barcode":{{- variant.barcode | json -}} {% comment %} {%- comment -%} SPECIAL HANDLING FOR CSP {%- endcomment -%} {%- if variant_has_csp -%} ,"csp_lookup":{ {%- for tag in all_shop_tags -%} {%- assign found_variant = '' -%} {%- if forloop.first != true -%},{%- endif -%}{{- tag | json -}}: {%- for csp_variant in bold_variant_base_product.variants -%} {%- if csp_variant.metafields.shappify_csp.csp_qty and csp_variant.metafields.shappify_csp.csp_qty != 1 -%}{%- continue -%}{%- endif -%} {%- assign base_check = csp_variant.metafields.shappify_csp.csp_base | default: csp_variant.id -%} {%- if base_check == bold_base_variant.id and csp_variant.metafields.shappify_csp.csp_tag == tag -%} {%- assign found_variant = csp_variant -%} {{- break -}} {%- endif -%} {%- endfor -%} { "id":{{- found_variant.id | json -}}, "price":{{- found_variant.price | json -}} {%- if found_variant.metafields.shappify_csp.pricing_html -%},"grid":{{- found_variant.metafields.shappify_csp.pricing_html | json -}}{%- endif -%} } {%- endfor -%} } {%- endif -%} {%- comment -%} END OF CSP SPECIAL HANDLING {%- endcomment -%} {%- comment -%} SPECIAL HANDLING FOR BTM {%- endcomment -%} {%- if variant_has_btm -%} ,"btm_lookup":{{- bold_variant.metafields.bold_measurement | json -}} {%- endif -%} {%- comment -%} END OF BTM SPECIAL HANDLING {%- endcomment -%} {%- comment -%} SPECIAL HANDLING FOR QB {%- endcomment -%} {%- if variant_has_qb -%} ,"qb_lookup":{ "levels": { {%- assign qb_price_varies = false -%} {%- assign not_first_tag = false -%} {%- for qb_variant in bold_variant_base_product.variants -%} {%- if qb_variant.metafields.shappify_qb.qb_parent == bold_variant.id or qb_variant.metafields.shappify_csp.csp_base == bold_base_variant.id or qb_variant.id == bold_base_variant.id -%} {%- if qb_variant.metafields.shappify_csp.csp_tag == blank or qb_variant.metafields.shappify_csp.csp_tag == bold_variant_customer_tag -%} {%- if not_first_tag -%},{%- endif -%}{%- assign not_first_tag = true -%} {%- unless qb_variant.price == bold_variant.price -%}{%- assign qb_price_varies = true -%}{%- endunless -%} "{{- qb_variant.metafields.shappify_qb.qb_qty | default: qb_variant.metafields.shappify_csp.csp_qty | default: 1 -}}": {"id":{{- qb_variant.id -}},"price":{{- qb_variant.price -}}} {%- endif -%} {%- endif -%} {%- endfor -%} } {%- if qb_price_varies -%} ,"qb_price_varies": {{- qb_price_varies | json -}} ,"grid": {{- bold_variant.metafields.shappify_qb.pricing_html | default: bold_variant.metafields.shappify_csp.pricing_html | json -}} {%- endif -%} } {%- endif -%} {%- comment -%} END OF QB SPECIAL HANDLING {%- endcomment -%} {%- comment -%} SPECIAL HANDLING FOR RO {%- endcomment -%} {%- if variant_has_ro -%} ,"ro_lookup":{{- bold_variant.metafields.bold_rp | json | remove: 'rp_' -}} {%- endif -%} {%- comment -%} END OF RO SPECIAL HANDLING {%- endcomment -%} {%- comment -%} SPECIAL HANDLING FOR BUNDLES {%- endcomment -%} {%- if variant_has_bdl -%} ,"bdl_lookup":{ {%- for bdl_variant in base_product.variants -%} {%- unless bold_variant.id == bdl_variant.metafields.shappify_bundle.bundle_parent -%}{%- continue -%}{%- endunless -%} "id":{{- bdl_variant.id -}}, "price":{{- bdl_variant.price | json -}}, "bundle_group":{{- bdl_variant.metafields.shappify_bundle.bundle_group -}} {%- break -%} {%- endfor -%} } {%- endif -%} {%- comment -%} END OF BUNDLES SPECIAL HANDLING {%- endcomment -%} {% endcomment %} } {%- endif -%}<div id='shappify_bundle' onclick='$("form.bundle-form").unbind("submit")'></div> <script async src="//secure.apps.shappify.com/apps/bundle/product_bundle.php?shop={{ shop.permanent_domain }}&product_id={{ product.id }}&_tmp=1529467710"></script> <!-- the liquid variable "bold_bundles_widget" is no longer required. The line below replaces it. --> <div class="bold-bundle" data-product-id="{{ product.id }}"></div>/* ------------------------------------ WARNING ------------------------------------ This file will be overwritten and should not be edited directly. In order to edit custom CSS for Bold Product Bundles you should: - Log into your Shopify Admin Panel - Go to Apps --> Installed --> Product Bundles - Go to Display Settings ------------------------------------ WARNING ------------------------------------ bold-bundles.css version 1 Generated at 2019-12-04 11:48:15 */ /* .bold-bundles-product component */ .bold-bundles-product { width: 100%; } .bold-bundles-product:empty { display:none; } /* .bold-bundles-widget component */ .bold-bundles-widget { box-sizing: border-box; border-style: solid; border-width: 1px; border-color: #c0c0c0; cursor: default; margin-top: 20px; } .bold-bundles-widget::before, .bold-bundles-widget::after { background-repeat: no-repeat; box-sizing: inherit; text-decoration: inherit; vertical-align: inherit; } /* .bold-bundles-widget-decorator component */ .bold-bundles-widget-decorator__wrapper { overflow: auto; min-height:20px; } .bold-bundles-widget-decorator { text-align: right; padding-left: 10px; padding-right: 10px; background-color: black; color: white; display: inline-block; float: right; } .bold-bundles-widget-decorator span { font-weight: bold; } /* .bold-bundles-widget-header component */ .bold-bundles-widget-header { text-align: center; padding-bottom: 20px; } .bold-bundles-widget-header__title { padding-top: 20px; margin-bottom:0px; font-size: 18px; color: #383838; } .bold-bundles-widget-decorator__wrapper + .bold-bundles-widget-header__title { padding-top: 0px; } .bold-bundles-widget-header__title:empty { display:none; } /* .bold-bundles-widget__items */ .bold-bundles-widget__items { justify-content: center; padding-left: 20px; padding-right: 20px; } @media screen and (min-width: 650px) { .bold-bundles-widget__items { display: flex; align-items: baseline; flex-wrap: wrap; } } /* .bold-bundles-widget-item component */ .bold-bundles-widget-item { flex: auto; display: block; width: 100%; padding-bottom: 10px; } /* .bold-bundles-widget-item-separator */ .bold-bundles-widget-item-separator__wrapper { border-bottom: 1px solid #c0c0c0; margin-bottom: 20px; } .bold-bundles-widget-item--with-separator:nth-child(n+1):last-child { display: none; } @media screen and (min-width: 650px) { .bold-bundles-widget-item-separator__wrapper { border-bottom: none; margin-bottom: 0px; } .bold-bundles-widget-item--with-separator:nth-child(n+1):last-child { display: block; visibility: hidden; } } .bold-bundles-widget-item--with-separator { text-align: center; } @media screen and (min-width: 650px) { .bold-bundles-widget-item.bold-bundles-widget-item--with-separator { max-width: 26px; margin-left: 2px; margin-right: 2px; } } .bold-bundles-widget-item-separator { background-color: #333333; border-radius: 50%; display: inline-block; width: 20px; height: 20px; position: relative; bottom: -18px; } .bold-bundles-widget-item-separator__icon { display: block; fill: #FFFFFF; margin: 0 auto; position: relative; top: 4px; height: 12px; width: 12px; } /* .bold-bundles-widget-item--product */ .bold-bundles-widget-item__wrapper { display: flex; flex-direction: row; flex-wrap: wrap; } @media screen and (min-width: 650px) { .bold-bundles-widget-item.bold-bundles-widget-item--product { min-width: 125px; width: calc(50% - 26px); max-width: calc(50% - 26px); padding-bottom: 0px; margin-bottom: 20px; } .bold-bundles-widget__items .bold-bundles-widget-item--product:first-child:nth-last-child(6), .bold-bundles-widget__items .bold-bundles-widget-item--product:first-child:nth-last-child(6) ~ .bold-bundles-widget-item--product { width: calc(33% - 26px); max-width: calc(33% - 26px); } .bold-bundles-widget__items .bold-bundles-widget-item--product:first-child:nth-last-child(8), .bold-bundles-widget__items .bold-bundles-widget-item--product:first-child:nth-last-child(8) ~ .bold-bundles-widget-item--product { width: calc(25% - 26px); max-width: calc(25% - 26px); } /* Try to get a row of 3 and a row of 2 */ .bold-bundles-widget__items .bold-bundles-widget-item--product:first-child:nth-last-child(10), .bold-bundles-widget__items .bold-bundles-widget-item--product:first-child:nth-last-child(10) ~ .bold-bundles-widget-item--product { width: calc(33% - 26px); max-width: calc(33% - 26px); } } /* .bold-bundles-widget-item__thumbnail-decorator */ .bold-bundles-widget-item__thumbnail-decorator { position: absolute; top: -10px; right: -10px; border: 1px solid #c0c0c0; background-color: white; text-align: center; height: 20px; line-height: 18px; } .bold-bundles-widget-item__thumbnail-decorator span { font-weight: bold; } .bold-bundles-widget-item__thumbnail-decorator.product-quantity { border-radius: 50%; width: 20px; display: none; } .bold-bundles-widget-item__thumbnail-decorator.product-discounted { border-radius: 10px; width: 80px; display: none; } .bold-bundles-widget-item__thumbnail-decorator.product-free { padding-left: 5px; padding-right: 5px; border-radius: 10px; display: none; } .bold-bundles-widget-item--product:not(.is_free) .bold-bundles-widget-item__thumbnail-decorator.product-quantity{ display: block; } .bold-bundles-widget-item--product.is_free .bold-bundles-widget-item__thumbnail-decorator.product-free{ display: block; } .bold-bundles-widget-item--product:not(.is_free) .bold-bundles-widget-item__thumbnail-decorator.product-discounted{ display: block; } /* .bold-bundles-widget-item__thumbnail */ .bold-bundles-widget-item__thumbnail { flex: auto; width: 25%; position: relative; } /* IE as issues with vertical-align with no height style */ @media screen and (min-width: 650px) { .bold-bundles-widget-item__thumbnail { margin-bottom: 0px; vertical-align: bottom; min-height: 1px; width: 100%; } } /* .bold-bundles-widget-item__link */ .bold-bundles-widget-item__link { max-width: 50%; } @media screen and (min-width: 650px) { .bold-bundles-widget-item__link { min-width: 100%; } } .bold-bundles-widget-item__image { vertical-align: bottom; width: 100%; border:solid #e8e8e8 2px; } .bold-bundles-widget-item__in_cart_identifier{ height:22px; width:22px; border-radius:50%; background-color:white; display:flex; justify-content:center; align-items:center; border: solid #a6d429 2px; position: absolute; right: -5px; top: -5px; } .bold-bundles-widget-item__in_cart_identifier img{ height:80%; width:80%; } /* .bold-bundles-widget-item__info */ .bold-bundles-widget-item__info { padding-left: 10px; min-width: 200px; width: 75%; flex: auto; text-align: left; } .bold-bundles-widget-item__info--centered { margin-top: 20px; text-align: center; } @media screen and (min-width: 650px) { .bold-bundles-widget-item__info { width: 100%; min-width: 0px; padding-left: 0px; } } /* .bold-bundles-widget-item__title */ .bold-bundles-widget-item__title { font-size: 16px; color: #383838; } @media screen and (min-width: 650px) { .bold-bundles-widget-item__title { margin-bottom: 5px; } } /* .bold-bundles-widget-item__variants */ .bold-bundles-widget-item__variants { display: block; margin-bottom: 15px; width: 100%; } select.bold-bundles-widget-item__variants option[disabled] { color: grey; } @media screen and (min-width: 650px) { .bold-bundles-widget-item__variants { margin-bottom: 5px; font-size: 12px; } } /* .bold-bundles-widget-item__price */ .bold-bundles-widget-item__price { font-size: 14px; color: #606060; } .bold-bundles-widget-item__price--old { opacity: 0.75; text-decoration: line-through; } .bold-bundles-widget-item__price--new { font-weight: 600; white-space: nowrap; } .bold-bundles-widget-item__price--price_multiplier { opacity: 0.75; font-weight: 400; } .bold-bundles-widget__price-total { border-top: 1px solid #c0c0c0; border-bottom: 1px solid #c0c0c0; text-align: center; } /* bold-bundles-widget__button */ .bold-bundles-widget__button { height:auto; border-radius: 2px; -webkit-appearance: button; display: inline-block; } .bold-bundles-widget__button--top { display: block; border-bottom-width: 1px; border-bottom-style: solid; border-bottom-color: rgba(0, 0, 0, 0.2); } .bold-bundles-widget__button--bottom { display: block; padding: 2px 5px 0 5px; border-top-width: 1px; border-top-style: solid; border-top-color: rgba(255, 255,255, 0.1); } .bold-bundles-widget__footer { padding: 15px 20px 20px 20px; text-align: center; } .bold-bundles-widget__footer_collection { padding-top: 5px; padding-bottom: 5px; text-align: center; font-size: 30px; border-top: solid #c0c0c0 1px; margin-left: 20px; margin-right: 20px; } /* Widget basic-bundle specific styles */ .basic-bundle .bold-bundles-widget__footer { text-align: left; } /* Widget basic-bogo-1 specific styles */ .basic-bogo-1.bold-bundles-widget { margin-top: 20px; } .basic-bogo-1 .bold-bundles-widget-item__thumbnail{ margin-bottom:10px; } .bold-bundles-widget-item__no_variants{ display: block; } .bold-bundles-widget-item__no_variants .bold-bundles-widget-item__thumbnail{ width:100%; margin-bottom:0px; } /* .bold-bundles-child-product component */ .bold-bundles-child-product-info{ padding-bottom:15px; } .bold-bundles-child-product__title{ font-size:large; opacity: 0.7; padding-bottom: 10px; } .bold-bundles-child-product__variant-wrapper{ padding-bottom:15px; } .bold-bundles-child-product__link-wrapper{ padding-bottom:5px; } .bold-bundles-widget-item__thumbnail-decorator.product-quantity, .bold-bundles-widget-item__thumbnail-decorator.product-free { z-index: 1; } .bold-checkout{ pointer-events: none; } [name=checkout] > *, [href*='/checkout'] > * { pointer-events: none; } /* Bundles Widget Overlay CSS start */ .bold-bundles-widget .overlay { display: none; width: 100%; height: 100%; position: absolute; background-color: rgba(0,0,0,0.7); z-index: 2; cursor: pointer; text-align: center; } .bold-bundles-widget #overlay-wrapper{ position: relative; } .bold-bundles-widget .modal-content { background-color: #fff; margin: auto; padding: 0 10px; border: 1px solid #888; width: 80%; margin-top: 20%; } .bold-bundles-widget .close { color: #aaaaaa; font-size: 28px; font-weight: bold; float: right; } .bold-bundles-widget .close:hover, .bold-bundles-widget .close:focus { color: #000; text-decoration: none; cursor: pointer; } .bold-bundles-widget .modalText{ margin-top:40px; } .bold-bundles-widget .buttonsContainer{ margin-top:10px } .bold-bundles-widget .modal-button{ padding: 10px 30px; margin: 20px; background: #47708A; border-radius: 2px; color: #fff !important; min-width: 110px; display: inline-block; text-align: center; min-height: 45px } /* Bundles Widget Overlay CSS end */ /* Bundles cart loader CSS start */ .bold-cart.bold-loading::before { z-index: 10; content: "Cart loading"; position: absolute; width: 100%; height: 100%; left: 0; top: 0; background-size: 10rem; background-position: center; background-repeat: no-repeat; background-image: url('https://bundles.staging.boldapps.net/assets/imgs/loading-spinner.gif'); background-color: rgba(0, 0, 0, 0.3); display: flex; flex-direction: row; align-items: center; justify-content: center; color: #FFF; } /* Bundles cart loader CSS end */ Select Save.
Repeat steps 6.1 – 6.5 for each missing snippet file.

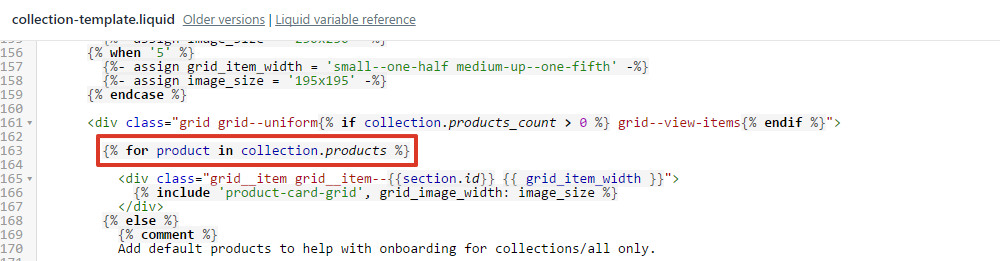
Step 2: Edit collection.liquid
Under Templates, select collection.liquid.
Note: If your theme contains sections, you may need to open collection-template.liquid under Sections instead.
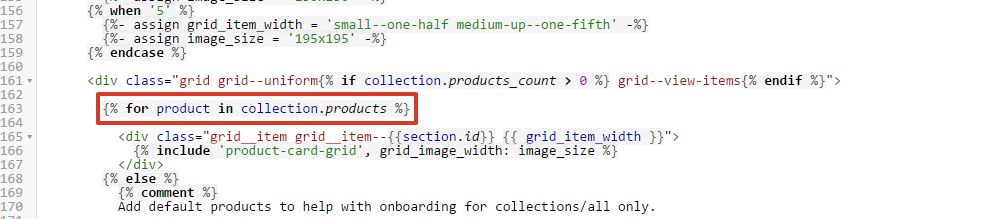
Find each instance of:
{% for product in collection.products %}Note: If you can't find this code, look to see if the theme has a product-loop.liquid.
Some themes will use a slight variation of this code. If you can't find it, try looking for the following instead:
{% for prod in collection.products %}
{% for product in collections.all.products %}
{% for product in products limit: limit %}
{% for product in product-list.products limit: for_limit %}
{% for product in collection.products limit: settings.pagination_limit %}
{% for product in collection.products limit: number_of_products_to_fetch %}
{% for product in collection.products limit: number_of_related_products %}
{% for product in collections[settings.frontpage_collection].products offset:1 %}
{% for product in collection.products limit: settings.products-per-page %}
Some themes will have this code in a file that is included into the collection.liquid file. Look to see if the theme has a product-loop.liquid or product-list.liquid in the Snippets folder, and see if the code is in there.
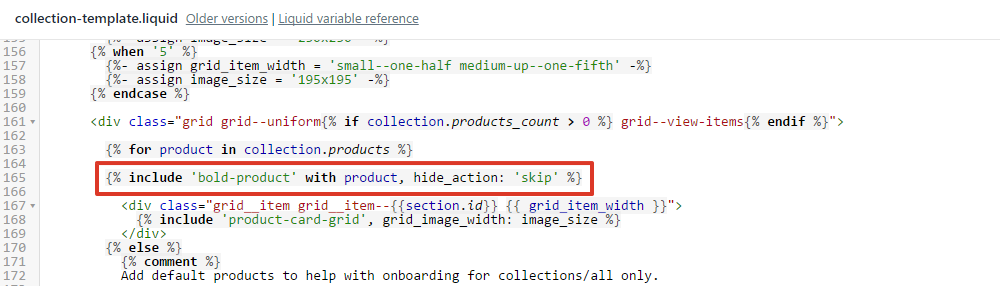
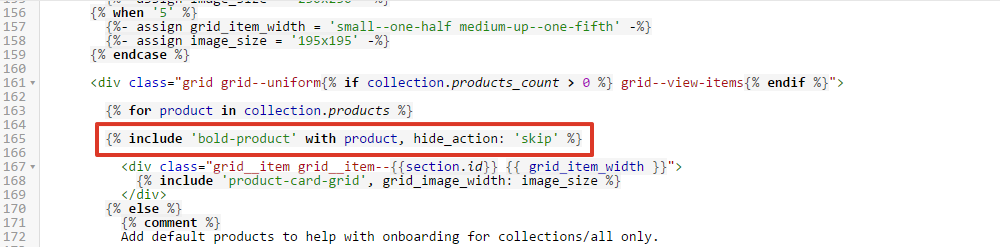
Copy and paste:
{% include 'bold-product' with product, hide_action: 'skip' %}on the line below each instance.
Select Save.
Step 3: Edit index.liquid
Under Templates, select index.liquid.
Note: If your theme contains Sections, you may need to look under Sections instead. The file may be named: featured-products.liquid, home-collection.liquid, home-featured-products.liquid, featured-row.liquid, simple-collection.liquid, featured-collection.liquid, home-tab.liquid, home-big-product.liquid, index-products.liquid or tabs-collection.liquid.
Find each instance of:
{% for product in collection.products %}Note: If you can't find this code, look to see if the theme has a product-loop.liquid.
Some themes will use a slight variation of this code. If you can't find it, try looking for the following instead:
{% for prod in collection.products %}
{% for product in collections.all.products %}
{% for product in products limit: limit %}
{% for product in product-list.products limit: for_limit %}
{% for product in collection.products limit: settings.pagination_limit %}
{% for product in collection.products limit: number_of_products_to_fetch %}
{% for product in collection.products limit: number_of_related_products %}
{% for product in collections[settings.frontpage_collection].products offset:1 %}
{% for product in collection.products limit: settings.products-per-page %}
The code to look for will most likely start with {% for product in.... If you find a line that starts with that, or what's listed above, add the following underneath it:
{% include 'bold-product' with product, hide_action: 'skip' %}
Some files may use something like this:
{% for prod in collection.products %}
If you find this, then put the following underneath it instead:
{% include 'bold-product' with prod, hide_action: 'skip' %}
Some themes will have the code in a file that's included in the index.liquid file. Try looking for the following files under Snippets instead:
featured-products.liquid
home-collection.liquid
home-featured-products.liquid
featured-row.liquid
simple-collection.liquid
featured-collection.liquid
home-tab.liquid
home-big-product.liquid
index-products.liquid
tabs-collection.liquid
Many themes will have a variation of this code that helps control the prices on the home page, but some themes don't. If you can't find the code, then this step can be skipped.
Copy and paste:
{% include 'bold-product' with product, hide_action: 'skip' %}on the line below each instance.
Select Save.

Step 4: Edit related-products.liquid
Under Snippets, select related-products.liquid.
Find each instance of:
{% for product in collection.products %}Note: If you can't find this code, look to see if the theme has a product-loop.liquid.
Some themes will have the related products code in a differently named file. Try looking for the following files instead:
product-related-items.liquid
snippet-related-products.liquid
Some themes will use a slight variation of this code. If you can't find it, try looking for the following instead:
{% for prod in collection.products %}
{% for product in collections.all.products %}
{% for product in products limit: limit %}
{% for product in product-list.products limit: for_limit %}
{% for product in collection.products limit: settings.pagination_limit %}
{% for product in collection.products limit: number_of_products_to_fetch %}
{% for product in collection.products limit: number_of_related_products %}
{% for product in collections[settings.frontpage_collection].products offset:1 %}
{% for product in collection.products limit: settings.products-per-page %}
The code to look for will most likely start with {% for product in.... If you find a line that starts with that, or what's listed above, add the following underneath it:
{% include 'bold-product' with product, hide_action: 'skip' %}
Some files may use something like this:
{% for prod in collection.products %}
If you find this, then put the following underneath it instead:
{% include 'bold-product' with prod, hide_action: 'skip' %}
Copy and paste:
{% include 'bold-product' with product, hide_action: 'skip' %}on the line below each instance.
Select Save.

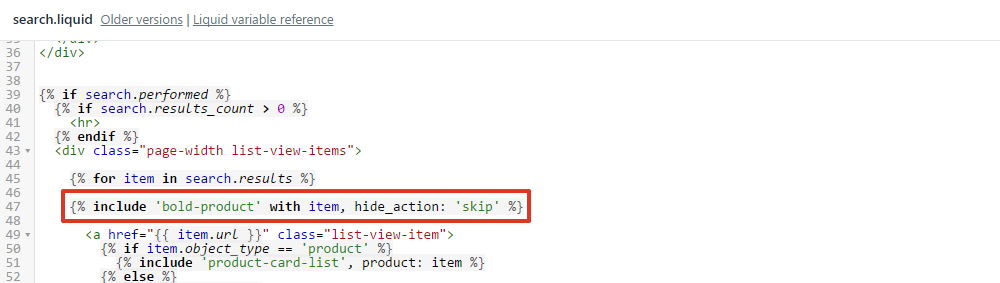
Step 5: Edit search.liquid
Under Templates, select search.liquid.
Find each instance of:
{% for item in search.results %}Copy and paste:
{% include 'bold-product' with item, hide_action: 'skip' %}on the line below each instance.
Select Save.

Step 6: Edit product.liquid
Under Templates, select product.liquid.
Add this code to the top of the file:
Note: If your theme contains Sections, you may have to make these changes in product-template.liquid under Sections.
{% include 'bold-product' with product, hide_action: 'break' %}{% if bold_hidden_product %}{% break %}{%endif %}Find each instance of:
{% for variant in product.variants %}Copy and paste:
{% include 'bold-variant' with variant, hide_action: 'skip' %}on the line below each instance.
Note: If your theme uses swatches, where variants are shown as buttons instead of through a drop-down menu, this code will also need to be added to a snippet file, usually named swatch.liquid or product-swatch.liquid.
Find each instance of:
product.variants.sizeNote: If you can't find this in the product.liquid file, then check the snippets folder for a product-form.liquid or short-form.liquid file and look for the code in there.
Replace each instance with:
bold_variants_sizeFind each instance of:
{{ product | json }}Note: If you can't find {{ product | json }} in those files, try searching for it in the theme.liquid file. If it's not in the product.liquid or theme.liquid file, then this can be skipped.
Replace each instance with:
{% include 'bold-product', output: 'json' %}Add this code where you would like the product bundle to display on the product page.
Note: This code cannot be within the form tags. We recommend adding it either after the </form> tag or just before the code that outputs the related products. If you can't find the </form> tag in the product.liquid file, check the Snippets folder for a product-form.liquid or short-form.liquid file and look for the code in there.
{% unless bundle_loaded == 'true' %}
{% include 'shappify-bdl-load-bundle' %}
{% assign bundle_loaded = 'true' %}
{% endunless %}
Select Save.
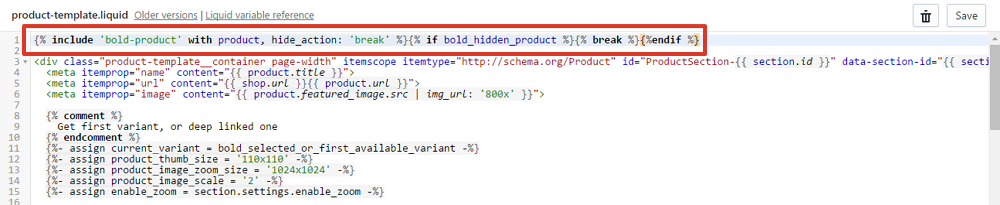
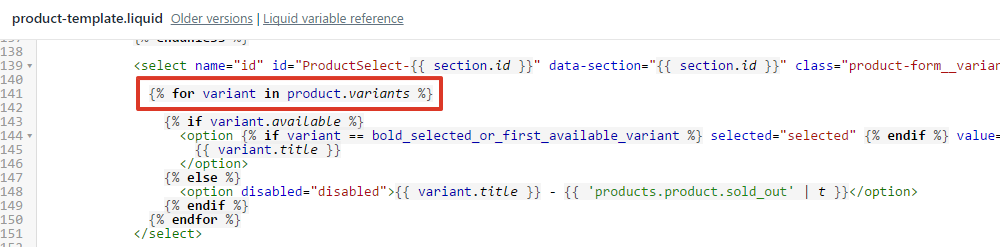
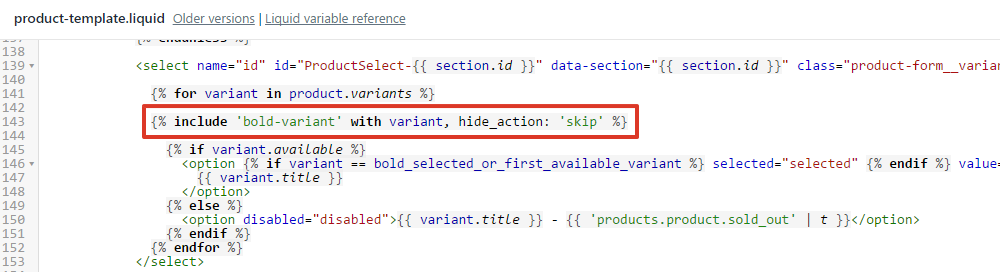
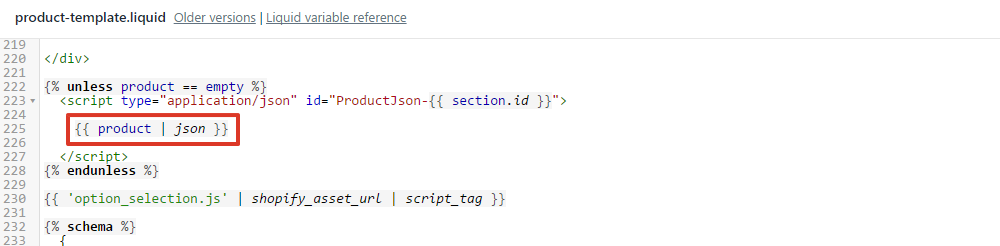


Step 7: Edit bold-includes.liquid
Under Snippets, select bold-incudes.liquid.
Copy and paste this code in the bottom of the file.
{{ 'https://bundles.boldapps.net/js/bundles.js' | script_tag }}
{{ 'bold-bundles.css' | asset_url | stylesheet_tag }}
Select Save.

Step 8: Edit theme.liquid
Under Layout, select theme.liquid.
Copy and paste this code directly above the </head> tag:
{% include 'bold-common' %}
{% include 'bold-includes' %}
Select Save.

Step 9: Edit cart.liquid
Under Templates, select cart.liquid.
Note: If your theme contains Sections, you may have to look for this code under Sections in cart-template.liquid instead.
Find every occurrence of code similar to:
{{ item.price | money }}On newer themes, it will be:
{{ item.final_price | money }}Note: The item price display can vary by theme but should be similar to this.
Copy and paste this code directly before that line:
<span class=“Bold-theme-hook-DO-NOT-DELETE bold_cart_item_price” data-item-key=“{{item.key}}” style=“display:none !important;“></span>Find every occurrence of code similar to:
{{ item.line_price | money }}On newer themes, it will be:
{{ item.final_line_price | money }}Note: The item line price display can vary by theme but should be similar to this.
Copy and paste this code directly before that line:
<span class="Bold-theme-hook-DO-NOT-DELETE bold_cart_item_total" data-item-key=”{{item.key}}" style="display:none !important;"></span>Find every occurrence of code similar to:
{{ cart.total_price | money }}Note: The cart total price display can vary by theme but should be similar to this.
Copy and paste this code directly above that line:
<span class="Bold-theme-hook-DO-NOT-DELETE bold_cart_total" style="display:none !important;"></span>Find the section that starts similar to:
{% for p in item.properties %}Replace the entire section with:
<span class="Bold-theme-hook-DO-NOT-DELETE bold_cart_item_properties" style="display:none !important;"></span>
{% assign propertySize = item.properties | size %}
{% if propertySize > 0 %}
    {% for p in item.properties %}
        {% assign first_character_in_key = p.first | truncate: 1, '' %}
        {% unless p.last == blank or first_character_in_key == '_' %}
            {{ p.first }}:
            {% if p.last contains '/uploads/' %}
               <a href="{{ p.last }}">{{ p.last | split: '/' | last }}</a>
            {% else %}
                {{ p.last }}
            {% endif %}
        {% endunless %}
    {% endfor %}
{% endif %}
Select Save.
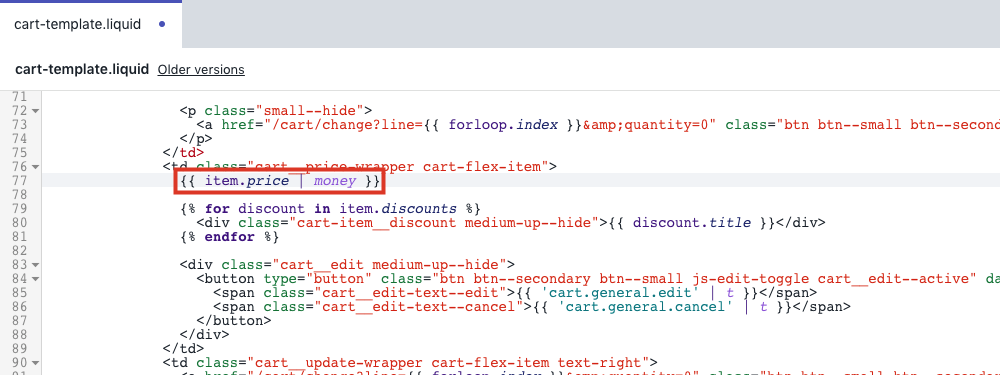
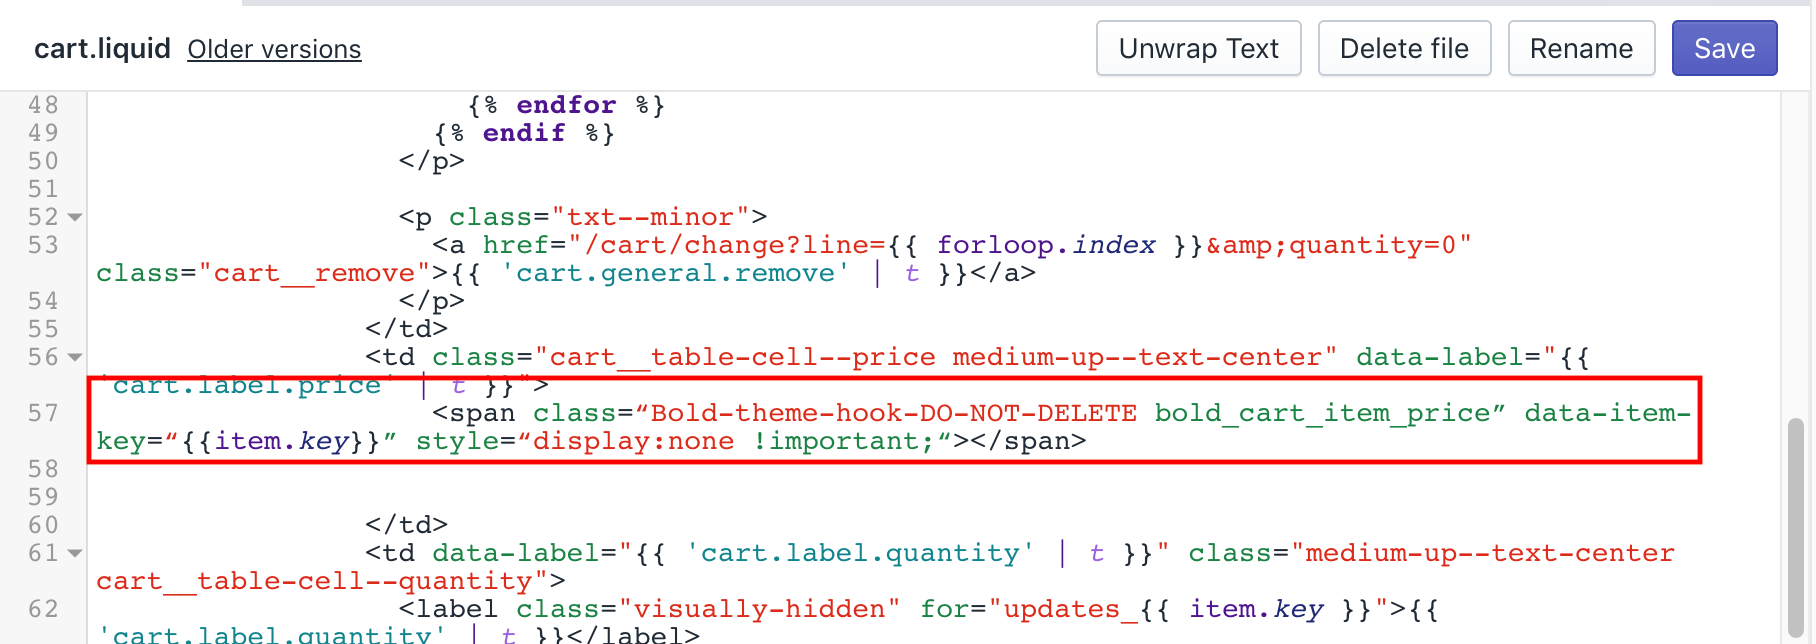
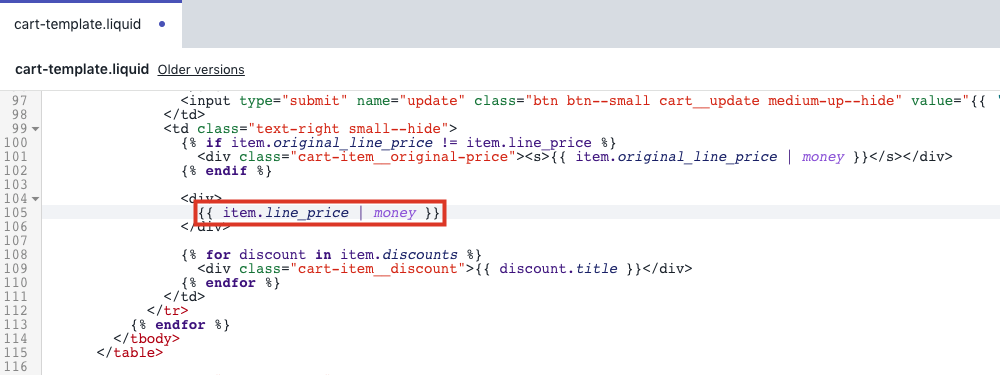
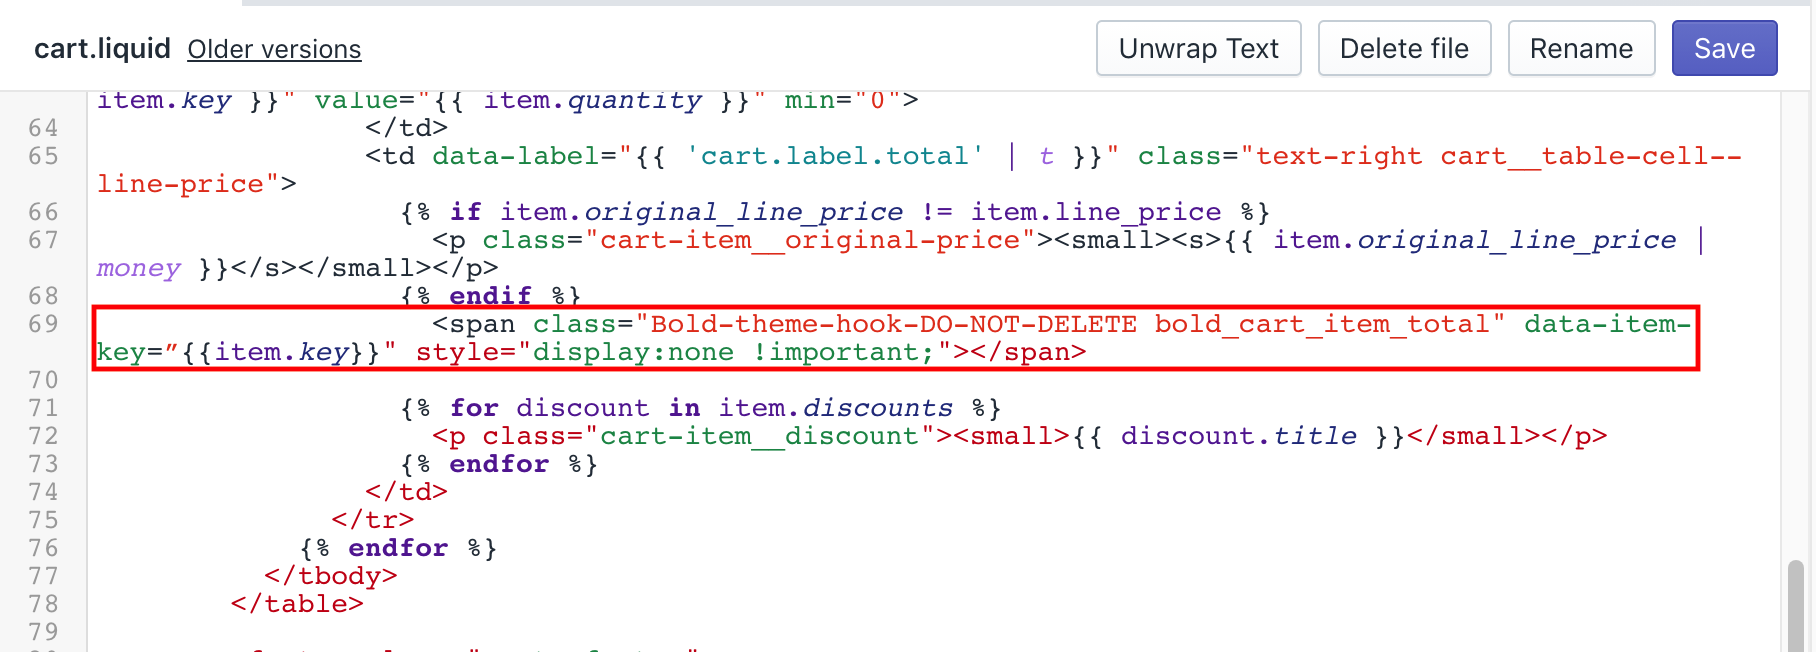
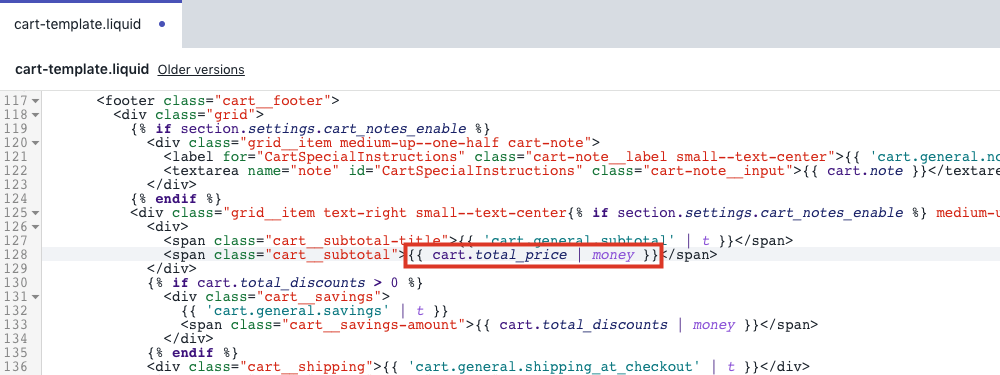
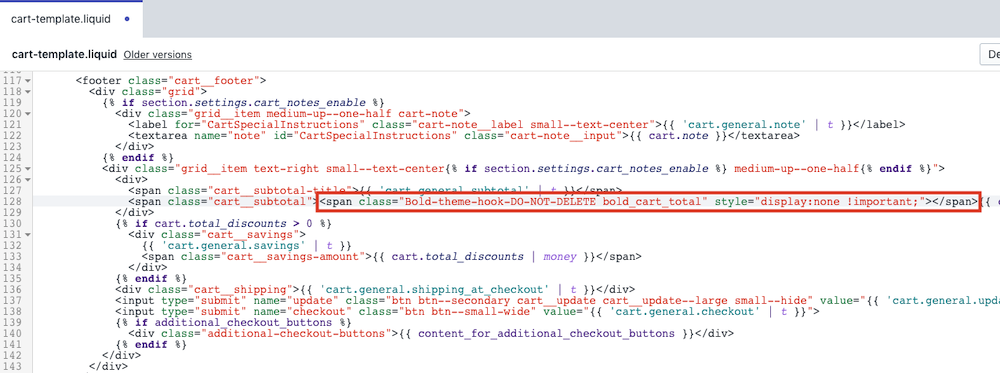
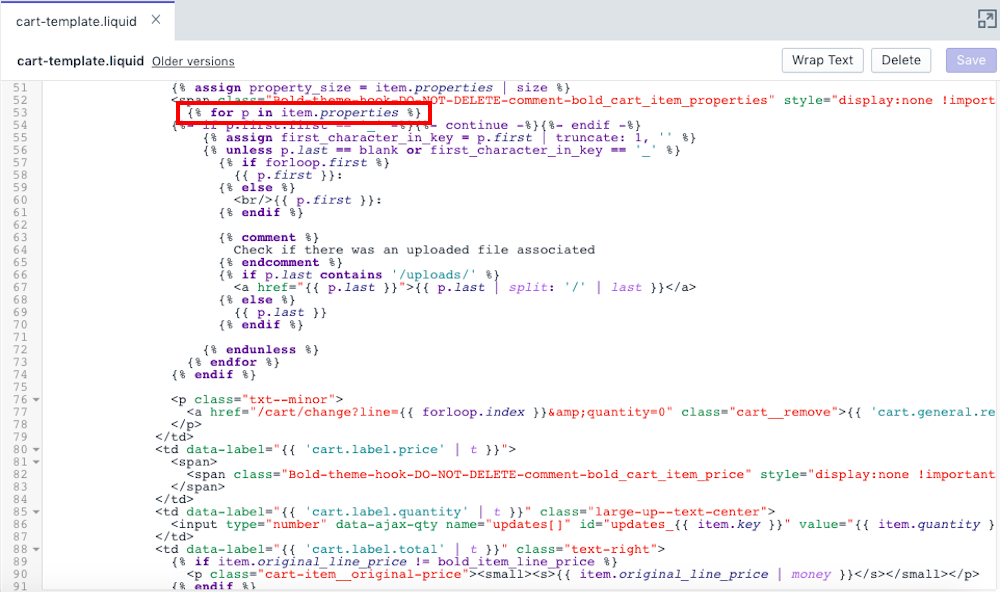
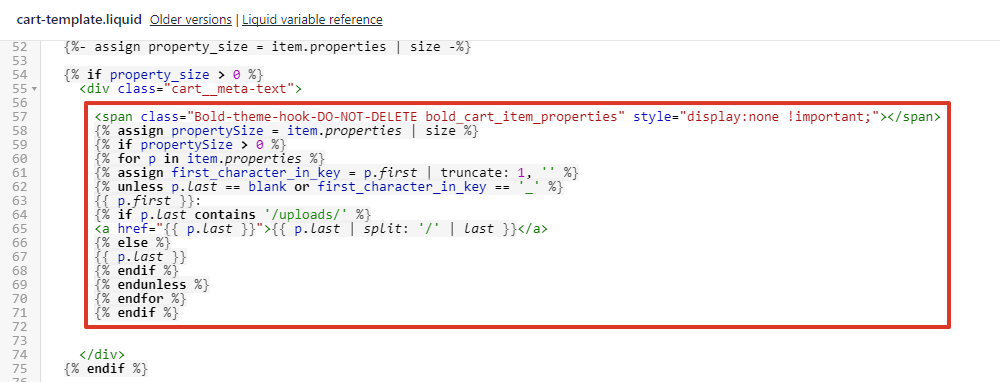
Step 10: Update pricing code
Updates need to be done on all theme files that output product prices on the store. The number and name of these files will vary from theme to theme. Generally, 3-5 files will need to be updated.
These control the price fields on the product, collection, search, related products, and home pages.
It's important that each theme file that outputs a price be modified. This is to ensure the correct pricing always shows for your customers.
Note: This will require you to go back and edit multiple files within your theme's Liquid coding.
Go through the list of files one at a time and reference your theme's files to see if that particular file exists in your theme. Not all of these files will exist in a given theme.
Templates: All themes should contain these files. If your theme is using Sections, these files will be located within the Sections folder as *-template.liquid files.
product.liquid
index.liquid
collection.liquid
search.liquid
Snippets: Any given theme should typically have several of these files.
product-block.liquid
product-card.liquid
product-form.liquid
product-grid-collage.liquid
product-grid-item-category.liquid
product-grid-item.liquid
product-list-item.liquid
product-listing.liquid
product-loop.liquid
product-single.liquid
product-thumbnail.liquid
product.liquid
related-products.liquid
search-result-grid.liquid
search-result.liquid
search.liquid
short-form.liquid
snippet-product-item.liquid
Assets: No changes necessary.
When you've gone through the list, this step will be complete.
Look for each of these ... | ... and replace all instances with this code |
|---|---|
product.price | bold_price |
product.price_min | bold_price_min |
product.price_max | bold_price_max |
product.price_varies | bold_price_varies |
product.compare_at_price | bold_compare_at_price |
product.compare_at_price_min | bold_compare_at_price_min |
product.compare_at_price_max | bold_compare_at_price_max |
product.compare_at_price_varies | bold_compare_at_price_varies |
product.selected_or_first_available_variant | bold_selected_or_first_available_variant |
product.variants.first | bold_selected_or_first_available_variant |
product.variants[0] | bold_selected_or_first_available_variant |
Not all of these will appear in a given file, but the ones that do appear in a file may appear a few times.
If the file has none of these, then select the item.price tab.
Look for each of these ... | ... and replace all instances with this code |
|---|---|
item.price | bold_price |
item.price_min | bold_price_min |
item.price_max | bold_price_max |
item.price_varies | bold_price_varies |
item.compare_at_price | bold_compare_at_price |
item.compare_at_price_min | bold_compare_at_price_min |
item.compare_at_price_max | bold_compare_at_price_max |
item.compare_at_price_varies | bold_compare_at_price_varies |
item.selected_or_first_available_variant | bold_selected_or_first_available_variant |
item.variants.first | bold_selected_or_first_available_variant |
item.variants[0] | bold_selected_or_first_available_variant |
Not all of these will appear in a given file, but the ones that do appear in a file may appear a few times.
If you found and replaced some of the above, then select the Files to Update tab and continue down the file list.
If the file has none of these, then bring up the file editor's search feature (CTRL+F), and do a search for .price and continue below.
If nothing is found after the search, or if you find variant.price, variant.price_min, variant.price_max or variant.price_varies, then nothing will need to be done with this file, and you can select the Files to Update tab and continue down the file list.
If something is found after the search, take note of what was found, and then select the Other tab.
Some files in some themes will use something other than product or item, and you'll need to change our code to work with what the file uses. For example, a file may use product-detail instead
To proceed, substitute * with whatever was before the .price when you searched in the previous section, then look for that code in the file and replace what you find with the app's code. It's not necessary to change anything with variant in it, such as variant.price.
For example, if you found product-detail.price, then replace * with product-detail with each item below, then look for that code in the theme. For the first item, you'd look for product-detail.price, and if found, replace it with bold_price
Look for each of these ... | ... and replace all instances with this code |
|---|---|
*.price | bold_price |
*.price_min | bold_price_min |
*.price_max | bold_price_max |
*.price_varies | bold_price_varies |
*.compare_at_price | bold_compare_at_price |
*.compare_at_price_min | bold_compare_at_price_min |
*.compare_at_price_max | bold_compare_at_price_max |
*.compare_at_price_varies | bold_compare_at_price_varies |
*.selected_or_first_available_variant | bold_selected_or_first_available_variant |
*.variants.first | bold_selected_or_first_available_variant |
*.variants[0] | bold_selected_or_first_available_variant |
Not all of these will appear in a given file, but the ones that do appear in a file may appear a few times.
When you're done with this file, select the File to Update tab and continue down the file list.
V3 Liquid code install instructions (vintage themes)
Alert: If you are using a Online Store 2.0 theme, please use the instructions under Manual install Online Store 2.0 themes (Bundles V3). If you are unsure of whether you are using a vintage or Online Store 2.0 theme, please visit Shopify’s article Theme architecture versions.
Step 1: Add Snippet files
Duplicate themes to create a backup copy.
From the Shopify admin, select Online Store.
Select Actions.
Select Edit code.
Under Snippets and Assets, find these files:
bold-bundles.css
bold-common.liquid
bold-includes.liquid
bold-pr.liquid
shappify-bdl-load-bundle.liquid
For any that don't exist:
Select Add a new snippet or Add a new asset.
Enter the correct snippet name.
Select Create snippet.
Copy and paste the code found in each of these links into their respective files:
/* ------------------------------------ WARNING ------------------------------------ This file will be overwritten and should not be edited directly. In order to edit custom CSS for Bold Product Bundles you should: - Log into your Shopify Admin Panel - Go to Apps --> Installed --> Product Bundles - Go to Display Settings ------------------------------------ WARNING ------------------------------------ bold-bundles.css version 1 Generated at 2019-12-04 11:48:15 */ /* .bold-bundles-product component */ .bold-bundles-product { width: 100%; } .bold-bundles-product:empty { display:none; } /* .bold-bundles-widget component */ .bold-bundles-widget { box-sizing: border-box; border-style: solid; border-width: 1px; border-color: #c0c0c0; cursor: default; margin-top: 20px; } .bold-bundles-widget::before, .bold-bundles-widget::after { background-repeat: no-repeat; box-sizing: inherit; text-decoration: inherit; vertical-align: inherit; } /* .bold-bundles-widget-decorator component */ .bold-bundles-widget-decorator__wrapper { overflow: auto; min-height:20px; } .bold-bundles-widget-decorator { text-align: right; padding-left: 10px; padding-right: 10px; background-color: black; color: white; display: inline-block; float: right; } .bold-bundles-widget-decorator span { font-weight: bold; } /* .bold-bundles-widget-header component */ .bold-bundles-widget-header { text-align: center; padding-bottom: 20px; } .bold-bundles-widget-header__title { padding-top: 20px; margin-bottom:0px; font-size: 18px; color: #383838; } .bold-bundles-widget-decorator__wrapper + .bold-bundles-widget-header__title { padding-top: 0px; } .bold-bundles-widget-header__title:empty { display:none; } /* .bold-bundles-widget__items */ .bold-bundles-widget__items { justify-content: center; padding-left: 20px; padding-right: 20px; } @media screen and (min-width: 650px) { .bold-bundles-widget__items { display: flex; align-items: baseline; flex-wrap: wrap; } } /* .bold-bundles-widget-item component */ .bold-bundles-widget-item { flex: auto; display: block; width: 100%; padding-bottom: 10px; } /* .bold-bundles-widget-item-separator */ .bold-bundles-widget-item-separator__wrapper { border-bottom: 1px solid #c0c0c0; margin-bottom: 20px; } .bold-bundles-widget-item--with-separator:nth-child(n+1):last-child { display: none; } @media screen and (min-width: 650px) { .bold-bundles-widget-item-separator__wrapper { border-bottom: none; margin-bottom: 0px; } .bold-bundles-widget-item--with-separator:nth-child(n+1):last-child { display: block; visibility: hidden; } } .bold-bundles-widget-item--with-separator { text-align: center; } @media screen and (min-width: 650px) { .bold-bundles-widget-item.bold-bundles-widget-item--with-separator { max-width: 26px; margin-left: 2px; margin-right: 2px; } } .bold-bundles-widget-item-separator { background-color: #333333; border-radius: 50%; display: inline-block; width: 20px; height: 20px; position: relative; bottom: -18px; } .bold-bundles-widget-item-separator__icon { display: block; fill: #FFFFFF; margin: 0 auto; position: relative; top: 4px; height: 12px; width: 12px; } /* .bold-bundles-widget-item--product */ .bold-bundles-widget-item__wrapper { display: flex; flex-direction: row; flex-wrap: wrap; } @media screen and (min-width: 650px) { .bold-bundles-widget-item.bold-bundles-widget-item--product { min-width: 125px; width: calc(50% - 26px); max-width: calc(50% - 26px); padding-bottom: 0px; margin-bottom: 20px; } .bold-bundles-widget__items .bold-bundles-widget-item--product:first-child:nth-last-child(6), .bold-bundles-widget__items .bold-bundles-widget-item--product:first-child:nth-last-child(6) ~ .bold-bundles-widget-item--product { width: calc(33% - 26px); max-width: calc(33% - 26px); } .bold-bundles-widget__items .bold-bundles-widget-item--product:first-child:nth-last-child(8), .bold-bundles-widget__items .bold-bundles-widget-item--product:first-child:nth-last-child(8) ~ .bold-bundles-widget-item--product { width: calc(25% - 26px); max-width: calc(25% - 26px); } /* Try to get a row of 3 and a row of 2 */ .bold-bundles-widget__items .bold-bundles-widget-item--product:first-child:nth-last-child(10), .bold-bundles-widget__items .bold-bundles-widget-item--product:first-child:nth-last-child(10) ~ .bold-bundles-widget-item--product { width: calc(33% - 26px); max-width: calc(33% - 26px); } } /* .bold-bundles-widget-item__thumbnail-decorator */ .bold-bundles-widget-item__thumbnail-decorator { position: absolute; top: -10px; right: -10px; border: 1px solid #c0c0c0; background-color: white; text-align: center; height: 20px; line-height: 18px; } .bold-bundles-widget-item__thumbnail-decorator span { font-weight: bold; } .bold-bundles-widget-item__thumbnail-decorator.product-quantity { border-radius: 50%; width: 20px; display: none; } .bold-bundles-widget-item__thumbnail-decorator.product-discounted { border-radius: 10px; width: 80px; display: none; } .bold-bundles-widget-item__thumbnail-decorator.product-free { padding-left: 5px; padding-right: 5px; border-radius: 10px; display: none; } .bold-bundles-widget-item--product:not(.is_free) .bold-bundles-widget-item__thumbnail-decorator.product-quantity{ display: block; } .bold-bundles-widget-item--product.is_free .bold-bundles-widget-item__thumbnail-decorator.product-free{ display: block; } .bold-bundles-widget-item--product:not(.is_free) .bold-bundles-widget-item__thumbnail-decorator.product-discounted{ display: block; } /* .bold-bundles-widget-item__thumbnail */ .bold-bundles-widget-item__thumbnail { flex: auto; width: 25%; position: relative; } /* IE as issues with vertical-align with no height style */ @media screen and (min-width: 650px) { .bold-bundles-widget-item__thumbnail { margin-bottom: 0px; vertical-align: bottom; min-height: 1px; width: 100%; } } /* .bold-bundles-widget-item__link */ .bold-bundles-widget-item__link { max-width: 50%; } @media screen and (min-width: 650px) { .bold-bundles-widget-item__link { min-width: 100%; } } .bold-bundles-widget-item__image { vertical-align: bottom; width: 100%; border:solid #e8e8e8 2px; } .bold-bundles-widget-item__in_cart_identifier{ height:22px; width:22px; border-radius:50%; background-color:white; display:flex; justify-content:center; align-items:center; border: solid #a6d429 2px; position: absolute; right: -5px; top: -5px; } .bold-bundles-widget-item__in_cart_identifier img{ height:80%; width:80%; } /* .bold-bundles-widget-item__info */ .bold-bundles-widget-item__info { padding-left: 10px; min-width: 200px; width: 75%; flex: auto; text-align: left; } .bold-bundles-widget-item__info--centered { margin-top: 20px; text-align: center; } @media screen and (min-width: 650px) { .bold-bundles-widget-item__info { width: 100%; min-width: 0px; padding-left: 0px; } } /* .bold-bundles-widget-item__title */ .bold-bundles-widget-item__title { font-size: 16px; color: #383838; } @media screen and (min-width: 650px) { .bold-bundles-widget-item__title { margin-bottom: 5px; } } /* .bold-bundles-widget-item__variants */ .bold-bundles-widget-item__variants { display: block; margin-bottom: 15px; width: 100%; } select.bold-bundles-widget-item__variants option[disabled] { color: grey; } @media screen and (min-width: 650px) { .bold-bundles-widget-item__variants { margin-bottom: 5px; font-size: 12px; } } /* .bold-bundles-widget-item__price */ .bold-bundles-widget-item__price { font-size: 14px; color: #606060; } .bold-bundles-widget-item__price--old { opacity: 0.75; text-decoration: line-through; } .bold-bundles-widget-item__price--new { font-weight: 600; white-space: nowrap; } .bold-bundles-widget-item__price--price_multiplier { opacity: 0.75; font-weight: 400; } .bold-bundles-widget__price-total { border-top: 1px solid #c0c0c0; border-bottom: 1px solid #c0c0c0; text-align: center; } /* bold-bundles-widget__button */ .bold-bundles-widget__button { height:auto; border-radius: 2px; -webkit-appearance: button; display: inline-block; } .bold-bundles-widget__button--top { display: block; border-bottom-width: 1px; border-bottom-style: solid; border-bottom-color: rgba(0, 0, 0, 0.2); } .bold-bundles-widget__button--bottom { display: block; padding: 2px 5px 0 5px; border-top-width: 1px; border-top-style: solid; border-top-color: rgba(255, 255,255, 0.1); } .bold-bundles-widget__footer { padding: 15px 20px 20px 20px; text-align: center; } .bold-bundles-widget__footer_collection { padding-top: 5px; padding-bottom: 5px; text-align: center; font-size: 30px; border-top: solid #c0c0c0 1px; margin-left: 20px; margin-right: 20px; } /* Widget basic-bundle specific styles */ .basic-bundle .bold-bundles-widget__footer { text-align: left; } /* Widget basic-bogo-1 specific styles */ .basic-bogo-1.bold-bundles-widget { margin-top: 20px; } .basic-bogo-1 .bold-bundles-widget-item__thumbnail{ margin-bottom:10px; } .bold-bundles-widget-item__no_variants{ display: block; } .bold-bundles-widget-item__no_variants .bold-bundles-widget-item__thumbnail{ width:100%; margin-bottom:0px; } /* .bold-bundles-child-product component */ .bold-bundles-child-product-info{ padding-bottom:15px; } .bold-bundles-child-product__title{ font-size:large; opacity: 0.7; padding-bottom: 10px; } .bold-bundles-child-product__variant-wrapper{ padding-bottom:15px; } .bold-bundles-child-product__link-wrapper{ padding-bottom:5px; } .bold-bundles-widget-item__thumbnail-decorator.product-quantity, .bold-bundles-widget-item__thumbnail-decorator.product-free { z-index: 1; } .bold-checkout{ pointer-events: none; } [name=checkout] > *, [href*='/checkout'] > * { pointer-events: none; } /* Bundles Widget Overlay CSS start */ .bold-bundles-widget .overlay { display: none; width: 100%; height: 100%; position: absolute; background-color: rgba(0,0,0,0.7); z-index: 2; cursor: pointer; text-align: center; } .bold-bundles-widget #overlay-wrapper{ position: relative; } .bold-bundles-widget .modal-content { background-color: #fff; margin: auto; padding: 0 10px; border: 1px solid #888; width: 80%; margin-top: 20%; } .bold-bundles-widget .close { color: #aaaaaa; font-size: 28px; font-weight: bold; float: right; } .bold-bundles-widget .close:hover, .bold-bundles-widget .close:focus { color: #000; text-decoration: none; cursor: pointer; } .bold-bundles-widget .modalText{ margin-top:40px; } .bold-bundles-widget .buttonsContainer{ margin-top:10px } .bold-bundles-widget .modal-button{ padding: 10px 30px; margin: 20px; background: #47708A; border-radius: 2px; color: #fff !important; min-width: 110px; display: inline-block; text-align: center; min-height: 45px } /* Bundles Widget Overlay CSS end */ /* Bundles cart loader CSS start */ .bold-cart.bold-loading::before { z-index: 10; content: "Cart loading"; position: absolute; width: 100%; height: 100%; left: 0; top: 0; background-size: 10rem; background-position: center; background-repeat: no-repeat; background-image: url('https://bundles.staging.boldapps.net/assets/imgs/loading-spinner.gif'); background-color: rgba(0, 0, 0, 0.3); display: flex; flex-direction: row; align-items: center; justify-content: center; color: #FFF; } /* Bundles cart loader CSS end */ {%- comment -%} BOLD-COMMON.LIQUID Last updated: 2018-Aug-9 --------------------------- WARNING --------------------------- This file is auto-generated by BOLD and should not be modified. It may be overwritten and any customizations would be lost. --------------------------- WARNING --------------------------- {%- endcomment -%} <script> {%- comment -%} common data {%- endcomment -%} window.BOLD = window.BOLD || {}; window.BOLD.common = window.BOLD.common || {}; window.BOLD.common.Shopify = window.BOLD.common.Shopify || {}; window.BOLD.common.Shopify.shop = { domain: '{{ shop.domain }}', permanent_domain: '{{ shop.permanent_domain }}', url: '{{ shop.url }}', secure_url: '{{ shop.secure_url }}', money_format: {{ shop.money_format | json }}, currency: {{ shop.currency | json }} }; window.BOLD.common.Shopify.customer = { id: {{ customer.id | json }}, tags: {{ customer.tags | json }}, }; window.BOLD.common.Shopify.cart = {{ cart | json }}; window.BOLD.common.template = '{{ template | split: "." | first }}'; {%- comment -%} common functions {%- endcomment -%} window.BOLD.common.Shopify.formatMoney = function(money, format) { function n(t, e) { return "undefined" == typeof t ? e : t } function r(t, e, r, i) { if (e = n(e, 2), r = n(r, ","), i = n(i, "."), isNaN(t) || null == t) return 0; t = (t / 100).toFixed(e); var o = t.split(".") , a = o[0].replace(/(\d)(?=(\d\d\d)+(?!\d))/g, "$1" + r) , s = o[1] ? i + o[1] : ""; return a + s } "string" == typeof money && (money = money.replace(".", "")); var i = "" , o = /\{\{\s*(\w+)\s*\}\}/ , a = format || window.BOLD.common.Shopify.shop.money_format || window.Shopify.money_format || "$ {% raw %}{{ amount }}{% endraw %}"; switch (a.match(o)[1]) { case "amount": i = r(money, 2, ",", "."); break; case "amount_no_decimals": i = r(money, 0, ",", "."); break; case "amount_with_comma_separator": i = r(money, 2, ".", ","); break; case "amount_no_decimals_with_comma_separator": i = r(money, 0, ".", ","); break; case "amount_with_space_separator": i = r(money, 2, " ", ","); break; case "amount_no_decimals_with_space_separator": i = r(money, 0, " ", ","); break; case "amount_with_apostrophe_separator": i = r(money, 2, "'", "."); break; } return a.replace(o, i); }; window.BOLD.common.Shopify.saveProduct = function (handle, product) { if (typeof handle === 'string' && typeof window.BOLD.common.Shopify.products[handle] === 'undefined') { if (typeof product === 'number') { window.BOLD.common.Shopify.handles[product] = handle; product = { id: product }; } window.BOLD.common.Shopify.products[handle] = product; } }; window.BOLD.common.Shopify.saveVariant = function (variant_id, variant) { if (typeof variant_id === 'number' && typeof window.BOLD.common.Shopify.variants[variant_id] === 'undefined') { window.BOLD.common.Shopify.variants[variant_id] = variant; } }; {%- comment -%} product data {%- endcomment -%} window.BOLD.common.Shopify.products = window.BOLD.common.Shopify.products || {}; window.BOLD.common.Shopify.variants = window.BOLD.common.Shopify.variants || {}; window.BOLD.common.Shopify.handles = window.BOLD.common.Shopify.handles || {}; {%- if template == 'product' -%} window.BOLD.common.Shopify.handle = {{ product.handle | json }} {%- endif -%} {%- comment -%} product page {%- endcomment -%} window.BOLD.common.Shopify.saveProduct({{ product.handle | json }}, {{ product.id | json }}); {%- for variant in product.variants -%}{%- assign csp_metafield_namespace = variant.id | prepend: "csp" -%}window.BOLD.common.Shopify.saveVariant({{ variant.id | json }}, { product_id: {{ product.id | json }}, product_handle: {{ product.handle | json }}, price: {{ variant.price | json }}, group_id: '{{variant.metafields.bold_rp.rp_group_id}}', csp_metafield: {{ product.metafields[csp_metafield_namespace] | json }}});{%- endfor -%} {%- comment -%} BOLD APPS INSTALLED {%- endcomment -%} {%- assign bold_apps_installed = shop | map: 'metafields' | map: 'bold_apps_installed' | first -%} window.BOLD.apps_installed = {{ bold_apps_installed | json }} || {}; {%- unless bold_apps_installed contains 'Customer Pricing' or bold_apps_installed contains 'Product Bundles' or bold_apps_installed contains 'Product Discount' or bold_apps_installed contains 'Quantity Breaks' or bold_apps_installed contains 'Custom Order' or bold_apps_installed contains 'Order Manager' or bold_apps_installed contains 'The Motivator'-%} {%- comment -%} collection page {%- endcomment -%} {%- for product in collection.products -%} window.BOLD.common.Shopify.saveProduct({{ product.handle | json }}, {{ product.id | json }}); {%- for variant in product.variants -%}{%- assign csp_metafield_namespace = variant.id | prepend: "csp" -%}window.BOLD.common.Shopify.saveVariant({{ variant.id | json }}, { product_id: {{ product.id | json }}, product_handle: {{ product.handle | json }}, price: {{ variant.price | json }}, group_id: '{{variant.metafields.bold_rp.rp_group_id}}', csp_metafield: {{ product.metafields[csp_metafield_namespace] | json }}});{%- endfor -%} {%- endfor -%} {%- comment -%} search page {%- endcomment -%} {%- for product in search.results -%} window.BOLD.common.Shopify.saveProduct({{ product.handle | json }}, {{ product.id | json }}); {%- for variant in product.variants -%}{%- assign csp_metafield_namespace = variant.id | prepend: "csp" -%}window.BOLD.common.Shopify.saveVariant({{ variant.id | json }}, { product_id: {{ product.id | json }}, product_handle: {{ product.handle | json }}, price: {{ variant.price | json }}, group_id: '{{variant.metafields.bold_rp.rp_group_id}}', csp_metafield: {{ product.metafields[csp_metafield_namespace] | json }}});{%- endfor -%} {%- endfor -%} {%- endunless -%} {%- comment -%} cart page {%- endcomment -%} {%- for item in cart.items -%}{%- assign csp_metafield_namespace = item.variant_id | prepend: "csp" -%}window.BOLD.common.Shopify.saveVariant({{ item.variant_id | json }}, { product_id: {{ item.product.id | json }}, product_handle: {{ item.product.handle | json }}, price: {{ item.variant.price | json }}, group_id: '{{item.variant.metafields.bold_rp.rp_group_id}}', csp_metafield: {{ item.product.metafields[csp_metafield_namespace] | json }}});{%- endfor -%} {%- comment -%} metafields {%- endcomment -%} window.BOLD.common.Shopify.metafields = window.BOLD.common.Shopify.metafields || {}; {%- assign metafield_namespaces_to_load = 'bold_rp,bold_csp_defaults' | split: ',' -%} {%- for namespace in metafield_namespaces_to_load -%} window.BOLD.common.Shopify.metafields[{{ namespace | json }}] = {{ shop.metafields[namespace] | json }}; {%- endfor -%} window.BOLD.common.cacheParams = window.BOLD.common.cacheParams || {}; </script> {%- comment -%} INCLUDE APP SCRIPTS BELOW {%- endcomment -%}{%- comment -%} BOLD-INCLUDES.LIQUID --------------------------- WARNING --------------------------- THIS IS A GENERATED ASSET OF INCLUDES FOR INSTALLED BOL APPLICATIONS SO NOT MODIFY --------------------------- WARNING --------------------------- {%- endcomment -%}<script id="bold-platform-data" type="application/json"> { "shop": { "domain": "{{ shop.domain }}", "permanent_domain": "{{ shop.permanent_domain }}", "url": "{{ shop.url }}", "secure_url": "{{ shop.secure_url }}", "money_format": {{ shop.money_format | json }}, "currency": {{ shop.currency | json }} }, "customer": { "id": {{ customer.id | json }}, "tags": {{ customer.tags | json }} }, "cart": {{ cart | json }}, "line_item_products": {{ cart | map: "items" | map: "product" | json }}, "template": "{{ template | split: "." | first }}", "product": {{ product | json }}, "collection": {{ collection.products | json }} } </script> {{ 'https://static.boldcommerce.com/bold-platform/sf/pr.js' | script_tag }} <style> .money[data-product-id], .money[data-product-handle], .money[data-variant-id], .money[data-line-index], .money[data-cart-total] { animation: moneyAnimation 0s 2s forwards; visibility: hidden; } @keyframes moneyAnimation { to { visibility: visible; } } .shappify_qb_grid { width: auto; background: #fff; margin: 8px 0; } .shappify_qb_grid, .shappify_qb_grid td, .shappify_qb_grid th { text-align: left; padding: 5px; border: 1px solid #ccc; border-collapse: collapse; } </style><div id='shappify_bundle' onclick='$("form.bundle-form").unbind("submit")'></div> <script async src="//secure.apps.shappify.com/apps/bundle/product_bundle.php?shop={{ shop.permanent_domain }}&product_id={{ product.id }}&_tmp=1529467710"></script> <!-- the liquid variable "bold_bundles_widget" is no longer required. The line below replaces it. --> <div class="bold-bundle" data-product-id="{{ product.id }}"></div>Select Save.
Repeat steps 6.1 - 6.5 for each missing snippet file.
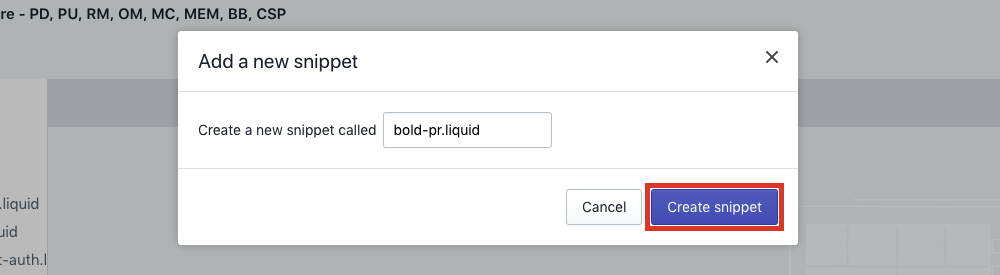
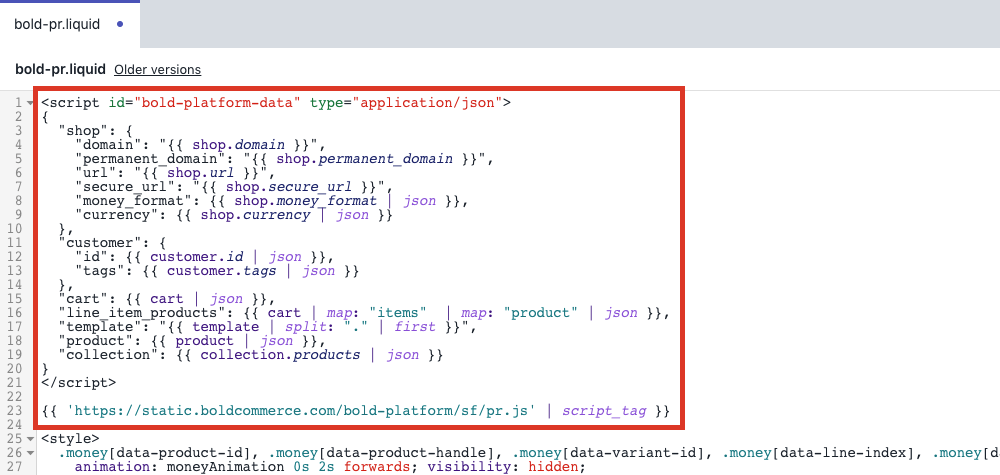
Step 2: Edit theme.liquid
Under Layout, select theme.liquid.
Copy and paste the following code below the {{ content_for_header }} line:
{%- render 'bold-pr' -%} {%- render 'bold-common' -%} {%- render 'bold-includes' -%}Select Save.
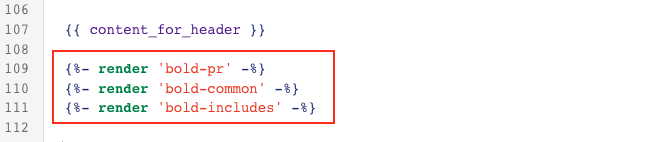
Step 3: Add the Product Loop Code
Overview
Updates need to be done on all theme files that pull your product information to the cart. The number and name of these files will vary from theme to theme. Generally, 3-5 files will need to be updated.
It's important that each theme file that outputs a price be modified. This is to ensure the correct information always shows for your customers.
Note: This will require you to go back and edit multiple files within your theme coding.
Go through the list of files one at a time and reference your theme's files to see if that particular file exists in your theme. Not all of these files will exist in a given theme.
List of Theme Files to Update
Templates: Themes should contain most of these files. If your theme is using "Sections", these files will be located within the "Sections" folder as *-template.liquid files.
collection.liquid
list-collections.liquid
search.liquid
Sections & Snippets: Any given theme should typically have a few of these files.
collection-template.liquid
featured-collection.liquid
product-full.liquid
product-loop.liquid
product-recommendations.liquid
product-slider.liquid
related-products.liquid
Not all of these will appear in a given file, but the ones that do may appear several times.
Code Adjustments Required
Your theme's product loop code should look similar to this:
{% for product in collection.products %}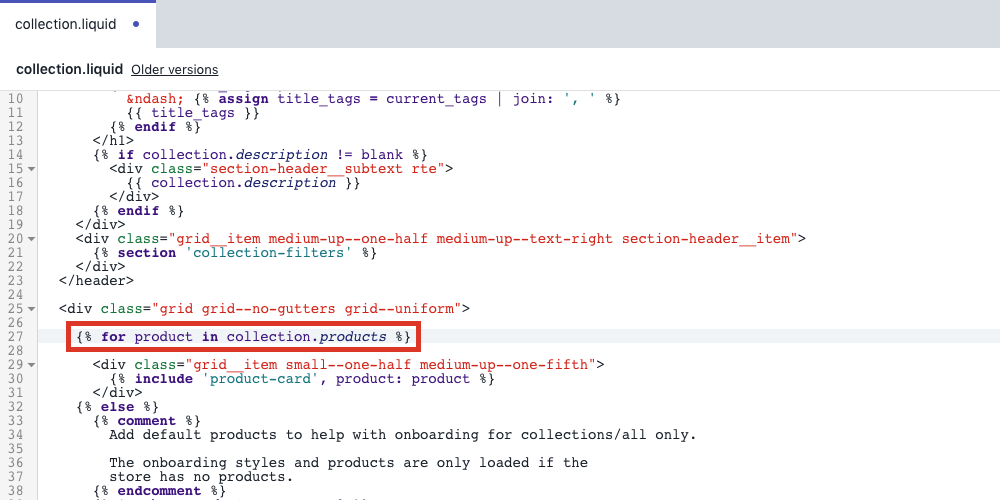
The following code should be inserted directly after each instance:
<script type="application/json" class="bold-product-json">{{ product | json }}</script>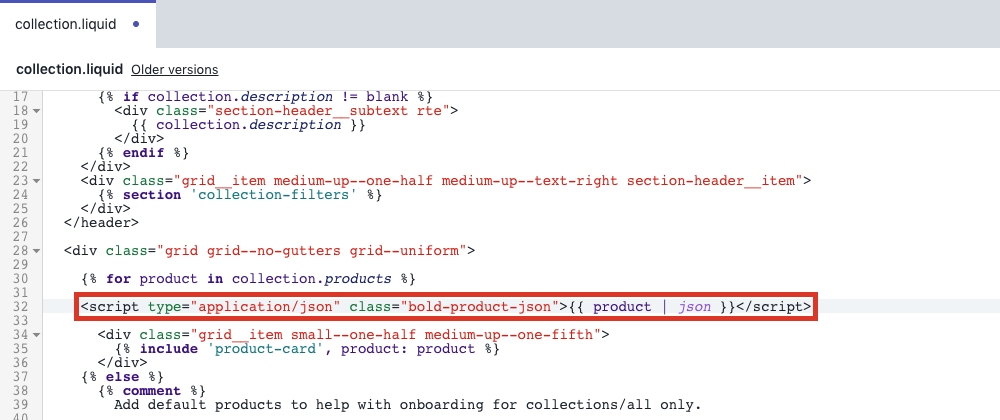
In some cases, the product loop code may look slightly different:
{% for item in search.results %}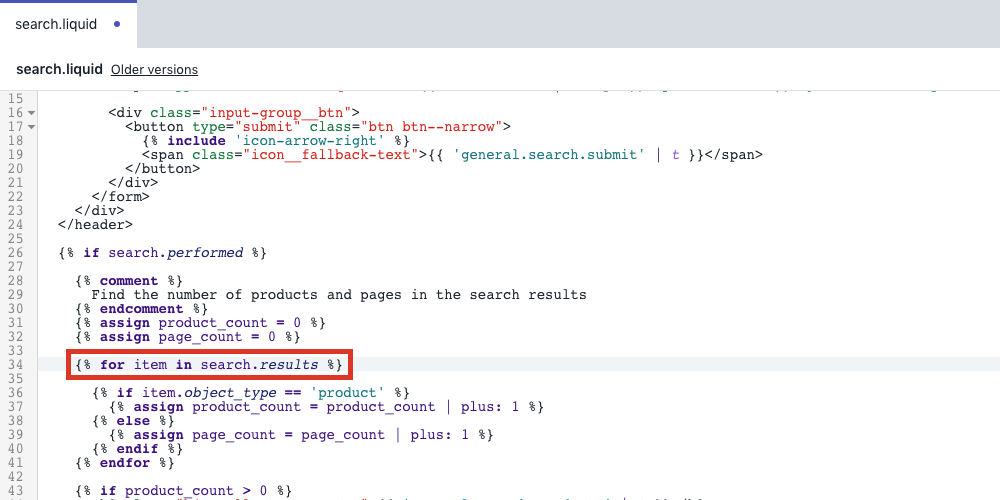
We then need to adjust the end of our Bold price code to include the loop's product reference:
Note: See Product Loop Code Variations for more information on what this coding may look like.
Some themes will use a slight variation of this code. The first half of this code will use one of the following:
{{% for product in
{% for prod in
{% for item in
The second half will be a variation of the following:
selected_collection.products %}
collection.products %}
search.results %}
collection.all.products %}
collections.all.products %}
product_collection.products %}
products %}
product-list.products %}
recommendations.products %}
featured_collection.products %}
featuredCollection.products %}
link.object.products %}
collection_products %}
coll.products %}
collection %}
collections %}
<script type="application/json" class="bold-product-json">{{ item | json }}</script>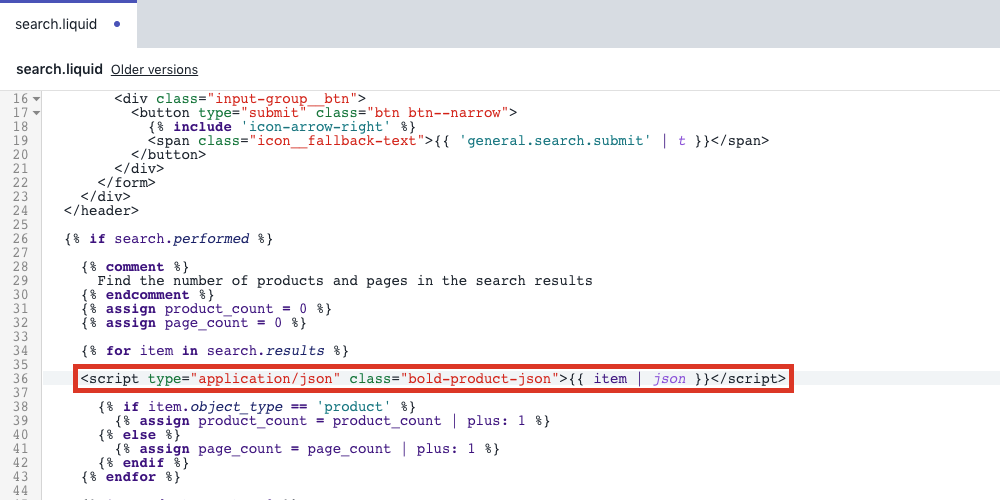
Step 4: Update the Product Price Code
Overview
Updates need to be done on all theme files that output product prices on the store. The number and name of these files will vary from theme to theme. Generally, 3-5 files will need to be updated.
These control the price fields on the product, collection, search, related products, and home pages.
It's important that each theme file that outputs a price be modified. This is to ensure the correct pricing always shows for your customers.
Note: This will require you to go back and edit multiple files within your theme coding.
Go through the list of files one at a time and reference your theme's files to see if that particular file exists in your theme. Not all of these files will exist in a given theme.
List of Theme Files to Update
Templates: Themes should contain most of these files. If your theme is using Sections, these files will be located within the Sections folder as *-template.liquid files.
product.liquid
index.liquid
collection.liquid
search.liquid
Sections & Snippets: Any given theme should typically have a few of these files.
featured-product.liquid
product-card.liquid
product-grid-item.liquid
product-form.liquid
product-template.liquid
related-products.liquid
Code adjustments required
Your theme's product price code should look similar to this:
{{ product.price | money }}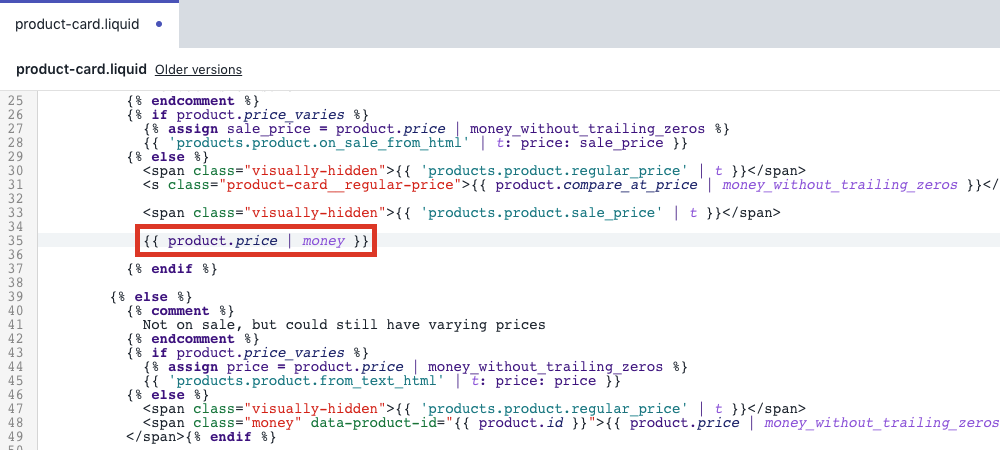
The following code should be placed around each of these instances with the <span> tags wrapping this price code:
<span class="money" data-product-id="{{ product.id }}">{{ product.price | money }}</span>
In some cases, the product price code may look slightly different:
{{ item.price | money }}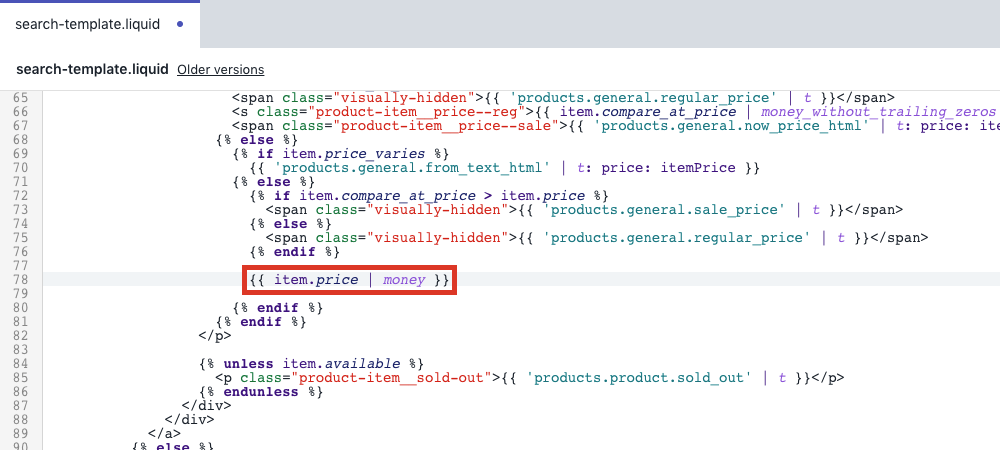
The following code should still be placed around each of these instances with the <span> tags wrapping this price code:
Note: See Product Price Code Variations for more information on what this coding may look like.
Some themes will use a slight variation of this code. The first half of this code will use one of the following:
{{ price | money }}
{{ price }}
{{ formatted_price }}
{{ money_price }}
{{ product.price | money }}
{{ item.price | money_without_trailing_zeros }}
{{ item.price | money }}
{{ current_variant.price | money }}
<span class="money" data-product-id="{{ item.id }}">{{ item.price | money }}</span>Step 5: Update the cart price code
Overview
Updates need to be done to the cart files that pull your product price information to the cart. The number and name of these files will vary from theme to theme.
It's important that each theme file that pulls this price information be edited. This is to ensure the correct information always shows for your customers.
Note: This will require you to go back and edit multiple files within your theme coding.
Go through the list of files one at a time and reference your theme's files to see if that particular file exists in your theme. Not all of these files will exist in a given theme.
List of theme files to update
Templates: If your theme is using Sections, these files will be located within the Sections folder as *-template.liquid files.
cart.liquid
Sections & Snippets:
cart-ajax.liquid
cart-content.liquid
cart-template.liquid
Code adjustments required
First, you'll need to find each instance of coding that looks similar to this:
{{ item.price | money }}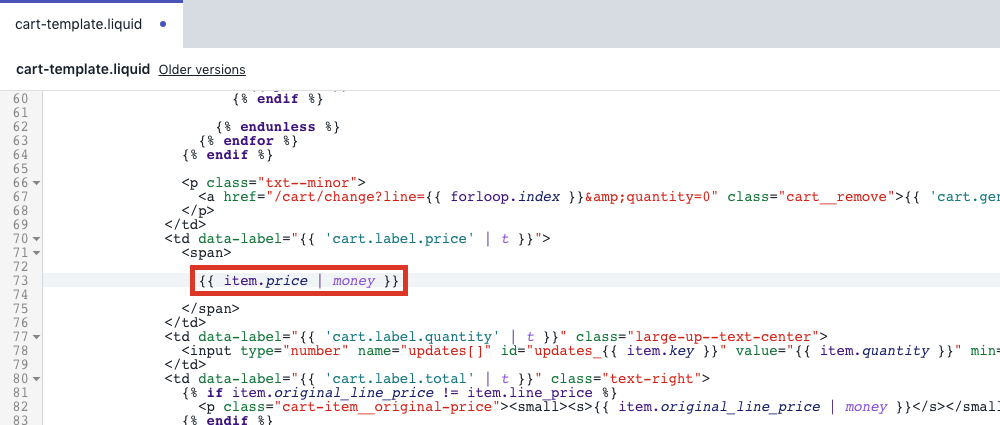
The following code should be placed around each of these instances with the <span> tags wrapping this code:
<span class="money" data-line-index="{{ forloop.index0 }}">{{ item.price | money }}</span>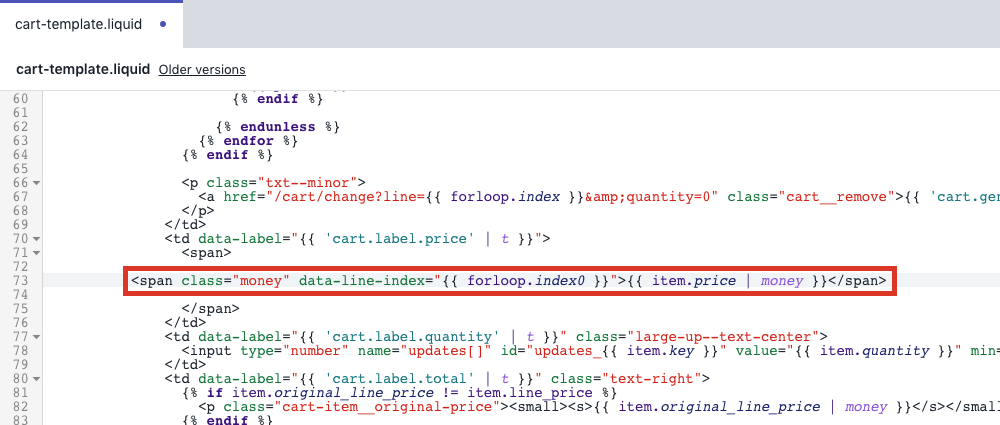
Next you'll need to find each instance of coding that looks similar to this:
{{ item.line_price | money }}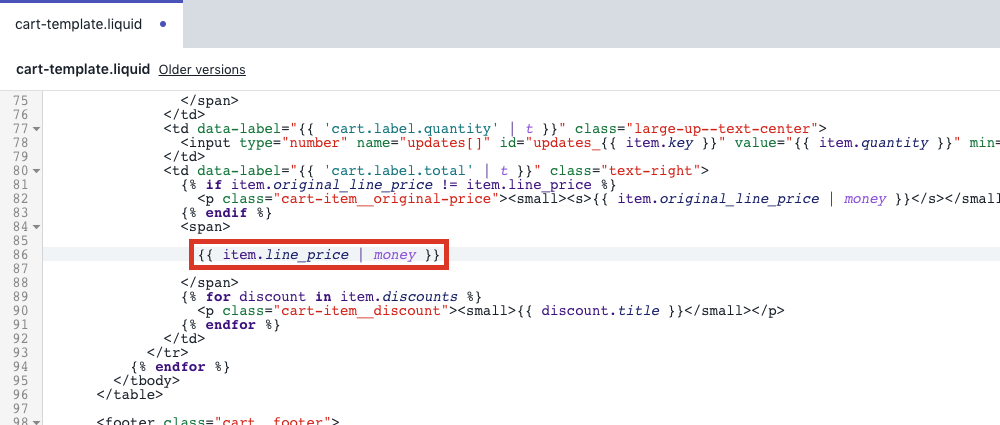
The following code should be placed around each of these instances with the <span> tags wrapping this code:
<span class="money" data-line-total data-line-index="{{ forloop.index0 }}">{{ item.line_price | money }}</span>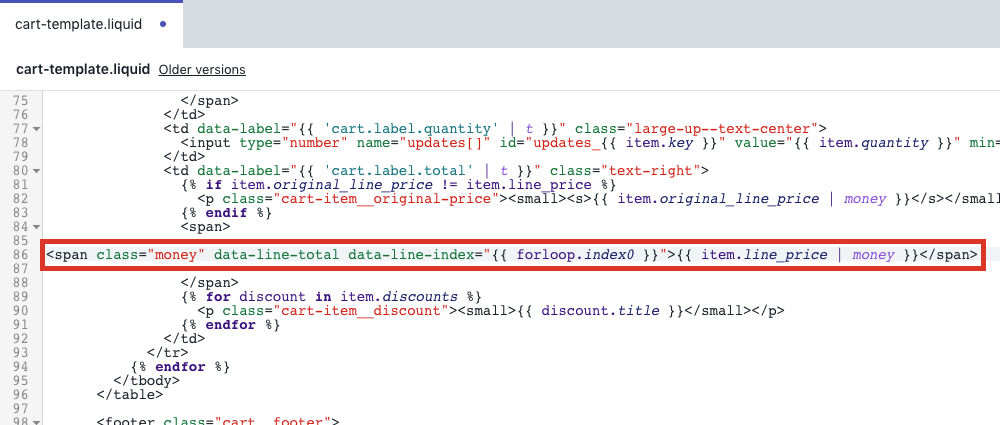
Lastly, you'll need to find each instance of coding that looks similar to this:
{{ cart.total_price | money }}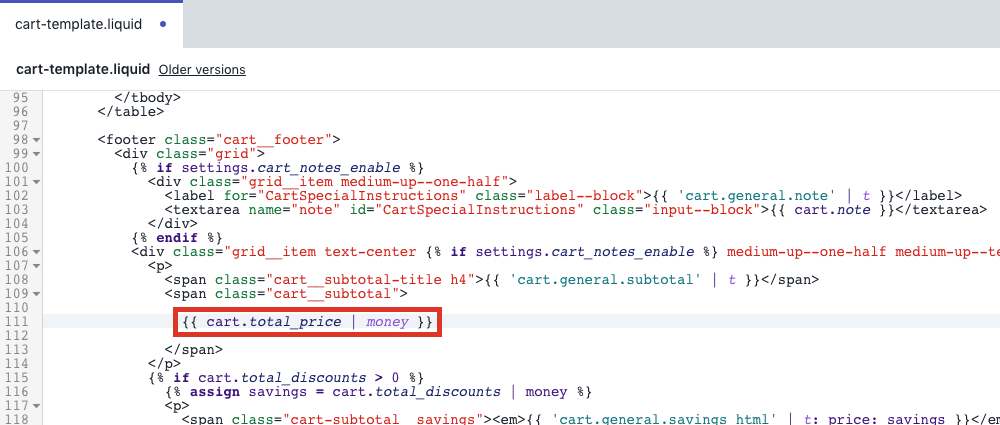
The following code should be placed around each of these instances with the <span> tags wrapping this code:
<span class="money" data-cart-total>{{ cart.total_price | money }}</span>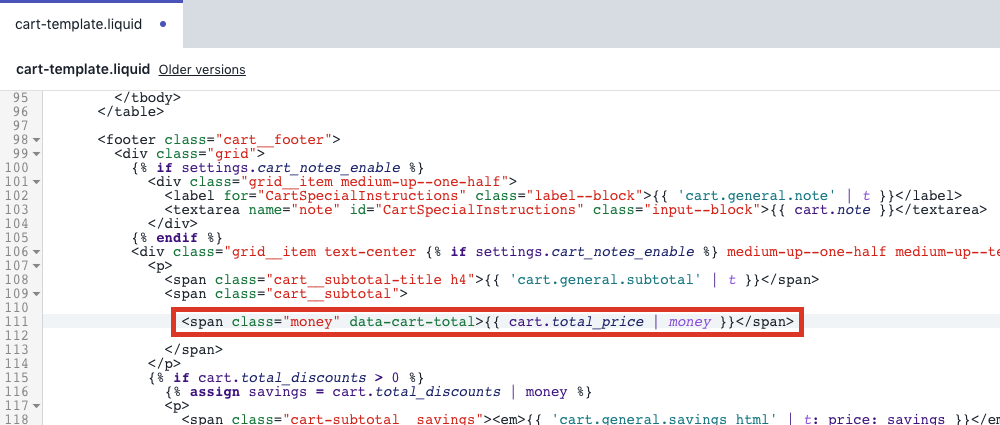
Step 6: Place the Bundles widget (optional)
In some cases, you may want to manually place where your Bold Bundles widget displays on the storefront.
To choose the placement of your widget, please follow these steps:
Under Templates, select product.liquid.
Note: If your theme is using Sections, the contents for this file may be within product-template.liquid.
Find where you want to place your widget in the code.
Note: Generally, most store owners will place just below your product page's </form> tag.
Copy and paste the following code in your desired location:
{%- render 'shappify-bdl-load-bundle' -%}Select Save.
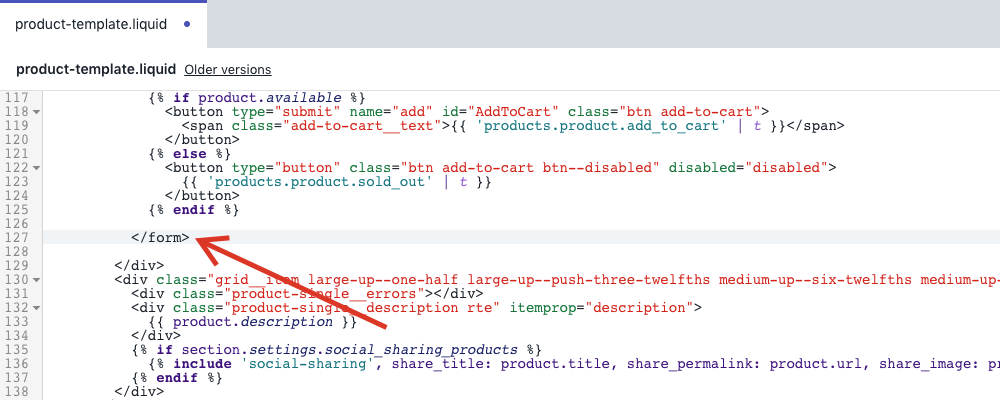
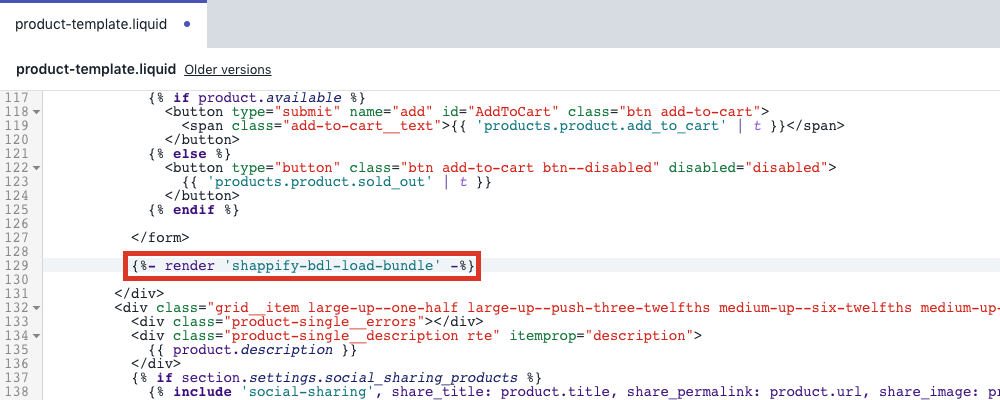
Step 7: Install the Ajax scripts
Alert: Not all of the following coding snippets will need to be inserted into your theme. You will need to determine the function your theme uses to build your AJAX modals and install the appropriate coding from there. This section requires advanced knowledge of JavaScript and web coding to complete. If you are not comfortable with this, please contact our Customer Success team using the chat widget at the bottom of the page.
Overview
For themes that use AJAX functionalities, updates must be made to the JavaScript files that build these AJAX pages and/or modals. The file name and location of this code will vary from theme to theme.
Note: This is only required for themes that have AJAX functions.
These updates are done to ensure the correct product price displays every time it's shown on your storefront. This may require you to go back and edit multiple files in your theme coding.
List of theme files to update
Assets: Your theme may contain one or a few of these files. The required coding adjustment(s) are explained in the next section.
ajax-cart.js.liquid
ajaxify-cart.js.liquid
ajaxify-shop.js.liquid
ajaxify.js.liquid
app.js
apps.js
atlantic.js* - Atlantic by Pixel Union
colors-ajax-cart.js.liquid* - Colors by Small Victories
ella.js* - Ella by Halo Themes
empire.js* - Empire by Pixel Union
functions.min.js
handy.js* - Handy by Pixel Union
jas_theme.min.js
js_main.js
main.js.liquid
script.js.liquid
script.min.js
sections.js.liquid
shop.js.liquid
site.js.liquid
superstore.js* - Superstore by Pixel Union
theme.js
theme.js.liquid
theme.min.js
timber.js.liquid
vendor.min.js
* = Theme specific file. The theme name and developer are noted beside the file name.
Code adjustments required
Themes that pass cart objects between your regular cart and the AJAX modals will need to use our Cart Doctor function.
Most themes will use the function buildCart to show your products in their AJAX modals and pass this information between both areas.
You'll need to find where this code is in one of the above files, and paste the following code within this function:
// Bold:PRE
if (typeof window.BOLD !== 'undefined'
&& typeof window.BOLD.common !== 'undefined'
&& typeof window.BOLD.common.cartDoctor !== 'undefined') {
// NOTE: "cart" should be the variable containing the cart JSON data
cart = window.BOLD.common.cartDoctor.fix(cart);
}
// Bold:PRE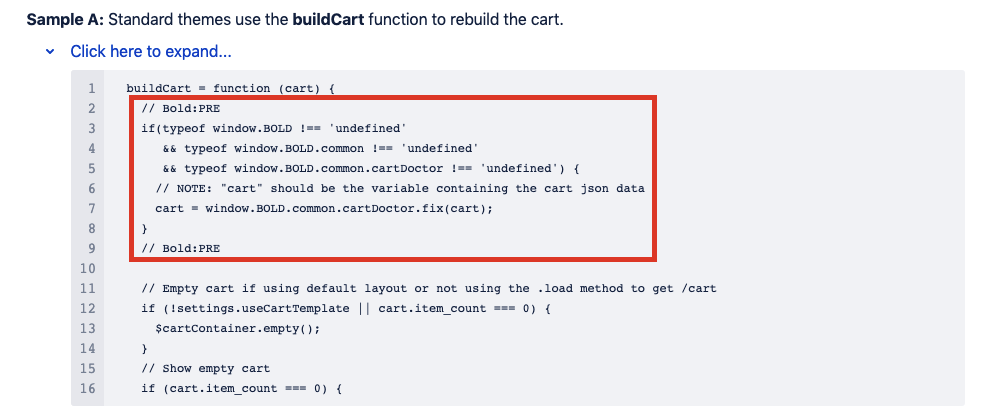
Some themes may use the function refreshCart to show your items in these modals.
You'll need to find where this code is in one of the above files, and paste the following code within this function:
// Bold:PRE
if (typeof window.BOLD !== 'undefined'
&& typeof window.BOLD.common !== 'undefined'
&& typeof window.BOLD.common.cartDoctor !== 'undefined') {
// NOTE: "cart" should be the variable containing the cart JSON data
cart = window.BOLD.common.cartDoctor.fix(cart);
}
// Bold:PRE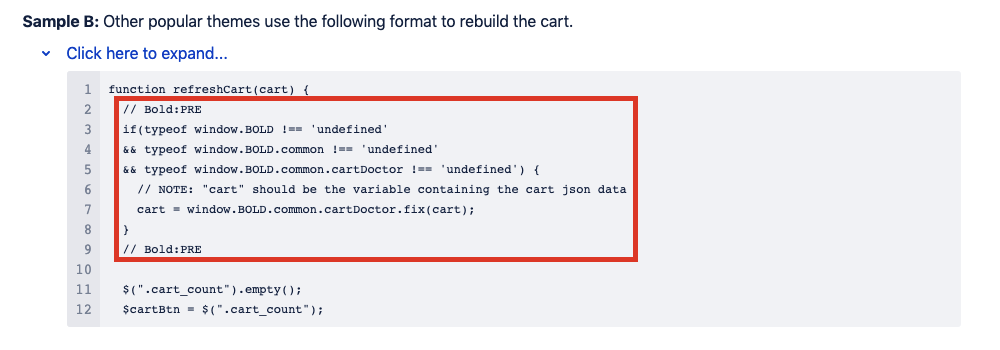
Themes that simply display the information from your cart in the AJAX modals will need to use our Event Emitter function.
Most themes will pull this information by using the getCartData function.
Note: If Bold Upsell's AJAX code is already installed on your theme, you do not need to install this code. It should already be contained in your theme files.
You'll need to find where this code is in one of the above files, and paste the following code within this function:
// Bold:PRE
if (window.BOLD && BOLD.common && BOLD.common.eventEmitter &&
typeof BOLD.common.eventEmitter.emit === 'function'){
BOLD.common.eventEmitter.emit('BOLD_COMMON_cart_loaded');
}
// Bold:PRE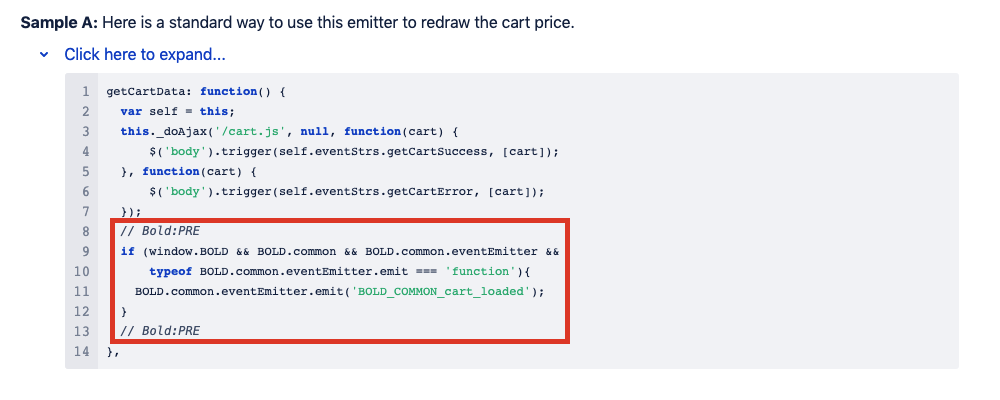
Some themes will grab this information through the updateView function.
You'll need to find where this code is in one of the above files, and paste the following code within this function:
// Bold:PRE
if (window.BOLD && BOLD.common && BOLD.common.eventEmitter &&
typeof BOLD.common.eventEmitter.emit === 'function'){
BOLD.common.eventEmitter.emit('BOLD_COMMON_cart_loaded');
}
// Bold:PRE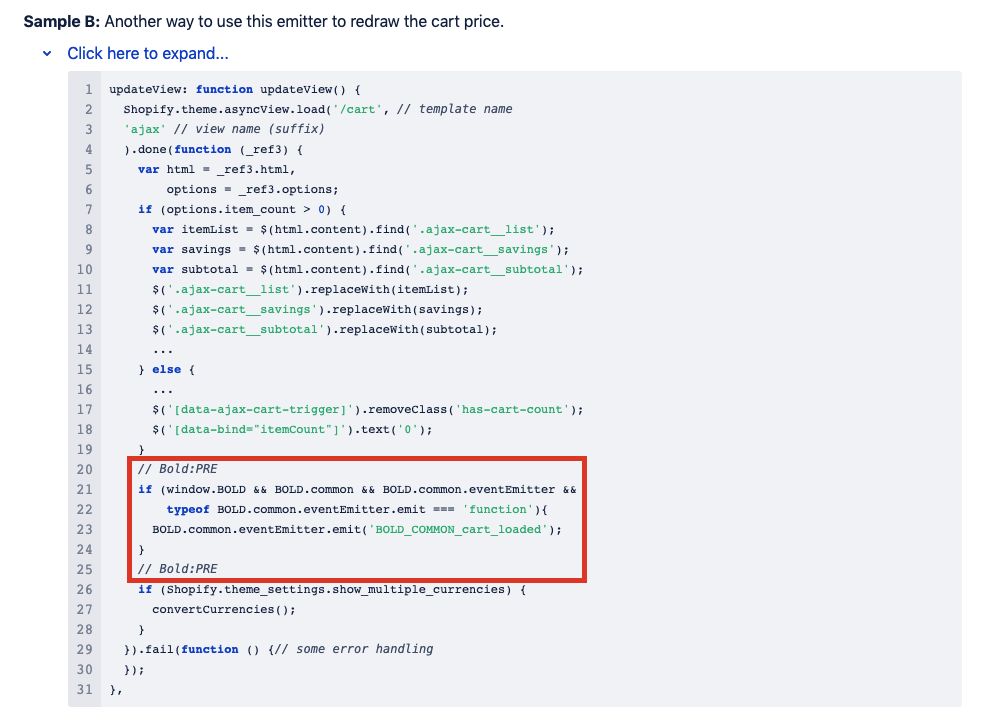
Step 8: Edit bold-includes.liquid
Under Snippets, select bold-includes.liquid.
Copy and paste this code in the bottom of the file.
{{ 'https://bundles.boldapps.net/js/bundles.js' | script_tag }} {{ 'bold-bundles.css' | asset_url | stylesheet_tag }}Select Save.

V2 Liquid code install instructions (Online Store 2.0 themes)
Alert: Bundles V1 & V2 are not supported on themes that use render tags such as Online Store 2.0 themes. Please upgrade to Bundles V3. For more information on how to identify or change your Bundles version, please visit Bundles' Discount Methods and How to Switch. If you require Bundles V2 and are using one of these themes but have had custom work to remove the render tag, please follow the instructions below.
This installation allows the bundles to appear on the product page and discount correctly on the product, cart and checkout page.
Step 1: Add Snippet and Asset files
Duplicate themes to create a backup copy.
From the Shopify admin, select Online Store.
Select Actions.
Select Edit code.
Under Snippets and Assets, find these files:
bold-common.liquid
bold-includes.liquid
bold-product.liquid
bold-variant.liquid
shappify-bdl-load-bundle.liquid
bold-bundles.css
For any that don't exist:
Select Add a new snippet or Add a new asset.
Enter the correct snippet or asset name.
Select Create snippet or Create asset.
Copy and paste the code found in each of these links into their respective files:
Note: Liquid files should go into the snippets folder, and CSS files should go into the assets folder.
{%- comment -%}
BOLD-COMMON.LIQUID
Last updated: 2018-Aug-9
--------------------------- WARNING ---------------------------
This file is auto-generated by BOLD and should not be modified.
It may be overwritten and any customizations would be lost.
--------------------------- WARNING ---------------------------
{%- endcomment -%}
<script>
{%- comment -%} common data {%- endcomment -%}
window.BOLD = window.BOLD || {};
window.BOLD.common = window.BOLD.common || {};
window.BOLD.common.Shopify = window.BOLD.common.Shopify || {};
window.BOLD.common.Shopify.shop = {
domain: '{{ shop.domain }}',
permanent_domain: '{{ shop.permanent_domain }}',
url: '{{ shop.url }}',
secure_url: '{{ shop.secure_url }}',
money_format: {{ shop.money_format | json }},
currency: {{ shop.currency | json }}
};
window.BOLD.common.Shopify.customer = {
id: {{ customer.id | json }},
tags: {{ customer.tags | json }},
};
window.BOLD.common.Shopify.cart = {{ cart | json }};
window.BOLD.common.template = '{{ template | split: "." | first }}';
{%- comment -%} common functions {%- endcomment -%}
window.BOLD.common.Shopify.formatMoney = function(money, format) {
function n(t, e) {
return "undefined" == typeof t ? e : t
}
function r(t, e, r, i) {
if (e = n(e, 2),
r = n(r, ","),
i = n(i, "."),
isNaN(t) || null == t)
return 0;
t = (t / 100).toFixed(e);
var o = t.split(".")
, a = o[0].replace(/(\d)(?=(\d\d\d)+(?!\d))/g, "$1" + r)
, s = o[1] ? i + o[1] : "";
return a + s
}
"string" == typeof money && (money = money.replace(".", ""));
var i = ""
, o = /\{\{\s*(\w+)\s*\}\}/
, a = format || window.BOLD.common.Shopify.shop.money_format || window.Shopify.money_format || "$ {% raw %}{{ amount }}{% endraw %}";
switch (a.match(o)[1]) {
case "amount":
i = r(money, 2, ",", ".");
break;
case "amount_no_decimals":
i = r(money, 0, ",", ".");
break;
case "amount_with_comma_separator":
i = r(money, 2, ".", ",");
break;
case "amount_no_decimals_with_comma_separator":
i = r(money, 0, ".", ",");
break;
case "amount_with_space_separator":
i = r(money, 2, " ", ",");
break;
case "amount_no_decimals_with_space_separator":
i = r(money, 0, " ", ",");
break;
case "amount_with_apostrophe_separator":
i = r(money, 2, "'", ".");
break;
}
return a.replace(o, i);
};
window.BOLD.common.Shopify.saveProduct = function (handle, product) {
if (typeof handle === 'string' && typeof window.BOLD.common.Shopify.products[handle] === 'undefined') {
if (typeof product === 'number') {
window.BOLD.common.Shopify.handles[product] = handle;
product = { id: product };
}
window.BOLD.common.Shopify.products[handle] = product;
}
};
window.BOLD.common.Shopify.saveVariant = function (variant_id, variant) {
if (typeof variant_id === 'number' && typeof window.BOLD.common.Shopify.variants[variant_id] === 'undefined') {
window.BOLD.common.Shopify.variants[variant_id] = variant;
}
};
{%- comment -%} product data {%- endcomment -%}
window.BOLD.common.Shopify.products = window.BOLD.common.Shopify.products || {};
window.BOLD.common.Shopify.variants = window.BOLD.common.Shopify.variants || {};
window.BOLD.common.Shopify.handles = window.BOLD.common.Shopify.handles || {};
{%- if template == 'product' -%}
window.BOLD.common.Shopify.handle = {{ product.handle | json }}
{%- endif -%}
{%- comment -%} product page {%- endcomment -%}
window.BOLD.common.Shopify.saveProduct({{ product.handle | json }}, {{ product.id | json }});
{%- for variant in product.variants -%}{%- assign csp_metafield_namespace = variant.id | prepend: "csp" -%}window.BOLD.common.Shopify.saveVariant({{ variant.id | json }}, { product_id: {{ product.id | json }}, product_handle: {{ product.handle | json }}, price: {{ variant.price | json }}, group_id: '{{variant.metafields.bold_rp.rp_group_id}}', csp_metafield: {{ product.metafields[csp_metafield_namespace] | json }}});{%- endfor -%}
{%- comment -%} BOLD APPS INSTALLED {%- endcomment -%}
{%- assign bold_apps_installed = shop | map: 'metafields' | map: 'bold_apps_installed' | first -%}
window.BOLD.apps_installed = {{ bold_apps_installed | json }} || {};
{%- unless bold_apps_installed contains 'Customer Pricing' or bold_apps_installed contains 'Product Bundles' or bold_apps_installed contains 'Product Discount' or bold_apps_installed contains 'Quantity Breaks' or bold_apps_installed contains 'Custom Order' or bold_apps_installed contains 'Order Manager' or bold_apps_installed contains 'The Motivator'-%}
{%- comment -%} collection page {%- endcomment -%}
{%- for product in collection.products -%}
window.BOLD.common.Shopify.saveProduct({{ product.handle | json }}, {{ product.id | json }});
{%- for variant in product.variants -%}{%- assign csp_metafield_namespace = variant.id | prepend: "csp" -%}window.BOLD.common.Shopify.saveVariant({{ variant.id | json }}, { product_id: {{ product.id | json }}, product_handle: {{ product.handle | json }}, price: {{ variant.price | json }}, group_id: '{{variant.metafields.bold_rp.rp_group_id}}', csp_metafield: {{ product.metafields[csp_metafield_namespace] | json }}});{%- endfor -%}
{%- endfor -%}
{%- comment -%} search page {%- endcomment -%}
{%- for product in search.results -%}
window.BOLD.common.Shopify.saveProduct({{ product.handle | json }}, {{ product.id | json }});
{%- for variant in product.variants -%}{%- assign csp_metafield_namespace = variant.id | prepend: "csp" -%}window.BOLD.common.Shopify.saveVariant({{ variant.id | json }}, { product_id: {{ product.id | json }}, product_handle: {{ product.handle | json }}, price: {{ variant.price | json }}, group_id: '{{variant.metafields.bold_rp.rp_group_id}}', csp_metafield: {{ product.metafields[csp_metafield_namespace] | json }}});{%- endfor -%}
{%- endfor -%}
{%- endunless -%}
{%- comment -%} cart page {%- endcomment -%}
{%- for item in cart.items -%}{%- assign csp_metafield_namespace = item.variant_id | prepend: "csp" -%}window.BOLD.common.Shopify.saveVariant({{ item.variant_id | json }}, { product_id: {{ item.product.id | json }}, product_handle: {{ item.product.handle | json }}, price: {{ item.variant.price | json }}, group_id: '{{item.variant.metafields.bold_rp.rp_group_id}}', csp_metafield: {{ item.product.metafields[csp_metafield_namespace] | json }}});{%- endfor -%}
{%- comment -%} metafields {%- endcomment -%}
window.BOLD.common.Shopify.metafields = window.BOLD.common.Shopify.metafields || {};
{%- assign metafield_namespaces_to_load = 'bold_rp,bold_csp_defaults' | split: ',' -%}
{%- for namespace in metafield_namespaces_to_load -%}
window.BOLD.common.Shopify.metafields[{{ namespace | json }}] = {{ shop.metafields[namespace] | json }};
{%- endfor -%}
window.BOLD.common.cacheParams = window.BOLD.common.cacheParams || {};
</script>

{%- comment -%} INCLUDE APP SCRIPTS BELOW {%- endcomment -%}
{%- comment -%} BOLD-INCLUDES.LIQUID --------------------------- WARNING --------------------------- THIS IS A GENERATED ASSET OF INCLUDES FOR INSTALLED BOL APPLICATIONS SO NOT MODIFY --------------------------- WARNING --------------------------- {%- endcomment -%}{%- comment -%} BOLD-PRODUCT.LIQUID Last updated: 2018-Oct-16 Sets all the appropriate liquid variables for Bold Apps that affect the product. Creates an updated JSON object that takes all appropriate apps into account. Can mimic all three types of product objects that Shopify uses. When installing, use {%- include 'bold-product', output: 'json' -%} to replace {{ product | json }} in the theme's liquid code. Alternatively, use {%- include 'bold-product', output: 'json', escape: true -%} to replace {{ product | json | escape }} in the theme's liquid code. FLAGS: output: 'none' | 'default' | 'script' | 'json' Controls how much data is printed endpoint: 'js' | 'json' | false (default) Prints 'layout none' to create an AJAX endpoint. Resulting object will be formatted to match either the '.js' or '.json' style of output. If set to a truth-y value other than 'json' will act like a '.js' endpoint. hide_action: 'header' | 'error' | 'break' | 'skip' | 'none' (default) Determines what happens if the product is hidden sort_by: {string} | null (default) If set, attempts to sort variants by the provided field sort_order: 'desc' | 'asc' (default) If set to 'desc' (descending), reverses the variant sort customer_tag: {string} | null (default) If set, forces bold-product to calculate as though the customer had the specified tag quick_price: true | false (default) If true, uses the metafields set by the CSP/QB apps to get the prices. Output must be 'none' to be allowed additional_includes: {string} | null (default) If set, includes the additional products after setting the initial bold_product liquid variables variant_includes: {string} | null (default) Additional include files to be passed on to bold-variant (comma-delimited) escape: {bool} | false (default) If set, forces bold-product to escape its json output REQUIRED: bold-variant.liquid is needed for full product handling. OPTIONAL: bold-product-error.liquid - If this snippet exists, it will be used to display content other than 'Product not available' to the customer if the hide_action is either 'break' or 'error'. A bold-product-error snippet can access: product: The liquid variable representing the product that is hidden reason: Why the product is hidden. Possible values are: 'customer-hide-tag' | 'motivator-hidden-product' | 'options-hidden-product' | 'duplicate-and-hide' | 'other' {%- endcomment -%} {%- comment -%} ============================================================================================================ ASSIGN LIQUID VARIABLES ============================================================================================================ {%- endcomment -%} {%- assign bold_product = bold-product | default: product -%} {%- assign bold_price = bold_product.price -%} {%- assign bold_price_min = bold_product.price_min -%} {%- assign bold_price_max = bold_product.price_max -%} {%- assign bold_price_varies = bold_product.price_varies -%} {%- assign bold_compare_at_price = bold_product.compare_at_price -%} {%- assign bold_compare_at_price_min = bold_product.compare_at_price_min -%} {%- assign bold_compare_at_price_max = bold_product.compare_at_price_max -%} {%- assign bold_compare_at_price_varies = bold_product.compare_at_price_varies -%} {%- assign bold_selected_or_first_available_variant = bold_product.selected_or_first_available_variant | default: bold_product.variants.first | default: bold_product.variants[0] -%} {%- if product or bold-product -%} {%- assign bold_apps_installed = shop | map: 'metafields' | map: 'bold_apps_installed' | first -%} {%- comment -%}Assign flags to their default values if not set {%- endcomment -%} {%- assign escape_output = escape | default: false -%} {%- assign bold_product_output = output | default: 'default' -%} {%- assign bold_product_endpoint = endpoint | default: false -%} {%- if bold_product_endpoint -%}{%- assign bold_product_output = 'json' -%}{%- endif -%} {%- assign bold_product_hide_action = hide_action | default: 'none' -%} {%- assign bold_product_sort_by = sort_by | default: nil -%} {%- assign bold_product_sort_order = sort_order | default: 'asc' -%} {%- assign bold_product_quick_price = quick_price | default: false -%} {%- if bold_product_hide_action == 'skip' and output == blank -%} {%- assign product_metafield_check = bold_product.variants | map: 'metafields' | map: 'shappify_csp' | map: 'csp_tag' | uniq -%} {%- if product_metafield_check.size > 1 or product_metafield_check.first != blank -%} {%- assign has_csp = true -%} {%- else -%} {%- assign has_csp = false -%} {%- endif -%} {%- if quick_price == blank and shop.metafields.shop_csp_tag_group.shop_csp_tag and has_csp -%} {%- assign bold_product_quick_price = true -%} {%- endif -%} {%- endif -%} {%- if bold_apps_installed contains 'Quantity Breaks' or bold_apps_installed contains 'Customer Pricing' or bold_apps_installed contains 'Product Bundles' or bold_apps_installed contains 'The Motivator' -%} {%- unless csp_customer_tag -%} {%- if customer.tags and shop.metafields.shop_csp_tag_group.shop_csp_tag -%} {%- assign all_shop_tags = shop.metafields.shop_csp_tag_group.shop_csp_tag | append: ',default' | split: ',' -%} {%- for customer_tag in customer.tags -%} {%- if all_shop_tags contains customer_tag -%} {%- assign csp_customer_tag = customer_tag -%} {%- endif -%} {%- endfor -%} {%- endif -%} {%- assign bold_product_customer_tag = customer_tag | default: csp_customer_tag | default: 'default' -%} {%- endunless -%} {%- if bold_product_output == 'json' and bold_product_endpoint -%}{%- layout none -%}{%- endif -%} {%- assign variant_list = bold_product.variants -%} {%- if bold_product_sort_by != blank -%}{%- assign variant_list = variant_list | sort: bold_product_sort_by -%}{%- endif -%} {%- if bold_product_sort_order == 'desc' or bold_product_sort_order == 'descending' -%}{%- assign variant_list = variant_list | reverse -%}{%- endif -%} {%- assign variant_list = variant_list | default: bold_product.variants -%} {%- if bold_product_output == 'json' -%} {%- assign requires_variant_loop = true -%} {%- elsif bold_product_quick_price and bold_product_output == 'none' -%} {%- assign requires_variant_loop = false -%} {%- else -%} {%- assign requires_variant_loop = bold_product.metafields.shappify_bundle | default: bold_product.metafields.shappify_csp | default: bold_product.metafields.shappify_qb | default: shop.metafields.shop_csp_tag_group | default: shop.metafields.bold_measurement | default: shop.metafields.bold_rp | default: false -%} {%- endif -%} {%- capture bold_bundles_widget -%} <div class="bold-bundle" data-product-id="{{ product.id }}"></div> {%- endcapture -%} {%- assign product_has_btm = false -%} {%- assign product_has_csp = false -%} {%- assign product_has_qb = false -%} {%- assign product_has_ro = false -%} {%- assign product_has_bdl = false -%} {%- assign bold_hidden_product = false -%} {%- assign bold_trigger_break = false -%} {%- if requires_variant_loop -%} {%- comment -%}INTIALIZE VARIABLES, CLEAR OLD VALUES {%- endcomment -%} {%- assign bold_price_min = 1000000000000000000 -%} {%- comment -%}Starting the count at Shopify's max allowed value {%- endcomment -%} {%- assign bold_price_max = 0 -%} {%- assign bold_price = bold_price_min -%} {%- assign bold_price_varies = false -%} {%- assign bold_compare_at_price_min = 1000000000000000000 -%} {%- comment -%}Starting the count at Shopify's max allowed value {%- endcomment -%} {%- assign bold_compare_at_price_max = 0 -%} {%- assign bold_compare_at_price = bold_compare_at_price_min -%} {%- assign bold_compare_at_price_varies = false -%} {%- assign bold_selected_or_first_available_variant = "" -%} {%- assign bold_variants_size = 0 -%} {%- assign options1 = nil -%} {%- assign options2 = nil -%} {%- assign options3 = nil -%} {%- assign bold_product_available = false -%} {%- comment -%}SET LIQUID PRODUCT VARIABLES DERIVED FROM VARIANT VALUES {%- endcomment -%} {%- assign variant_output_json = '' -%} {%- for variant in variant_list -%} {%- capture bold_variant_check -%} {%- include 'bold-variant' with variant, output: 'json', hide_action: 'skip', base_product: bold_product, customer_tag: bold_product_customer_tag, price_style: bold_product_endpoint -%} {%- endcapture -%} {%- unless bold_product_output == 'none' -%} {%- if bold_variant_check contains 'Liquid error' -%} {%- assign variant_output_json = variant_list | json -%} {%- break -%} {%- endif -%} {%- endunless -%} {%- if variant_output_json.size > 1 -%}{%- assign variant_output_json = variant_output_json | append: ',' -%}{%- endif -%} {%- assign variant_output_json = variant_output_json | append: bold_variant_check -%} {%- if bold_variant_price < bold_price_min -%}{%- assign bold_price_min = bold_variant_price -%}{%- endif -%} {%- if bold_variant_price > bold_price_max -%}{%- assign bold_price_max = bold_variant_price -%}{%- endif -%} {%- if bold_price_max != bold_price_min -%}{%- assign bold_price_varies = true -%}{%- endif -%} {%- assign bold_price = bold_price_min -%} {%- if variant.compare_at_price < bold_compare_at_price_min -%}{%- assign bold_compare_at_price_min = variant.compare_at_price -%}{%- endif -%} {%- if variant.compare_at_price > bold_compare_at_price_max -%}{%- assign bold_compare_at_price_max = variant.compare_at_price -%}{%- endif -%} {%- if bold_compare_at_price_max != bold_compare_at_price_min -%}{%- assign bold_compare_at_price_varies = true -%}{%- endif -%} {%- assign bold_compare_at_price = bold_compare_at_price_min -%} {%- if variant.id == bold_product.selected_or_first_available_variant.id -%}{%- assign bold_selected_or_first_available_variant = variant -%}{%- endif -%} {%- if bold_selected_or_first_available_variant == "" -%}{%- assign bold_selected_or_first_available_variant = variant -%}{%- endif -%} {%- if bold_selected_or_first_available_variant.available == false and variant.available == true -%}{%- assign bold_selected_or_first_available_variant = variant -%}{%- endif -%} {%- assign bold_variants_size = bold_variants_size | plus: 1 -%} {%- unless options1 contains option1_clean_name or option1_clean_name == blank -%} {%- unless options1 == blank -%}{%- assign options1 = options1 | join: '~~' | append: '~~' -%}{%- endunless -%} {%- assign options1 = options1 | append: option1_clean_name | split: '~~' -%} {%- endunless -%} {%- unless options2 contains option2_clean_name or option2_clean_name == blank -%} {%- unless options2 == blank -%}{%- assign options2 = options2 | join: '~~' | append: '~~' -%}{%- endunless -%} {%- assign options2 = options2 | append: option2_clean_name | split: '~~' -%} {%- endunless -%} {%- unless options3 contains option3_clean_name or option3_clean_name == blank -%} {%- unless options3 == blank -%}{%- assign options3 = options3 | join: '~~' | append: '~~' -%}{%- endunless -%} {%- assign options3 = options3 | append: option3_clean_name | split: '~~' -%} {%- endunless -%} {%- assign bold_product_available = bold_product_available | default: bold_variant_available -%} {%- assign product_has_btm = variant_has_btm | default: product_has_btm -%} {%- assign product_has_csp = variant_has_csp | default: product_has_csp -%} {%- assign product_has_qb = variant_has_qb | default: product_has_qb -%} {%- assign product_has_ro = variant_has_ro | default: product_has_ro -%} {%- assign product_has_bdl = variant_has_bdl | default: product_has_bdl -%} {%- endfor -%} {%- if variant_output_json.first != '[' -%} {%- assign variant_output_json = '[' | append: variant_output_json | append: ']' -%} {%- endif -%} {%- comment -%}Failsafe: This will set all the Bold prices to "NaN" (Not A Number) in the unexpected case where all variants are supposed to be hidden from the customer {%- endcomment -%} {%- if bold_variants_size == 0 -%}{%- assign bold_price_min = "NaN" -%}{%- assign bold_price_max = "NaN" -%}{%- assign bold_price = "NaN" -%}{%- assign bold_compare_at_price_min = "NaN" -%}{%- assign bold_compare_at_price_max = "NaN" -%}{%- assign bold_compare_at_price = "NaN" -%}{%- endif -%} {%- comment -%}Failsafe: This will set all the Bold compare_at prices to the default compare_at_prices when 'compare_at' is not found {%- endcomment -%} {%- if bold_compare_at_price_min > bold_compare_at_price_max -%}{%- assign bold_compare_at_price_min = bold_product.compare_at_price_min -%}{%- assign bold_compare_at_price_max = bold_product.compare_at_price_max -%}{%- assign bold_compare_at_price = bold_product.compare_at_price -%}{%- endif -%} {%- comment -%}Failsafe: If no valid variants exist, fail back to product.selected_or_first_available_variant after all {%- endcomment -%} {%- if bold_selected_or_first_available_variant == "" -%}{%- assign bold_selected_or_first_available_variant = product.selected_or_first_available_variant -%}{%- endif -%} {%- else -%} {%- if bold_product_quick_price -%} {%- assign money_prefix = shop.money_format | split: '{{' | first -%} {%- assign money_suffix = shop.money_format | split: '}}' | last -%} {%- assign high_tag = bold_product_customer_tag | append: '_price_high' -%} {%- assign bold_price_min = bold_product.metafields.shappify_csp[bold_product_customer_tag] | default: bold_product.metafields.shappify_qb.qb_min | default: bold_product.price | remove: money_prefix | remove: money_suffix | remove: '.' | remove: ',' | remove: ' ' | times: 1 -%} {%- assign bold_price_max = bold_product.metafields.shappify_csp[high_tag] | default: bold_product.price_max | remove: money_prefix | remove: money_suffix | remove: '.' | remove: ',' | remove: ' ' | times: 1 -%} {%- assign bold_price = bold_price_min -%} {%- if bold_price_max == bold_price_min -%} {%- assign bold_price_varies = false -%} {%- else -%} {%- assign bold_price_varies = true -%} {%- endif -%} {%- else -%} {%- assign bold_price_min = bold_product.price_min -%} {%- assign bold_price_max = bold_product.price_max -%} {%- assign bold_price = bold_product.price -%} {%- assign bold_price_varies = bold_product.price_varies -%} {%- endif -%} {%- assign bold_compare_at_price_min = bold_product.compare_at_price_min -%} {%- assign bold_compare_at_price_max = bold_product.compare_at_price_max -%} {%- assign bold_compare_at_price = bold_product.compare_at_price -%} {%- assign bold_compare_at_price_varies = bold_product.compare_at_price_varies -%} {%- assign bold_selected_or_first_available_variant = bold_product.selected_or_first_available_variant -%} {%- assign bold_variants_size = bold_product.variants.size -%} {%- assign options1 = bold_product.options[0].values -%} {%- assign options2 = bold_product.options[1].values -%} {%- assign options3 = bold_product.options[2].values -%} {%- assign bold_product_available = false -%} {%- assign variant_output_json = variant_list | json -%} {%- endif -%} {%- if bold_product_endpoint == 'json' -%} {%- assign cents = bold_price | modulo: 100 | prepend: '00' | slice: -2, 2 -%} {%- assign dollars = bold_price | times: 0.01 | floor -%} {%- assign bold_price = dollars | append: '.' | append: cents -%} {%- assign cents = bold_price_min | modulo: 100 | prepend: '00' | slice: -2, 2 -%} {%- assign dollars = bold_price_min | times: 0.01 | floor -%} {%- assign bold_price_min = dollars | append: '.' | append: cents -%} {%- assign cents = bold_price_max | modulo: 100 | prepend: '00' | slice: -2, 2 -%} {%- assign dollars = bold_price_max | times: 0.01 | floor -%} {%- assign bold_price_max = dollars | append: '.' | append: cents -%} {%- assign cents = bold_compare_at_price | modulo: 100 | prepend: '00' | slice: -2, 2 -%} {%- assign dollars = bold_compare_at_price | times: 0.01 | floor -%} {%- assign bold_compare_at_price = dollars | append: '.' | append: cents -%} {%- assign cents = bold_compare_at_price_min | modulo: 100 | prepend: '00' | slice: -2, 2 -%} {%- assign dollars = bold_compare_at_price_min | times: 0.01 | floor -%} {%- assign bold_compare_at_price_min = dollars | append: '.' | append: cents -%} {%- assign cents = bold_compare_at_price_max | modulo: 100 | prepend: '00' | slice: -2, 2 -%} {%- assign dollars = bold_compare_at_price_max | times: 0.01 | floor -%} {%- assign bold_compare_at_price_max = dollars | append: '.' | append: cents -%} {%- endif -%} {%- endif -%} {%- comment -%} ============================================================================================================ HANDLE HIDDEN PRODUCTS ============================================================================================================ {%- endcomment -%} {%- comment -%}CHECK FOR CSP VISIBILITY {%- endcomment -%} {%- assign csp_hide_tag = false -%} {%- assign hide_check = bold_product_customer_tag | append: '-HIDE' -%} {%- if bold_product.tags contains hide_check -%}{%- assign csp_hide_tag = true -%}{%- endif -%} {%- comment -%}END OF CSP CHECK {%- endcomment -%} {%- unless bold_product.id == blank -%} {%- if csp_hide_tag == true or bold_product.type == 'OPTIONS_HIDDEN_PRODUCT' or bold_product.type == 'MOTIVATOR_HIDDEN_PRODUCT' or bold_product.metafields.inventory.ShappifyHidden == "true" -%} {%- assign bold_hidden_product = true -%} {%- comment -%}What is the reason for the hidden product? {%- endcomment -%} {%- if csp_hide_tag == true -%} {%- assign reason = 'customer-hide-tag' -%} {%- elsif bold_product.type == 'MOTIVATOR_HIDDEN_PRODUCT' -%} {%- assign reason = 'motivator-hidden-product' -%} {%- elsif bold_product.type == 'OPTIONS_HIDDEN_PRODUCT' -%} {%- assign reason = 'options-hidden-product' -%} {%- elsif bold_product.metafields.inventory.ShappifyHidden == "true" -%} {%- assign reason = 'duplicate-and-hide' -%} {%- else -%} {%- assign reason = 'other' -%} {%- endif -%} {%- capture hidden_product_output -%} {%- case bold_product_hide_action -%} {%- when 'break' -%} {%- capture error_page_check -%}{%- include 'bold-product-error' with reason, product: bold_product -%}{%- endcapture -%} {%- unless error_page_check contains 'Liquid error' -%} {{- error_page_check -}} {%- else -%} <p class='bold_not_available'>Product is not available</p> {%- endunless -%} {%- assign bold_trigger_break = true -%} {%- when 'error' -%} {%- include 'bold-product-error' with reason, product: bold_product -%} {%- assign bold_trigger_break = true -%} {%- when 'skip' -%} {%- continue -%} {%- when 'header' -%} {%- if template == 'product' -%}<meta name="robots" content="noindex">{%- endif -%} {%- endcase -%} {%- endcapture%} {%- endif -%} {%- endunless -%} {%- comment -%} ============================================================================================================ MIN/MAX QUANTITY ============================================================================================================ {%- endcomment -%} {%- if bold_apps_installed contains 'Customer Pricing' or bold_apps_installed contains 'Quantity Breaks' -%} {%- assign bold_product_min = false -%} {%- assign bold_product_max = false -%} {%- for tag in bold_product.tags -%} {%- assign lowercase_tag = tag | downcase | replace: 'min ', 'min_' | replace: 'min-', 'min_' | replace: 'max ', 'max_' | replace: 'max-', 'max_' -%} {%- assign lowercase_customer_tag = bold_product_customer_tag | downcase -%} {%- if lowercase_tag contains 'min_' -%} {%- assign tag_info = lowercase_tag | split: 'min_' -%} {%- assign cust_tag = tag_info.first | strip -%} {%- if tag_info.first == blank or cust_tag == lowercase_customer_tag -%} {%- assign bold_product_min = tag_info | last | times: 1 %} {%- endif -%} {%- elsif lowercase_tag contains 'max_' -%} {%- assign tag_info = lowercase_tag | split: 'max_' -%} {%- assign cust_tag = tag_info.first | strip -%} {%- if tag_info.first == blank or cust_tag == lowercase_customer_tag -%} {%- assign bold_product_max = tag_info | last | times: 1 %} {%- endif -%} {%- endif -%} {%- endfor -%} {%- endif -%} {%- comment -%} ============================================================================================================ BEGIN JSON OUTPUT ============================================================================================================ {%- endcomment -%} {%- unless no_quick_shop_buy == true -%} {%- assign variant_ids = product | map: 'variants' | map: 'id' -%} {%- assign bold_variant_ids = bold_product.variants | map: 'id' -%} {%- capture bold_product_json -%} {%- if bold_product_endpoint == 'json' -%} { "product": {%- endif -%} { "id": {{- bold_product_id | default: bold_product.id | json -}}, "title": {{- bold_product_title | default: bold_product.title | json -}}, {%- if bold_product_endpoint == 'json' -%} "body_html": {{- bold_product.description | json -}}, "template_suffix": {{- bold_product.template_suffix | json -}}, "images": [ {%- for image in bold_product.images -%} { "id": {{- image.id | json -}}, "product_id": {{- image.product_id | json -}}, "position": {{- image.position | json -}}, "src": {{- image.src | json -}}, "variant_ids": {{- variant_ids | json -}} } {%- unless forloop.last -%},{%- endunless -%} {%- endfor -%}], "image": { "id": {{- bold_product.featured_image.id | json -}}, "product_id": {{- bold_product.featured_image.product_id | json -}}, "position": {{- bold_product.featured_image.position | json -}}, "src": {{- bold_product.featured_image.src | json -}}, "variant_ids": {{- variant_ids | json -}} }, {%- endif -%} "handle": {{- bold_product_handle | default: bold_product.handle | json -}}, "description": {{- bold_product.description | json -}}, "published_at": {%- capture published_at -%}{{- bold_product.published_at | date: "%F" -}}T{{- bold_product.published_at | date: "%T" -}}{%- endcapture -%}{{- shop.timezone -}}{{- published_at | json -}}, "created_at": {%- capture created_at -%}{{- bold_product.created_at | date: "%F" -}}T{{- bold_product.created_at | date: "%T" -}}{%- endcapture -%}{{- shop.timezone -}}{{- created_at | json -}}, "vendor": {{- bold_product.vendor | json -}}, "{%- if bold_product_endpoint == 'json' -%}product_{%- endif -%}type": {{- bold_product.type | json -}}, "tags": {%- unless bold_product_endpoint == 'json' -%}{{- bold_product.tags | json -}}{%- else -%}{{- bold_product.tags | join: ',' | json -}}{%- endunless -%}, "price": {{- bold_price | default: bold_product.price | json -}}, "price_min": {{- bold_price_min | default: bold_product.price_min | json -}}, "price_max": {{- bold_price_max | default: bold_product.price_max | json -}}, "price_varies": {{- bold_price_varies | json -}}, "compare_at_price": {{- bold_compare_at_price | default: bold_product.compare_at_price | json -}}, "compare_at_price_min": {{- bold_compare_at_price_min | default: bold_product.compare_at_price_min | json -}}, "compare_at_price_max": {{- bold_compare_at_price_max | default: bold_product.compare_at_price_max | json -}}, "compare_at_price_varies": {{- bold_compare_at_price_varies | json -}}, "all_variant_ids": {{- bold_variant_ids | json -}}, "variants": {%- if variant_output_json -%}{{- variant_output_json -}}{%- else -%}{{- bold_product.variants | json -}}{%- endif -%}, "available": {{- bold_product_available | json -}}, {%- unless bold_product_endpoint == 'json' -%} "images": {{- bold_product.images | json -}}, {%- endunless -%} "featured_image": {{- bold_product.featured_image | json -}}, "options": {%- if bold_product_endpoint -%} [ {%- for opt in bold_product.options -%} {%- assign option_name = 'options' | append: forloop.index -%} { "name": {{- opt | json -}}, {%- if bold_product_endpoint == 'json' -%}"product_id":{{- bold_product.id | json -}},{%- endif -%} "position":{{- forloop.index | json -}}, "values":{{- [option_name] | json -}} } {%- unless forloop.last -%},{%- endunless -%} {%- endfor -%} ] {%- else -%} {{- bold_product.options | json -}} {%- endif -%}, "url": {{- bold_product.url | json -}} {%- comment -%}FLAGS TO INDICATE WHICH APPS ARE IN PLAY {%- endcomment -%} {%- if product_has_btm -%},"hasBTM": true{%- endif -%} {%- if product_has_csp -%},"hasCSP": true{%- endif -%} {%- if product_has_qb -%},"hasQB": true{%- endif -%} {%- if product_has_ro -%},"hasRO": true{%- endif -%} {%- if product_has_bdl -%},"hasBDL": true{%- endif -%} {%- comment -%}SET MINIMUM/MAXIMUM QUANTITIES{%- endcomment -%} {%- if bold_product_min -%},"min": {{ bold_product_min | json }}{%- endif -%} {%- if bold_product_max -%},"max": {{ bold_product_max | json }}{%- endif -%} } {%- if bold_product_endpoint == 'json' -%} } {%- endif -%} {%- endcapture -%} {%- unless bold_product_output == 'json' or bold_product_output == 'none'-%} <script> var currentScript = document.currentScript || document.scripts[document.scripts.length - 1]; var boldVariantIds = {{- bold_variant_ids | json -}}; var boldProductHandle = {{- bold_product.handle | json -}}; var BOLD = BOLD || {}; BOLD.products = BOLD.products || {}; BOLD.variant_lookup = BOLD.variant_lookup || {}; if (window.BOLD && !BOLD.common) { BOLD.common = BOLD.common || {}; BOLD.common.Shopify = BOLD.common.Shopify || {}; window.BOLD.common.Shopify.products = window.BOLD.common.Shopify.products || {}; window.BOLD.common.Shopify.variants = window.BOLD.common.Shopify.variants || {}; window.BOLD.common.Shopify.handles = window.BOLD.common.Shopify.handles || {}; window.BOLD.common.Shopify.saveProduct = function (handle, product) { if (typeof handle === 'string' && typeof window.BOLD.common.Shopify.products[handle] === 'undefined') { if (typeof product === 'number') { window.BOLD.common.Shopify.handles[product] = handle; product = { id: product }; } window.BOLD.common.Shopify.products[handle] = product; } }; window.BOLD.common.Shopify.saveVariant = function (variant_id, variant) { if (typeof variant_id === 'number' && typeof window.BOLD.common.Shopify.variants[variant_id] === 'undefined') { window.BOLD.common.Shopify.variants[variant_id] = variant; } }; } for (var boldIndex = 0; boldIndex < boldVariantIds.length; boldIndex = boldIndex + 1) { BOLD.variant_lookup[boldVariantIds[boldIndex]] = boldProductHandle; } BOLD.products[boldProductHandle] = {{- bold_product_json -}}; {%- if product_has_qb -%} {%- assign qb_pricing_html = bold_product | map: 'variants' | map: 'metafields' | map: 'shappify_qb' | map: 'pricing_html' -%}; {%- assign csp_pricing_html = bold_product | map: 'variants' | map: 'metafields' | map: 'shappify_csp' | map: 'pricing_html' -%}; var pricingHTML = {%- if qb_pricing_html[0] -%}{{- qb_pricing_html | json -}}{%- else -%}{{- csp_pricing_html | json -}}{%- endif -%}; for (var boldIndex = 0; boldIndex < pricingHTML.length; boldIndex = boldIndex + 1) { var element = document.createElement('DIV'); element.className = 'bold-hidden'; element.style.display = 'none'; element.id = 'variant_html_' + boldVariantIds[boldIndex]; element.innerHTML = pricingHTML[boldIndex]; if (document.body) { document.body.prepend(element); } else if (document.head) { document.head.prepend(element); } } {%- endif -%} {%- assign bold_rp = product | map: 'variants' | map: 'metafields' | map: 'bold_rp' -%} var boldCSPMetafields = { {%- if bold_apps_installed contains 'Customer Pricing' -%} {%- for variant in product.variants -%}{%- assign csp_metafield_namespace = variant.id | prepend: "csp" -%}{{variant.id}}:{{ product.metafields[csp_metafield_namespace] | json }}{%- unless forloop.last -%}, {%- endunless -%}{%- endfor -%} {%- endif -%} }; var boldTempProduct = {{- product | json -}}; var bold_rp = {{- bold_rp | json -}}; if(boldTempProduct){ window.BOLD.common.Shopify.saveProduct(boldTempProduct.handle, boldTempProduct.id); for (var boldIndex = 0; boldTempProduct && boldIndex < boldTempProduct.variants.length; boldIndex = boldIndex + 1){ var rp_group_id = bold_rp[boldIndex].rp_group_id ? '' + bold_rp[boldIndex].rp_group_id : ''; window.BOLD.common.Shopify.saveVariant( boldTempProduct.variants[boldIndex].id, { product_id: boldTempProduct.id, product_handle: boldTempProduct.handle, price: boldTempProduct.variants[boldIndex].price, group_id: rp_group_id, csp_metafield: boldCSPMetafields[boldTempProduct.variants[boldIndex].id] } ); } } currentScript.parentNode.removeChild(currentScript); </script> {%- endunless -%} {%- if bold_product_output == 'json' or bold_product_output == 'js' -%} {%- if escape_output -%} {{- bold_product_json | strip_newlines | escape -}} {%- else -%} {{- bold_product_json | strip_newlines -}} {%- endif -%} {%- endif -%} {%- if bold_hidden_product -%} {{- hidden_product_output -}} {%- endif -%} {%- endunless -%} {%- if bold_trigger_break -%} {%- break -%} {%- endif -%} {%- endif -%}{%- comment -%} BOLD-VARIANT.LIQUID Last updated: 2018-December-7 Sets all appropriate liquid variables for Bold Apps that affect the variant. Creates an updated JSON object that includes key information relating to our apps. Combines the functionality of bold-hidden-variants, bold-base-variant and bold-variant-inventory FLAGS: base_product: {product object} Base product object for the variant, used to check/set several properties. If not supplied, defaults to bold_product. If no bold_product is set, defaults to product line_item: {line item object} | null (default) If set, pass the line item to the included snippets - some apps may adjust prices differently depending on whether we're influencing the cart total or not output: 'json' | 'none' (default) Controls whether anything is printed to the DOM hide_action: 'skip' | 'none' (default) Forces a 'continue' to skip hidden variants when 'skip' is set customer_tag: {string} | null (default) If set, forces bold-variant to calculate as though the customer had the specified tag price_style: 'json' | null (default) If set, sets prices as '10.00' instead of 1000 custom_app_list: {string} | null (default) List of apps to apply to the price. Associated snippets will be automatically included. If not specified, will check for a shop metafield to get a list of all relevant apps that need to be included. third_party_check: false | true (default) If true, runs additional checks that we know about to be compatible with third-party apps additonal_includes: {string} | null (default) Additional snippets that need to be included after the initial liquid variable assignments (comma-delimited) {%- endcomment -%} {%- comment -%} ============================================================================================================ ASSIGN LIQUID VARIABLES ============================================================================================================ {%- endcomment -%} {%- comment -%} Assign flags to their default values if not set {%- endcomment -%} {%- assign bold_apps_installed = shop | map: 'metafields' | map: 'bold_apps_installed' | first -%} {%- assign bold_variant = bold-variant | default: variant -%} {%- assign bold_variant_line_item = line_item | default: false -%} {%- assign bold_variant_base_product = base_product | default: bold_product | default: bold_variant_line_item.product | default: product | default: item.product | default: item -%} {%- assign bold_variant_output = output | default: 'none' -%} {%- assign bold_variant_hide_action = hide_action | default: 'none' -%} {%- assign bold_variant_customer_tag = customer_tag | default: csp_customer_tag -%} {%- comment -%} Check for CSP visibility. Other 'hide' rules are based directly on metafields on the variants. {%- endcomment -%} {%- assign csp_hidden = false -%} {%- if bold_variant_hide_action == 'skip' and bold_apps_installed contains 'Customer Pricing' -%} {%- if shop.metafields.shop_csp_tag_group.shop_csp_tag or bold_variant.metafields.shappify_csp -%} {%- assign csp_flag_string = ' (' | append: bold_variant_customer_tag | append: ')' -%} {%- assign all_shop_tags = shop.metafields.shop_csp_tag_group.shop_csp_tag | append: ',default' | split: ',' -%} {%- unless bold_variant.metafields.shappify_csp.csp_tag == blank -%} {%- if bold_variant.metafields.shappify_csp.csp_tag == 'default' and bold_variant_customer_tag != 'default' -%} {%- if bold_variant_base_product -%} {%- assign found_csp_level = false -%} {%- assign csp_bases = bold_variant_base_product | map: 'variants' | map: 'metafields' | map: 'shappify_csp' | map: 'csp_base' -%} {%- assign csp_tags = bold_variant_base_product | map: 'variants' | map: 'metafields' | map: 'shappify_csp' | map: 'csp_tag' -%} {%- if csp_bases contains bold_variant.id and csp_tags contains bold_variant_customer_tag -%}{%- assign found_csp_level = true -%}{%- endif -%} {%- if found_csp_level -%}{%- continue -%}{%- endif -%} {%- endif -%} {%- elsif bold_variant_customer_tag != bold_variant.metafields.shappify_csp.csp_tag -%} {%- continue -%} {%- endif -%} {%- assign bold_variant_title = bold_variant.title | remove: csp_flag_string -%} {%- endunless -%} {%- endif -%} {%- endif -%} {%- assign app_list = '' -%} {%- if app_list != blank and custom_app_list != blank -%} {%- assign bold_variant_app_list = app_list | append: ',' | append: custom_app_list -%} {%- else -%} {%- assign bold_variant_app_list = app_list | default: custom_app_list | default: false -%} {%- endif -%} {%- assign bold_variant_price = bold_variant.price -%} {%- if bold_variant_app_list -%} {%- assign bold_variant_app_list = bold_variant_app_list | split: ',' -%} {%- for app in bold_variant_app_list -%} {%- assign snippet_title = 'bold-' | append: app | append: '-variant' -%} {%- capture silence_output -%} {%- include snippet_title with bold_variant, base_product: bold_variant_base_product, line_item: bold_variant_line_item, customer_tag: bold_variant_customer_tag -%} {%- endcapture -%} {%- endfor -%} {%- endif -%} {%- assign bold_variant_available = bold_variant.available -%} {% if bold_apps_installed contains 'Quantity Breaks' or bold_apps_installed contains 'Customer Pricing' or bold_apps_installed contains 'Product Bundles' %} {%- comment -%} Find the base variant and base variant's inventory {%- endcomment -%} {%- assign bold_base_variant_id = bold_variant.metafields.shappify_csp['csp_base'] | default: bold_variant.metafields.shappify_qb['qb_parent'] | default: bold_variant.metafields.shappify_bundle['bundle_parent'] | default: bold_variant.id -%} {%- comment -%} Make sure we can find the indicated base variant! {%- endcomment -%} {%- assign bold_is_base_variant = true -%} {%- assign bold_base_variant = bold_variant -%} {%- unless bold_base_variant_id == bold_variant.id -%} {%- for variant_check in bold_variant_base_product.variants -%} {%- if variant_check.id == bold_base_variant_id -%} {%- assign bold_base_variant = variant_check -%} {%- assign bold_is_base_variant = false -%} {%- break -%} {%- endif -%} {%- endfor -%} {%- endunless -%} {%- comment -%} Assign inventory variables (based on the base_variant, if different from the current variant) {%- endcomment -%} {%- assign target_variant_inventory_quantity = bold_base_variant.inventory_quantity -%} {%- assign target_variant_inventory_policy = bold_base_variant.inventory_policy -%} {%- assign bold_variant_cart_quantity = 0 -%} {%- for inv_check_item in cart.items -%} {%- assign cart_variant = inv_check_item.variant -%} {%- assign cart_base_variant_id = cart_variant.metafields.shappify_csp['csp_base'] | default: cart_variant.metafields.shappify_qb['qb_parent'] | default: cart_variant.metafields.shappify_bundle['bundle_parent'] | default: cart_variant.id -%} {%- if cart_base_variant_id == bold_base_variant_id -%} {%- assign bold_variant_cart_quantity = bold_variant_cart_quantity | plus: inv_check_item.quantity -%} {%- endif -%} {%- endfor -%} {%- assign bold_variant_inventory_quantity = bold_base_variant.inventory_quantity -%} {%- assign bold_variant_remaining_quantity = bold_variant_inventory_quantity | minus: bold_variant_cart_quantity -%} {%- assign bold_variant_inventory_policy = bold_base_variant.inventory_policy -%} {%- assign bold_variant_inventory_management = bold_base_variant.inventory_management -%} {%- comment -%} Now that we've established quantity, re-evaluate the variant's availablility {%- endcomment -%} {%- if bold_variant_remaining_quantity <= 0 and bold_variant_inventory_policy == 'deny' and bold_variant_inventory_management != blank -%} {%- assign bold_variant_available = false -%} {%- endif -%} {%- comment -%} If we're calling this from bold-cart-item, also set the max quantity the line item can go up to {%- endcomment -%} {%- if bold_item and bold_variant_inventory_management != blank and bold_variant_inventory_policy == 'deny' -%} {%- assign bold_item_max_quantity = bold_item.quantity | plus: bold_variant_remaining_quantity -%} {%- else -%} {%- assign bold_item_max_quantity = '' -%} {%- endif -%} {%- comment -%} Check for QB level, hide variant and update title as appropriate {%- endcomment -%} {%- if bold_apps_installed contains 'Quantity Breaks' or bold_apps_installed contains 'Customer Pricing' -%} {%- assign qb_hidden = false -%} {%- assign qb_level = bold_variant.metafields.shappify_qb.qb_qty | default: bold_variant.metafields.shappify_csp.csp_qty | times: 1 -%} {%- if qb_level > 1 -%}{%- assign qb_hidden = true -%}{%- endif -%} {%- if bold_variant.title == '1+' -%} {%- assign bold_variant_title = 'Default title' -%} {%- endif -%} {%- endif -%} {%- comment -%} If required, check for third-party Hide Rules as well {%- endcomment -%} {%- if third_party_check == blank -%}{%- assign third_party_check = true -%}{%- endif -%} {%- assign third_party_hidden = false -%} {%- if third_party_check -%} {%- if bold_variant.title contains '% Off' or bold_variant.metafields.brodev_scn.hide == "true" or bold_variant.metafields.secomapp.freegifts or bold_variant.title contains '(Bundle price)' -%}{%- assign third_party_hidden = true%}{%- endif -%} {%- endif -%} {%- if csp_hidden or qb_hidden or third_party_hidden or bold_variant.metafields.shappify_bundle.is_bundle == 'true' or third_party_hidden -%} {%- assign bold_hidden_variant = true -%} {%- else -%} {%- assign bold_hidden_variant = false -%} {%- endif -%} {%- comment -%} Check for presence of our apps {%- endcomment -%} {%- if bold_variant.metafields.bold_measurement.formula -%}{%- assign variant_has_btm = true -%}{%- else -%}{%- assign variant_has_btm = false -%}{%- endif -%} {%- if bold_variant.metafields.shappify_csp.csp_tag -%}{%- assign variant_has_csp = true -%}{%- else -%}{%- assign variant_has_csp = false -%}{%- endif -%} {%- if bold_variant.metafields.shappify_qb.pricing_html or bold_variant.metafields.shappify_csp.pricing_html -%}{%- assign variant_has_qb = true -%}{%- else -%}{%- assign variant_has_qb = false -%}{%- endif -%} {%- if bold_variant.metafields.bold_rp.rp_group_id -%}{%- assign variant_has_ro = true -%}{%- else -%}{%- assign variant_has_ro = false -%}{%- endif -%} {%- assign bdl_check = base_product.variants | map: 'metafields' | map: 'shappify_bundle' | map: 'bundle_parent' -%} {%- if bdl_check contains bold_variant.id -%}{%- assign variant_has_bdl = true -%}{%- else -%}{%- assign variant_has_bdl = false -%}{%- endif -%} {%- if bold_variant_hide_action == 'skip' and bold_hidden_variant -%}{%- continue -%}{%- endif -%} {% endif %} {%- assign option1_clean_name = variant.option1 | remove: csp_flag_string -%} {%- assign option2_clean_name = variant.option2 | remove: csp_flag_string -%} {%- assign option3_clean_name = variant.option3 | remove: csp_flag_string -%} {%- comment -%} ============================================================================================================ BEGIN JSON OUTPUT ============================================================================================================ {%- endcomment -%} {%- if bold_variant_output == 'json' -%} { "id":{{- bold_variant.id | json -}}, "product_id":{{- bold_variant_base_product.id | json -}}, "product_handle":{{- bold_variant_base_product.handle | json -}}, "title":{{- bold_variant_title | default: bold_variant.title | json -}}, "option1":{%- unless option1_clean_name == blank -%}{{- option1_clean_name | json -}}{%- else -%}null{%- endunless -%}, "option2":{%- unless option2_clean_name == blank -%}{{- option2_clean_name | json -}}{%- else -%}null{%- endunless -%}, "option3":{%- unless option3_clean_name == blank -%}{{- option3_clean_name | json -}}{%- else -%}null{%- endunless -%}, "sku":{{- bold_variant.sku | json -}}, "requires_shipping":{{- bold_variant.requires_shipping | json -}}, "taxable":{{- bold_variant.taxable | json -}}, "featured_image": {%- if bold_variant.featured_image == blank -%} {{bold_base_variant.featured_image | json}}, {%- else -%} { "created_at":{%- capture created_at -%}{{- bold_variant.featured_image.created_at -}}T{{- bold_variant.featured_image.created_at | date: "%T" -}}{%- endcapture -%}{{- shop.timezone -}}{{- created_at | json -}}, "id":{{- bold_variant.featured_image.id | json -}}, "position":{{- bold_variant.featured_image.position | json -}}, "product_id":{{- bold_variant.featured_image.product_id | json -}}, "src":{{- bold_variant.featured_image.src | json -}}, "updated_at":{%- capture updated_at -%}{{- bold_variant.featured_image.updated_at | date: "%F" -}}T{{- bold_variant.featured_image.updated_at | date: "%T" -}}{%- endcapture -%}{{- shop.timezone -}}{{- updated_at | json -}}, "width":{{- bold_variant.featured_image.width -}}, "height":{{- bold_variant.featured_image.height -}} }, {%- endif -%} "image_id":{{variant.featured_image.id | default: bold_base_variant.featured_image.id | json -}}, "available":{{- bold_variant_available | json -}}, "name":{{- bold_variant_base_product.title | append: " - " | append: bold_variant.title | remove: csp_flag_string | json -}}, "options":{{- bold_variant.options | json | remove: csp_flag_string -}}, "price":{%- unless price_style == 'json' -%}{{- bold_variant_price | default: bold_variant.price | json -}}{%- else -%}{%- assign cents = bold_variant_price | default: bold_variant.price | modulo: 100 | prepend: '00' | slice: -2, 2 -%}{%- assign dollars = bold_variant_price | default: bold_variant.price | times: 0.01 | floor -%}{{- dollars | append: '.' | append: cents | json -}}{%- endunless -%}, "weight":{{- bold_variant.weight | json -}}, "compare_at_price":{%- if bold_base_variant.compare_at_price == blank -%}null{% else %}{%- unless price_style == 'json' -%}{{- bold_variant_compare_at_price | default: bold_variant.compare_at_price | json -}}{%- else -%}{%- assign cents = bold_variant_compare_at_price | default: bold_variant.compare_at_price | modulo: 100 | prepend: '00' | slice: -2, 2 -%}{%- assign dollars = bold_variant_compare_at_price | default: bold_variant.compare_at_price | times: 0.01 | floor -%}{{- dollars | append: '.' | append: cents | json -}}{%- endunless -%}{%- endif -%}, "inventory_quantity":{{- bold_variant_inventory_quantity | default: variant.inventory_quantity | json -}}, "inventory_management":{{- bold_variant_inventory_management | default: variant.inventory_management | json -}}, "inventory_policy":{{- bold_variant_inventory_policy | default: variant.inventory_policy | json -}}, "inventory_in_cart": {{- bold_variant_cart_quantity | default: 0 | json -}}, "inventory_remaining":{{- bold_variant_remaining_quantity | default: bold_variant_inventory_quantity | default: bold_variant.inventory_quantity | json -}}, "incoming":{{- bold_variant.incoming | default: bold_base_variant.incoming | json -}}, "next_incoming_date":{{- bold_variant.next_incoming_date | default: bold_base_variant.next_incoming_date | date: "%Y-%m-%d" | json -}}, "taxable":{%- unless bold_variant_taxable == blank -%}{{- bold_variant_taxable | json -}}{%- else -%}{{- bold_variant.taxable | json -}}{%- endunless -%}, "barcode":{{- variant.barcode | json -}} {% comment %} {%- comment -%} SPECIAL HANDLING FOR CSP {%- endcomment -%} {%- if variant_has_csp -%} ,"csp_lookup":{ {%- for tag in all_shop_tags -%} {%- assign found_variant = '' -%} {%- if forloop.first != true -%},{%- endif -%}{{- tag | json -}}: {%- for csp_variant in bold_variant_base_product.variants -%} {%- if csp_variant.metafields.shappify_csp.csp_qty and csp_variant.metafields.shappify_csp.csp_qty != 1 -%}{%- continue -%}{%- endif -%} {%- assign base_check = csp_variant.metafields.shappify_csp.csp_base | default: csp_variant.id -%} {%- if base_check == bold_base_variant.id and csp_variant.metafields.shappify_csp.csp_tag == tag -%} {%- assign found_variant = csp_variant -%} {{- break -}} {%- endif -%} {%- endfor -%} { "id":{{- found_variant.id | json -}}, "price":{{- found_variant.price | json -}} {%- if found_variant.metafields.shappify_csp.pricing_html -%},"grid":{{- found_variant.metafields.shappify_csp.pricing_html | json -}}{%- endif -%} } {%- endfor -%} } {%- endif -%} {%- comment -%} END OF CSP SPECIAL HANDLING {%- endcomment -%} {%- comment -%} SPECIAL HANDLING FOR BTM {%- endcomment -%} {%- if variant_has_btm -%} ,"btm_lookup":{{- bold_variant.metafields.bold_measurement | json -}} {%- endif -%} {%- comment -%} END OF BTM SPECIAL HANDLING {%- endcomment -%} {%- comment -%} SPECIAL HANDLING FOR QB {%- endcomment -%} {%- if variant_has_qb -%} ,"qb_lookup":{ "levels": { {%- assign qb_price_varies = false -%} {%- assign not_first_tag = false -%} {%- for qb_variant in bold_variant_base_product.variants -%} {%- if qb_variant.metafields.shappify_qb.qb_parent == bold_variant.id or qb_variant.metafields.shappify_csp.csp_base == bold_base_variant.id or qb_variant.id == bold_base_variant.id -%} {%- if qb_variant.metafields.shappify_csp.csp_tag == blank or qb_variant.metafields.shappify_csp.csp_tag == bold_variant_customer_tag -%} {%- if not_first_tag -%},{%- endif -%}{%- assign not_first_tag = true -%} {%- unless qb_variant.price == bold_variant.price -%}{%- assign qb_price_varies = true -%}{%- endunless -%} "{{- qb_variant.metafields.shappify_qb.qb_qty | default: qb_variant.metafields.shappify_csp.csp_qty | default: 1 -}}": {"id":{{- qb_variant.id -}},"price":{{- qb_variant.price -}}} {%- endif -%} {%- endif -%} {%- endfor -%} } {%- if qb_price_varies -%} ,"qb_price_varies": {{- qb_price_varies | json -}} ,"grid": {{- bold_variant.metafields.shappify_qb.pricing_html | default: bold_variant.metafields.shappify_csp.pricing_html | json -}} {%- endif -%} } {%- endif -%} {%- comment -%} END OF QB SPECIAL HANDLING {%- endcomment -%} {%- comment -%} SPECIAL HANDLING FOR RO {%- endcomment -%} {%- if variant_has_ro -%} ,"ro_lookup":{{- bold_variant.metafields.bold_rp | json | remove: 'rp_' -}} {%- endif -%} {%- comment -%} END OF RO SPECIAL HANDLING {%- endcomment -%} {%- comment -%} SPECIAL HANDLING FOR BUNDLES {%- endcomment -%} {%- if variant_has_bdl -%} ,"bdl_lookup":{ {%- for bdl_variant in base_product.variants -%} {%- unless bold_variant.id == bdl_variant.metafields.shappify_bundle.bundle_parent -%}{%- continue -%}{%- endunless -%} "id":{{- bdl_variant.id -}}, "price":{{- bdl_variant.price | json -}}, "bundle_group":{{- bdl_variant.metafields.shappify_bundle.bundle_group -}} {%- break -%} {%- endfor -%} } {%- endif -%} {%- comment -%} END OF BUNDLES SPECIAL HANDLING {%- endcomment -%} {% endcomment %} } {%- endif -%}<div id='shappify_bundle' onclick='$("form.bundle-form").unbind("submit")'></div> <script async src="//secure.apps.shappify.com/apps/bundle/product_bundle.php?shop={{ shop.permanent_domain }}&product_id={{ product.id }}&_tmp=1529467710"></script> <!-- the liquid variable "bold_bundles_widget" is no longer required. The line below replaces it. --> <div class="bold-bundle" data-product-id="{{ product.id }}"></div>/* ------------------------------------ WARNING ------------------------------------ This file will be overwritten and should not be edited directly. In order to edit custom CSS for Bold Product Bundles you should: - Log into your Shopify Admin Panel - Go to Apps --> Installed --> Product Bundles - Go to Display Settings ------------------------------------ WARNING ------------------------------------ bold-bundles.css version 1 Generated at 2019-12-04 11:48:15 */ /* .bold-bundles-product component */ .bold-bundles-product { width: 100%; } .bold-bundles-product:empty { display:none; } /* .bold-bundles-widget component */ .bold-bundles-widget { box-sizing: border-box; border-style: solid; border-width: 1px; border-color: #c0c0c0; cursor: default; margin-top: 20px; } .bold-bundles-widget::before, .bold-bundles-widget::after { background-repeat: no-repeat; box-sizing: inherit; text-decoration: inherit; vertical-align: inherit; } /* .bold-bundles-widget-decorator component */ .bold-bundles-widget-decorator__wrapper { overflow: auto; min-height:20px; } .bold-bundles-widget-decorator { text-align: right; padding-left: 10px; padding-right: 10px; background-color: black; color: white; display: inline-block; float: right; } .bold-bundles-widget-decorator span { font-weight: bold; } /* .bold-bundles-widget-header component */ .bold-bundles-widget-header { text-align: center; padding-bottom: 20px; } .bold-bundles-widget-header__title { padding-top: 20px; margin-bottom:0px; font-size: 18px; color: #383838; } .bold-bundles-widget-decorator__wrapper + .bold-bundles-widget-header__title { padding-top: 0px; } .bold-bundles-widget-header__title:empty { display:none; } /* .bold-bundles-widget__items */ .bold-bundles-widget__items { justify-content: center; padding-left: 20px; padding-right: 20px; } @media screen and (min-width: 650px) { .bold-bundles-widget__items { display: flex; align-items: baseline; flex-wrap: wrap; } } /* .bold-bundles-widget-item component */ .bold-bundles-widget-item { flex: auto; display: block; width: 100%; padding-bottom: 10px; } /* .bold-bundles-widget-item-separator */ .bold-bundles-widget-item-separator__wrapper { border-bottom: 1px solid #c0c0c0; margin-bottom: 20px; } .bold-bundles-widget-item--with-separator:nth-child(n+1):last-child { display: none; } @media screen and (min-width: 650px) { .bold-bundles-widget-item-separator__wrapper { border-bottom: none; margin-bottom: 0px; } .bold-bundles-widget-item--with-separator:nth-child(n+1):last-child { display: block; visibility: hidden; } } .bold-bundles-widget-item--with-separator { text-align: center; } @media screen and (min-width: 650px) { .bold-bundles-widget-item.bold-bundles-widget-item--with-separator { max-width: 26px; margin-left: 2px; margin-right: 2px; } } .bold-bundles-widget-item-separator { background-color: #333333; border-radius: 50%; display: inline-block; width: 20px; height: 20px; position: relative; bottom: -18px; } .bold-bundles-widget-item-separator__icon { display: block; fill: #FFFFFF; margin: 0 auto; position: relative; top: 4px; height: 12px; width: 12px; } /* .bold-bundles-widget-item--product */ .bold-bundles-widget-item__wrapper { display: flex; flex-direction: row; flex-wrap: wrap; } @media screen and (min-width: 650px) { .bold-bundles-widget-item.bold-bundles-widget-item--product { min-width: 125px; width: calc(50% - 26px); max-width: calc(50% - 26px); padding-bottom: 0px; margin-bottom: 20px; } .bold-bundles-widget__items .bold-bundles-widget-item--product:first-child:nth-last-child(6), .bold-bundles-widget__items .bold-bundles-widget-item--product:first-child:nth-last-child(6) ~ .bold-bundles-widget-item--product { width: calc(33% - 26px); max-width: calc(33% - 26px); } .bold-bundles-widget__items .bold-bundles-widget-item--product:first-child:nth-last-child(8), .bold-bundles-widget__items .bold-bundles-widget-item--product:first-child:nth-last-child(8) ~ .bold-bundles-widget-item--product { width: calc(25% - 26px); max-width: calc(25% - 26px); } /* Try to get a row of 3 and a row of 2 */ .bold-bundles-widget__items .bold-bundles-widget-item--product:first-child:nth-last-child(10), .bold-bundles-widget__items .bold-bundles-widget-item--product:first-child:nth-last-child(10) ~ .bold-bundles-widget-item--product { width: calc(33% - 26px); max-width: calc(33% - 26px); } } /* .bold-bundles-widget-item__thumbnail-decorator */ .bold-bundles-widget-item__thumbnail-decorator { position: absolute; top: -10px; right: -10px; border: 1px solid #c0c0c0; background-color: white; text-align: center; height: 20px; line-height: 18px; } .bold-bundles-widget-item__thumbnail-decorator span { font-weight: bold; } .bold-bundles-widget-item__thumbnail-decorator.product-quantity { border-radius: 50%; width: 20px; display: none; } .bold-bundles-widget-item__thumbnail-decorator.product-discounted { border-radius: 10px; width: 80px; display: none; } .bold-bundles-widget-item__thumbnail-decorator.product-free { padding-left: 5px; padding-right: 5px; border-radius: 10px; display: none; } .bold-bundles-widget-item--product:not(.is_free) .bold-bundles-widget-item__thumbnail-decorator.product-quantity{ display: block; } .bold-bundles-widget-item--product.is_free .bold-bundles-widget-item__thumbnail-decorator.product-free{ display: block; } .bold-bundles-widget-item--product:not(.is_free) .bold-bundles-widget-item__thumbnail-decorator.product-discounted{ display: block; } /* .bold-bundles-widget-item__thumbnail */ .bold-bundles-widget-item__thumbnail { flex: auto; width: 25%; position: relative; } /* IE as issues with vertical-align with no height style */ @media screen and (min-width: 650px) { .bold-bundles-widget-item__thumbnail { margin-bottom: 0px; vertical-align: bottom; min-height: 1px; width: 100%; } } /* .bold-bundles-widget-item__link */ .bold-bundles-widget-item__link { max-width: 50%; } @media screen and (min-width: 650px) { .bold-bundles-widget-item__link { min-width: 100%; } } .bold-bundles-widget-item__image { vertical-align: bottom; width: 100%; border:solid #e8e8e8 2px; } .bold-bundles-widget-item__in_cart_identifier{ height:22px; width:22px; border-radius:50%; background-color:white; display:flex; justify-content:center; align-items:center; border: solid #a6d429 2px; position: absolute; right: -5px; top: -5px; } .bold-bundles-widget-item__in_cart_identifier img{ height:80%; width:80%; } /* .bold-bundles-widget-item__info */ .bold-bundles-widget-item__info { padding-left: 10px; min-width: 200px; width: 75%; flex: auto; text-align: left; } .bold-bundles-widget-item__info--centered { margin-top: 20px; text-align: center; } @media screen and (min-width: 650px) { .bold-bundles-widget-item__info { width: 100%; min-width: 0px; padding-left: 0px; } } /* .bold-bundles-widget-item__title */ .bold-bundles-widget-item__title { font-size: 16px; color: #383838; } @media screen and (min-width: 650px) { .bold-bundles-widget-item__title { margin-bottom: 5px; } } /* .bold-bundles-widget-item__variants */ .bold-bundles-widget-item__variants { display: block; margin-bottom: 15px; width: 100%; } select.bold-bundles-widget-item__variants option[disabled] { color: grey; } @media screen and (min-width: 650px) { .bold-bundles-widget-item__variants { margin-bottom: 5px; font-size: 12px; } } /* .bold-bundles-widget-item__price */ .bold-bundles-widget-item__price { font-size: 14px; color: #606060; } .bold-bundles-widget-item__price--old { opacity: 0.75; text-decoration: line-through; } .bold-bundles-widget-item__price--new { font-weight: 600; white-space: nowrap; } .bold-bundles-widget-item__price--price_multiplier { opacity: 0.75; font-weight: 400; } .bold-bundles-widget__price-total { border-top: 1px solid #c0c0c0; border-bottom: 1px solid #c0c0c0; text-align: center; } /* bold-bundles-widget__button */ .bold-bundles-widget__button { height:auto; border-radius: 2px; -webkit-appearance: button; display: inline-block; } .bold-bundles-widget__button--top { display: block; border-bottom-width: 1px; border-bottom-style: solid; border-bottom-color: rgba(0, 0, 0, 0.2); } .bold-bundles-widget__button--bottom { display: block; padding: 2px 5px 0 5px; border-top-width: 1px; border-top-style: solid; border-top-color: rgba(255, 255,255, 0.1); } .bold-bundles-widget__footer { padding: 15px 20px 20px 20px; text-align: center; } .bold-bundles-widget__footer_collection { padding-top: 5px; padding-bottom: 5px; text-align: center; font-size: 30px; border-top: solid #c0c0c0 1px; margin-left: 20px; margin-right: 20px; } /* Widget basic-bundle specific styles */ .basic-bundle .bold-bundles-widget__footer { text-align: left; } /* Widget basic-bogo-1 specific styles */ .basic-bogo-1.bold-bundles-widget { margin-top: 20px; } .basic-bogo-1 .bold-bundles-widget-item__thumbnail{ margin-bottom:10px; } .bold-bundles-widget-item__no_variants{ display: block; } .bold-bundles-widget-item__no_variants .bold-bundles-widget-item__thumbnail{ width:100%; margin-bottom:0px; } /* .bold-bundles-child-product component */ .bold-bundles-child-product-info{ padding-bottom:15px; } .bold-bundles-child-product__title{ font-size:large; opacity: 0.7; padding-bottom: 10px; } .bold-bundles-child-product__variant-wrapper{ padding-bottom:15px; } .bold-bundles-child-product__link-wrapper{ padding-bottom:5px; } .bold-bundles-widget-item__thumbnail-decorator.product-quantity, .bold-bundles-widget-item__thumbnail-decorator.product-free { z-index: 1; } .bold-checkout{ pointer-events: none; } [name=checkout] > *, [href*='/checkout'] > * { pointer-events: none; } /* Bundles Widget Overlay CSS start */ .bold-bundles-widget .overlay { display: none; width: 100%; height: 100%; position: absolute; background-color: rgba(0,0,0,0.7); z-index: 2; cursor: pointer; text-align: center; } .bold-bundles-widget #overlay-wrapper{ position: relative; } .bold-bundles-widget .modal-content { background-color: #fff; margin: auto; padding: 0 10px; border: 1px solid #888; width: 80%; margin-top: 20%; } .bold-bundles-widget .close { color: #aaaaaa; font-size: 28px; font-weight: bold; float: right; } .bold-bundles-widget .close:hover, .bold-bundles-widget .close:focus { color: #000; text-decoration: none; cursor: pointer; } .bold-bundles-widget .modalText{ margin-top:40px; } .bold-bundles-widget .buttonsContainer{ margin-top:10px } .bold-bundles-widget .modal-button{ padding: 10px 30px; margin: 20px; background: #47708A; border-radius: 2px; color: #fff !important; min-width: 110px; display: inline-block; text-align: center; min-height: 45px } /* Bundles Widget Overlay CSS end */ /* Bundles cart loader CSS start */ .bold-cart.bold-loading::before { z-index: 10; content: "Cart loading"; position: absolute; width: 100%; height: 100%; left: 0; top: 0; background-size: 10rem; background-position: center; background-repeat: no-repeat; background-image: url('https://bundles.staging.boldapps.net/assets/imgs/loading-spinner.gif'); background-color: rgba(0, 0, 0, 0.3); display: flex; flex-direction: row; align-items: center; justify-content: center; color: #FFF; } /* Bundles cart loader CSS end */ Select Save.
Repeat steps 6.1 – 6.5 for each missing snippet or asset file.
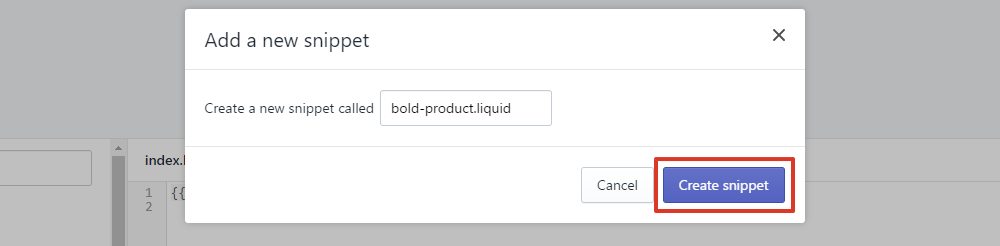
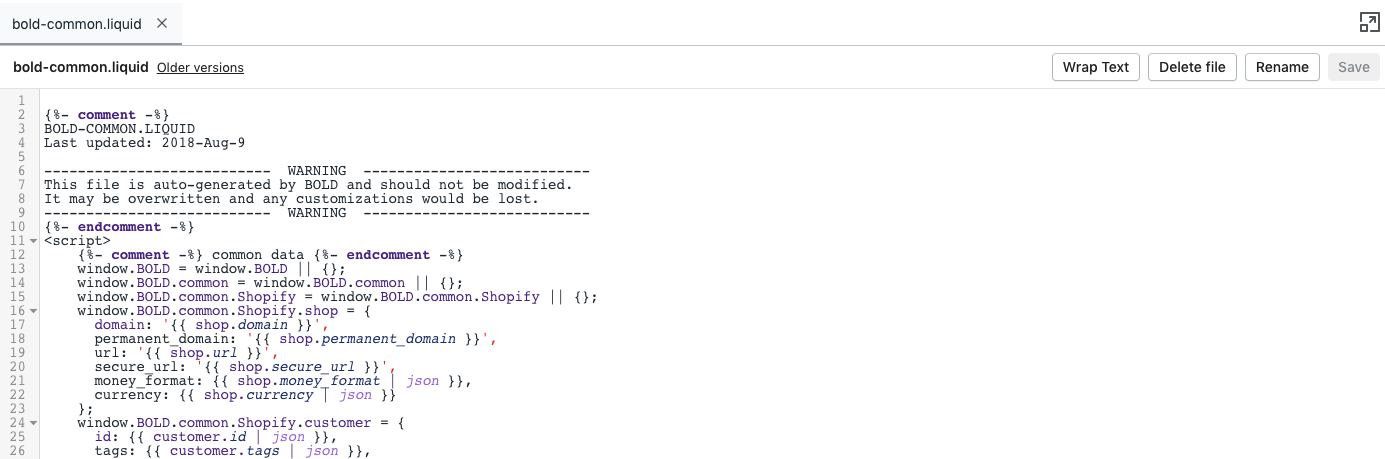
Step 2: Edit bold-includes.liquid
Under Snippets, select bold-includes.liquid.
Copy and paste this code into the bottom of the file:
{{ 'https://bundles.boldapps.net/js/bundles.js' | script_tag }}
{{ 'bold-bundles.css' | asset_url | stylesheet_tag }}
Select Save.
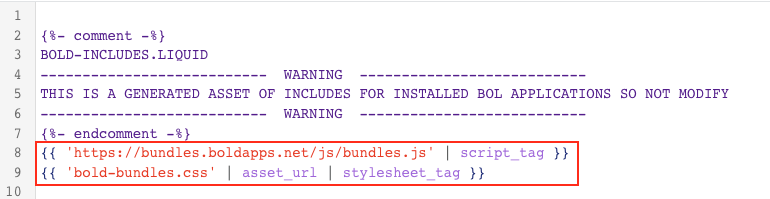
Step 3: Edit theme.liquid
Under Layout, select theme.liquid.
Copy and paste this code directly under the content_for_header:
{%- include 'bold-product' with product, hide_action: 'header' -%}
{%- include 'bold-common' -%}
{%- include 'bold-common' -%}
Select Save.

Step 4: Edit main-product.liquid
Under Sections, select main-product.liquid.
Copy and paste this code outside of the first product form:
{%- render 'shappify-bdl-load-bundle' -%}Select Save.
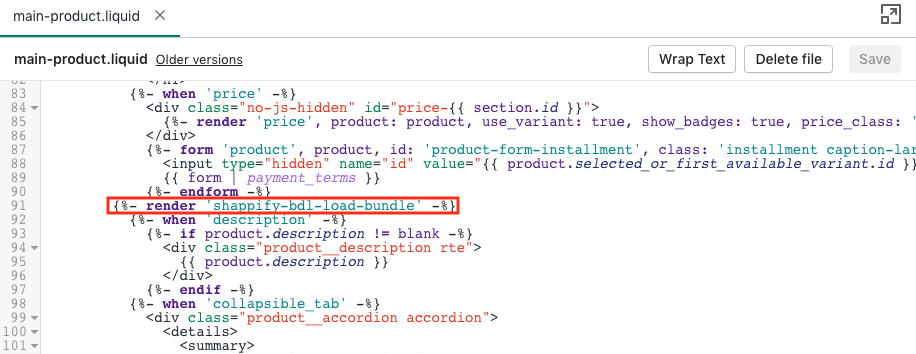
Step 5: Edit main-cart-items.liquid
Under Sections, select main-cart-items.liquid.
In the else condition of the second statement:
{%- if item.original_price != item.final_price -%}replace:
<span class="price price--end">
{{ item.original_line_price | money }}
</span>
with:
<div class="money" data-line-index="{{ forloop.index0 }}" data-line-total>
{{ bold_item_line_price | money }}
</div>
Select Save.
Step 6: Edit main-cart-footer.liquid
Under Sections, select main-cart-footer.liquid.
Find the code that looks like:
{{%- cart.total_price | money_with_currency }}Copy and paste this code directly before that line:
<span class="Bold-theme-hook-DO-NOT-DELETE bold_cart_total" style="display:none !important;"></span>Find the <noscript> code snippet:
<noscript>
<button type="submit" class="cart__update-button button button--secondary" form="cart">
{{ 'sections.cart.update' | t }}
</button>
</noscript>
and replace it with the following:
<noscript></noscript>
<div></div> <!-- Override the Shopify 2.0 theme .cart__ctas>:not(noscript:first-child)+ script -->
<button type="submit" class="cart__update-button button button--secondary" form="cart">
{{ 'sections.cart.update' | t }}
</button>
Select Save.
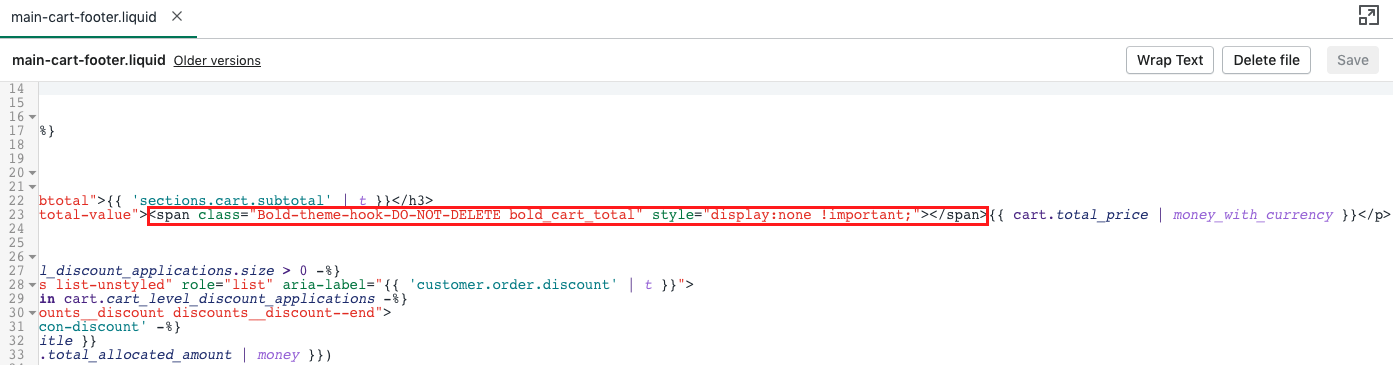
Uninstall
If you would like to remove the liquid code from your theme, the liquid code can be removed by deleting the snippet files, asset files, and the code includes mentioned in the instruction steps above.
Note: If you are experience issues with performance on the storefront with Bold Bundles after completing the steps above, we recommend requesting a Bundles install. Your theme may require further liquid code changes.
To remove the app from your store and cancel your Bundles subscription, please follow the steps below.
In Bundles, navigate to Product Bundles, and turn off any active bundles groups. Allow the sync to complete.
From your Shopify admin, click Settings.
Click Apps and sales channels.
Click the three dots next to Bold Bundles, and select Uninstall.
Optional: Select a reason for the uninstall.
Click Uninstall.