
Manage Order Mappings
QuickBooks Sync allows you to manage the order mappings between your Shopify store and your QuickBooks Online account.
This article shows you how to search for and export orders, and create, edit, or delete order mappings.
Functionality
After a Shopify order successfully exports to QuickBooks Online, a mapping is created. This mapping links the Shopify order to its corresponding sales receipt in QuickBooks Online.
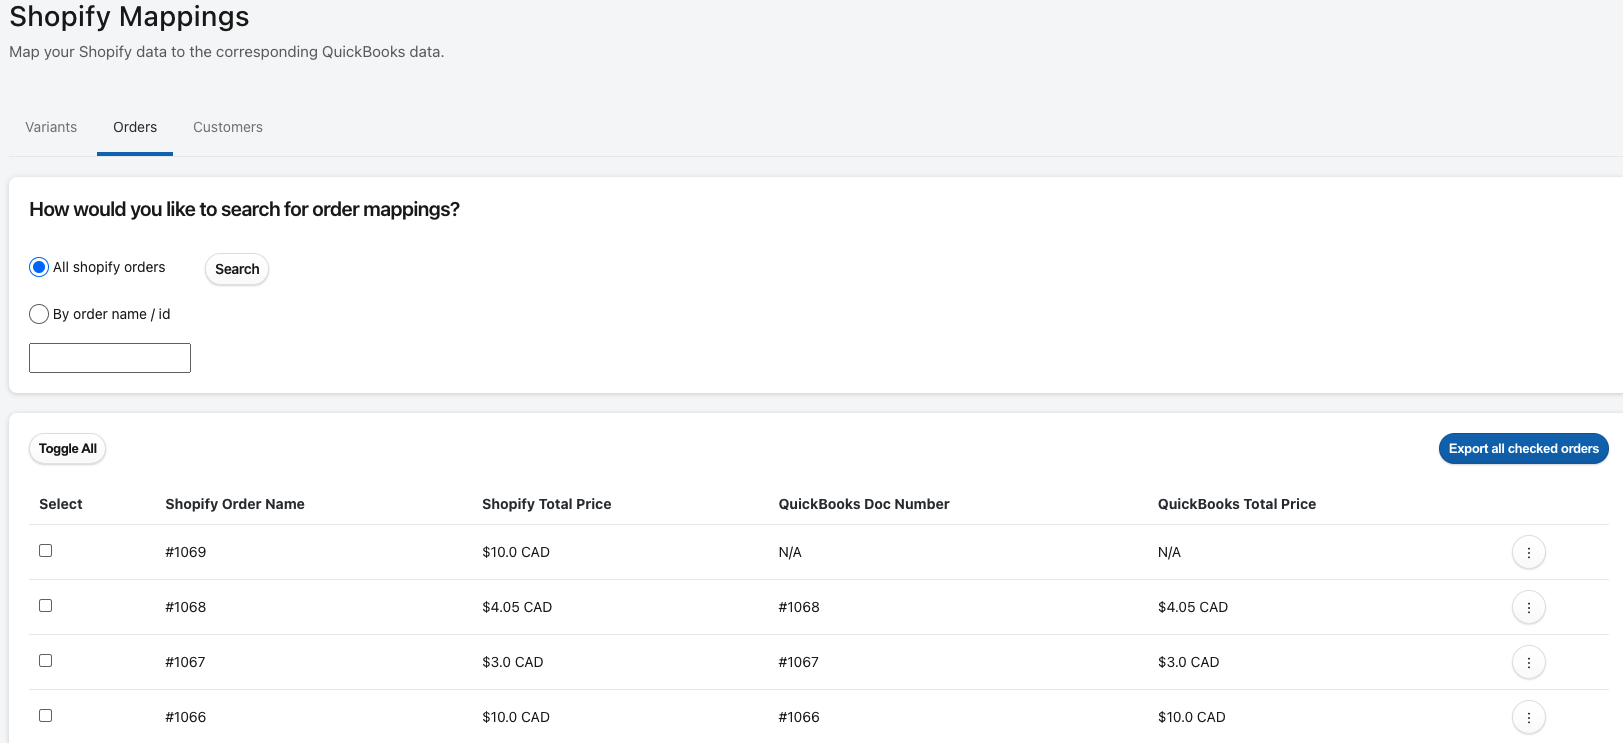
You can review all of your order mappings on the Mappings page by clicking the Orders tab. This page shows every Shopify order and its corresponding QuickBooks receipt, if it exists. This provides a clear overview of all your exported orders, making it easy to identify any issues. From this page, you can also edit existing mappings or manually export new orders if needed.
Example
Searching for orders
You can quickly find specific Shopify orders on the Mappings page to confirm they've been exported and mapped correctly.
From your Shopify admin, open QuickBooks Sync.
Click Manage mappings from the homepage or Mappings in the left menu.
Click the Orders tab.
Search for orders using one of the following two ways:
All shopify orders (default): Browse all your Shopify orders, with the most recent ones appearing first.
By order name / id: Enter a specific order name or ID to find it.
Note: You don't need to enter the full ID. For example, entering 106 will show all orders that start with that number.

Exporting orders
Instead of exporting your orders by date, you can select specific orders to export from the Mappings page.
From your Shopify admin, open QuickBooks Sync.
Click Manage mappings from the homepage or Mappings in the left menu.
Click the Orders tab.
Search for and select the orders you want to export.
Click Export all checked orders, and confirm the number of orders you would like to export.
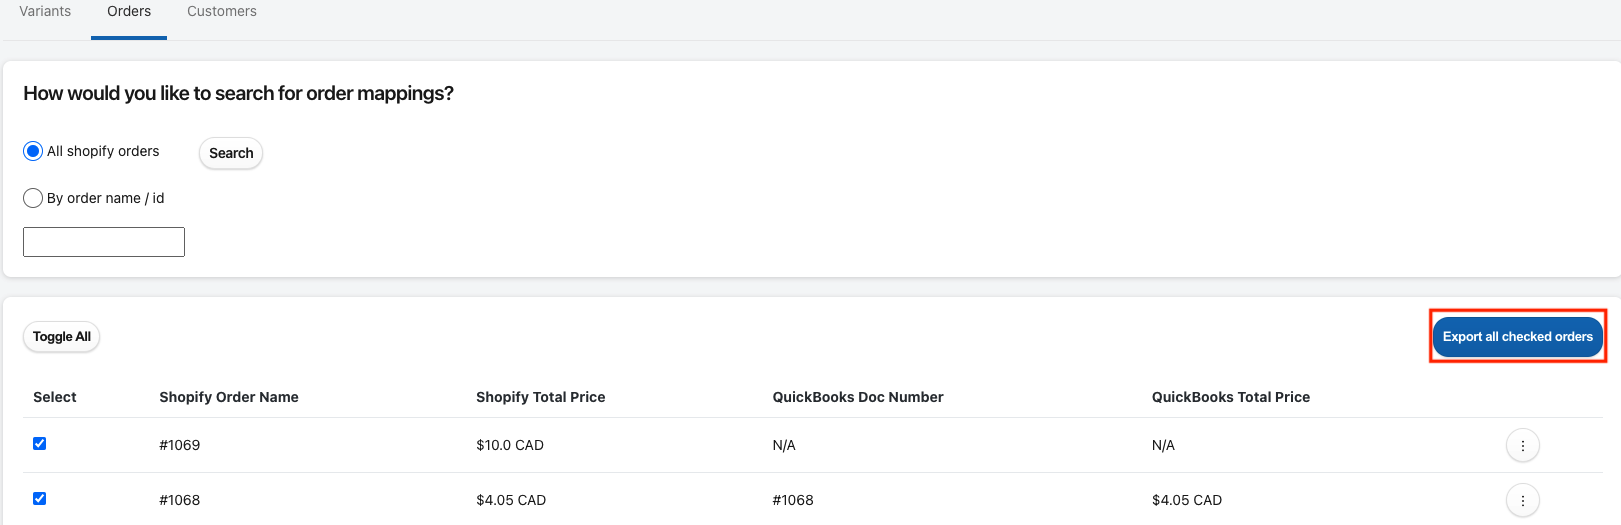
You can leave the page while the orders are exporting. The page will refresh automatically when it's complete. The new data will be displayed with a link to the export results. Any orders that have already been exported will be skipped.
Create a new mapping
If an order failed to export due to an error, you can manually create the sales receipt in QuickBooks and then manually map the order to it. This prevents QuickBooks Sync from trying to export the order again.
From your Shopify admin, open QuickBooks Sync.
Click Manage mappings from the homepage, or select Mappings from the left menu.
Click the Orders tab.
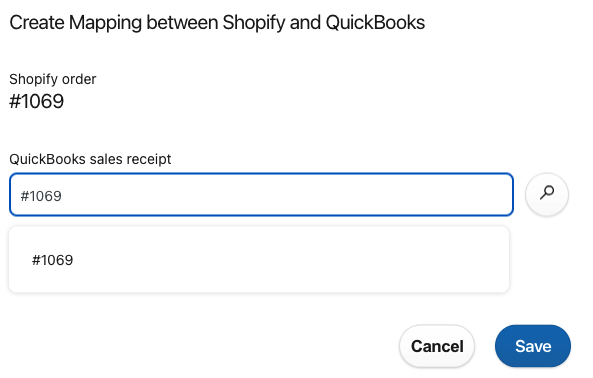
Click the ellipsis next to an order mapping with N/A values (this indicates a sales receipt for it does not exist), then click New.
Enter all or part of the Doc Number for the sales receipt you've created, and press enter on your keyboard or the magnifying glass icon to search.
Choose a sales receipt in the results, and click Save.
Edit an existing mapping
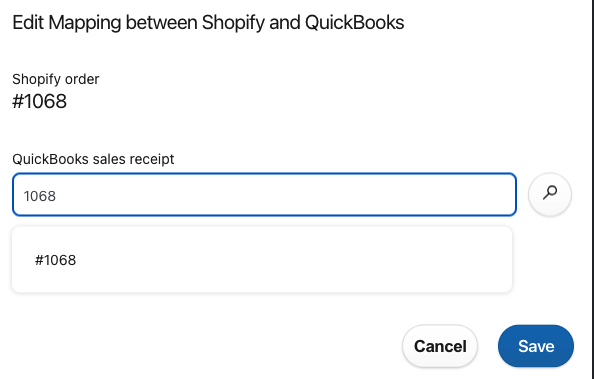
On the rare occasion an order in Shopify is mapped to the incorrect sales receipt in QuickBooks, you can edit the mapping to correct it.
From your Shopify admin, open QuickBooks Sync.
Click Manage mappings from the homepage, or select Mappings from the left menu.
Click the Orders tab.
Enter all or part of the Doc Number, and press enter on your keyboard or the magnifying glass icon to search.
Choose a sales receipt in the results, and click Save.
Delete a mapping
On the rare occasion where there is an issue with a sales receipt in QuickBooks, you may choose to delete the mapping and create a new mapping for another sales receipt. However, this is the same functionality as just editing the mapping.
Note: If you accidentally delete a mapping, you can always recreate it to connect to the same sales receipt in QuickBooks.
From your Shopify admin, open QuickBooks Sync.
Click Manage mappings from the homepage, or select Mappings from the left menu.
Click the Orders tab.
Click the ellipsis next to an order mapping, then click Delete and confirm the deletion.