
Create/Edit/Delete a Bundle
In order for bundle discounts to appear on the storefront, a bundle group must be created within Bold Bundles.
Group type and Mix & Match type bundles are available on the Basic plan.
Buy/Get type bundles are available on the Premium plan.
For steps on how to create or edit each type of bundle within Bold Bundles, please view the information below.
Create a Group Type Bundle
From the homepage of the Bold Bundles admin, select Create New.
Under Choose a bundle type, select Group.
Select Add Products.
Select the products that you would like to include in the bundle.
Select Save Selection.
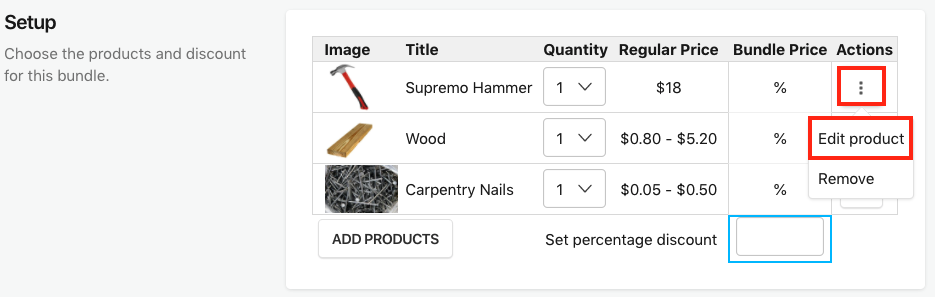
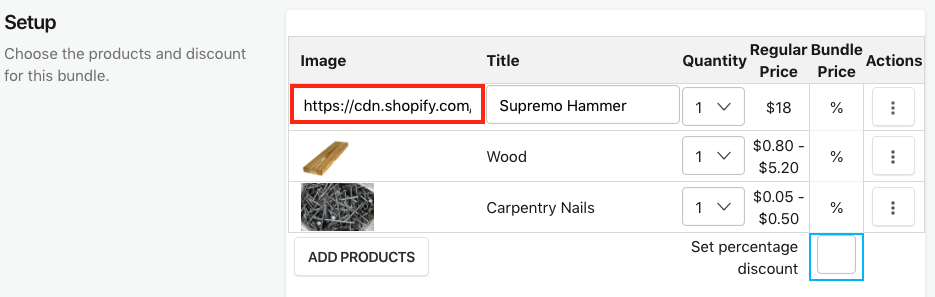
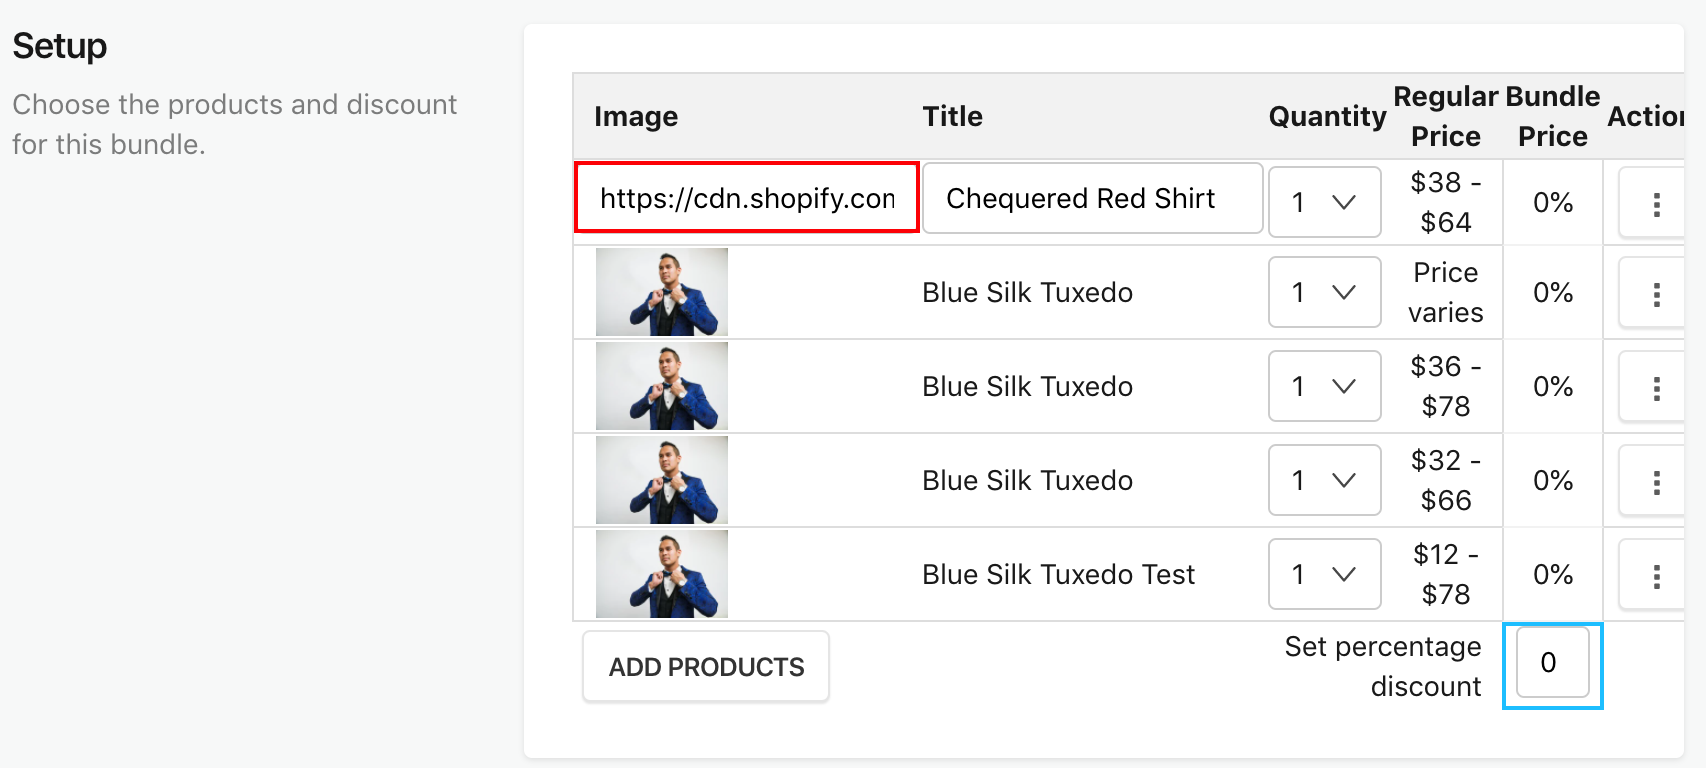
Optional: Change the image that is used for each product by replacing the image URL under Actions > Edit product.
Note: This image url will need to be reselected if you turn off, or re-sync the bundle.
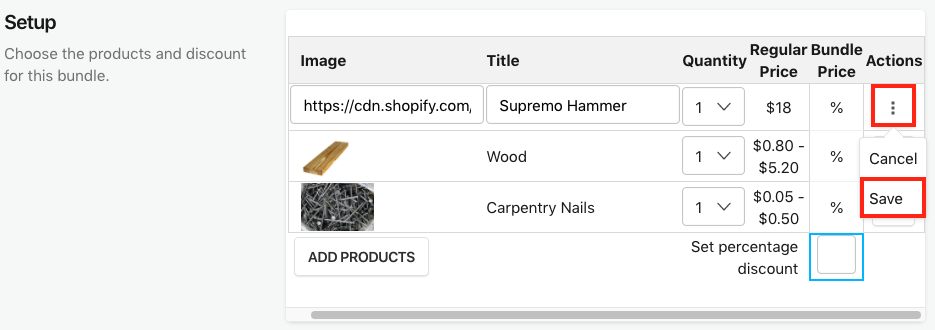
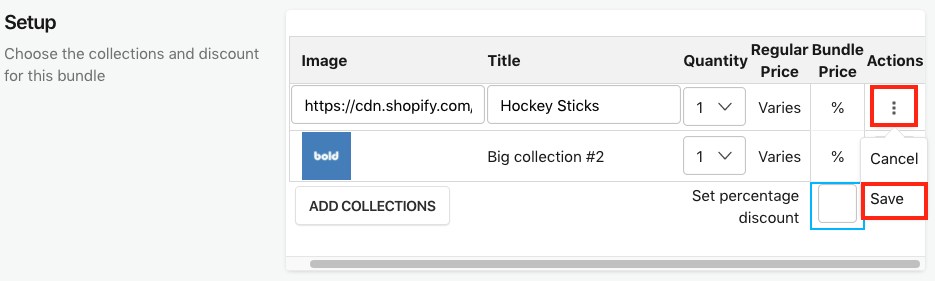
Once the image has been adjusted for each product selected for the bundle, make sure to select the Actions icon, then Save next to each product.
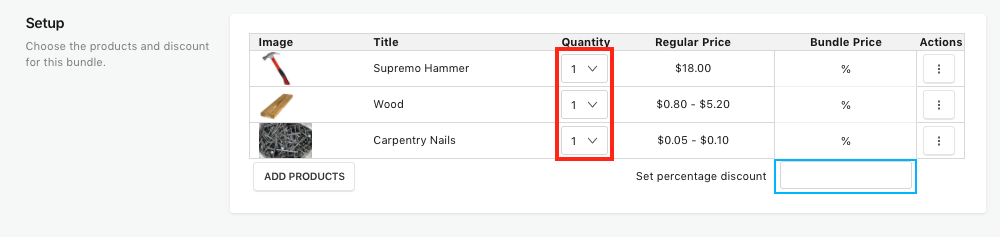
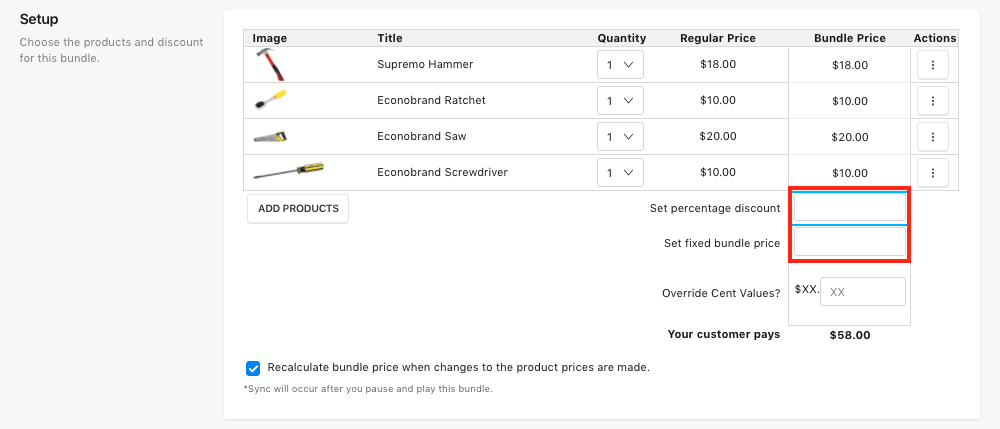
Optional: Select a quantity for each product.
Optional: Add a discount amount under Set percentage discount or Set fixed bundle price.
Note: If your group contains a product with differently priced variants, you will not be able to set a fixed bundle price. You will have to use a percentage discount.
Optional: Select and add an amount next to Override Cent Values.
Note: This setting is used to ensure your bundle price always ends in a specific number (i.e. .99, .95, etc.).
Optional: Select Recalculate bundle price when changes to the product prices are made.
Note: If the prices are adjusted for products in the Shopify admin, the bundle groups that contain those products will need to be manually synced by turning off and back on the bundle groups in the Bundles admin.
Optional: Under Combo Product, select Generate New Product.
Note: This setting is only available while on the premium plan of Bundles. For more information, please visit Combo Products in Bold Bundles.
Add a title for the Combo Product.
Enter a Title for the bundle widget.
Select a Style for the bundle widget's Add to Cart button.
Edit the Internal Name if needed.
Select Save Bundle.
Create a Mix & Match Type Bundle
From the homepage of the Bundles admin, select Create New.
Under Choose a bundle type, select Mix & Match.
Select Add collections.
Select the collections you would like to include in the bundle.
Select Save Selection.
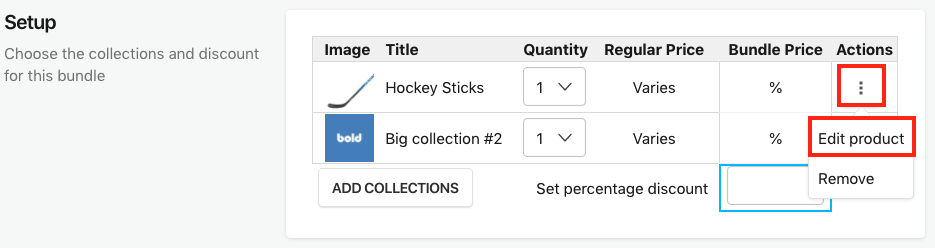
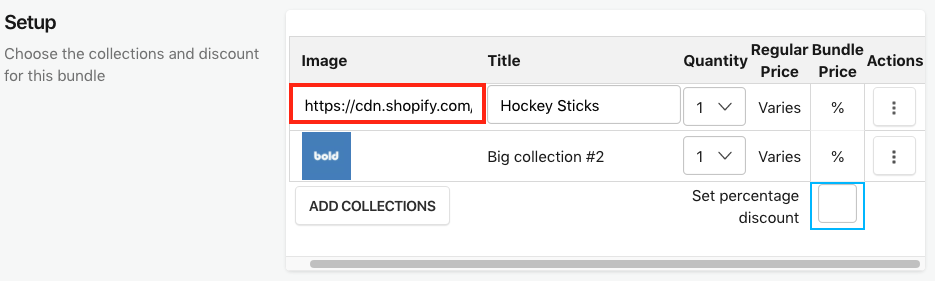
Optional: Change the image that is used for each collection by replacing the image URL under Actions > Edit product.
Note: This image url will need to be reselected if you turn off, or re-sync the bundle.
Once the image has been adjusted for each collection selected for the bundle, make sure to select the Actions icon, then Save next to each collection.
Optional: Select a quantity for each collection.
Enter a Set percentage discount.
Note: Fixed bundle prices cannot be used with Mix & Match type bundles, only percentage base discounts.
Enter a Title for the bundle widget.
Select a Style for the bundle widget's Add to Cart button.
Optional: Enable the toggle next to Show Title as Button.
Edit the Internal Name if needed.
Select Save Bundle.


Create a Buy/Get (BOGO) Type Bundle
Buy/Get - BOGO bundles are only available while on the premium plan of Bundles. Please visit Bold Bundles Information & Pricing for more information on changing to the premium plan.
Both the Buy and Get products are predetermined by you. This means that customers must add both the Buy and Get products to the cart to receive the discount on the Get products.
From the homepage of the Bundles admin, select Create New.
Under Choose a bundle type, select Buy/Get.
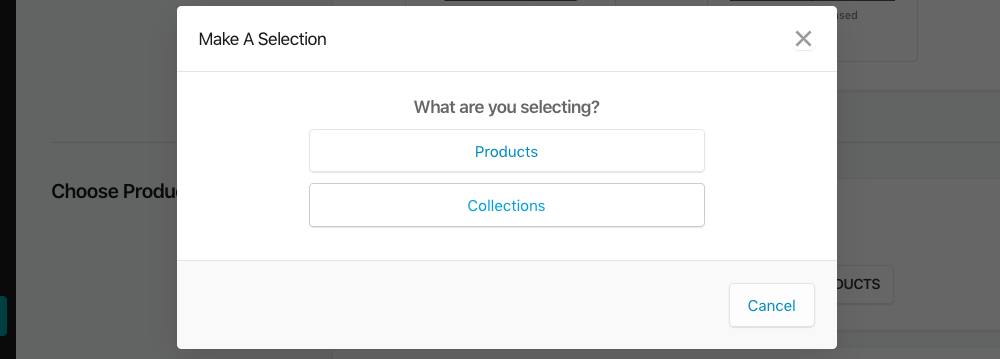
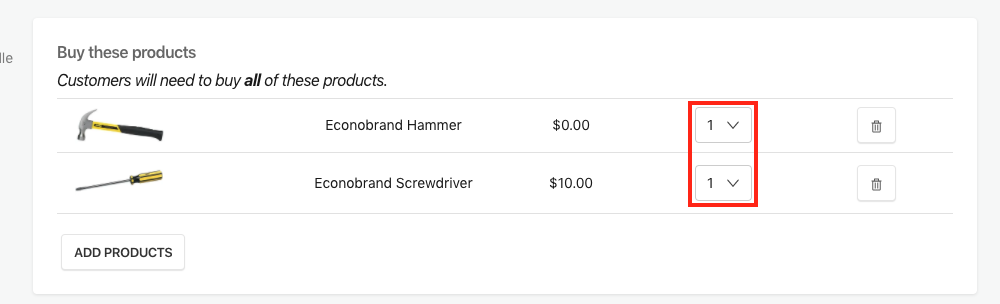
Under Buy these products, select Choose Products.
Choose your full priced product(s) and select Save Selection.
Note: If Bundles is set to the Accelerated Draft Order Method, you will have the option to choose either Products or Collections.
Optional: Select a quantity for each product or collection selected.
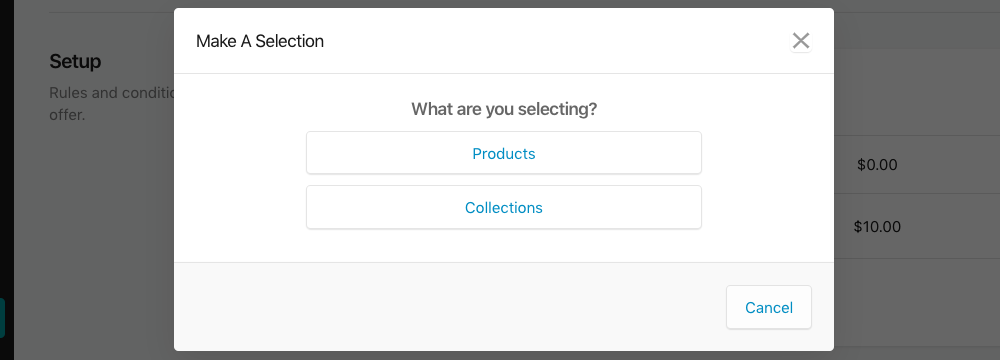
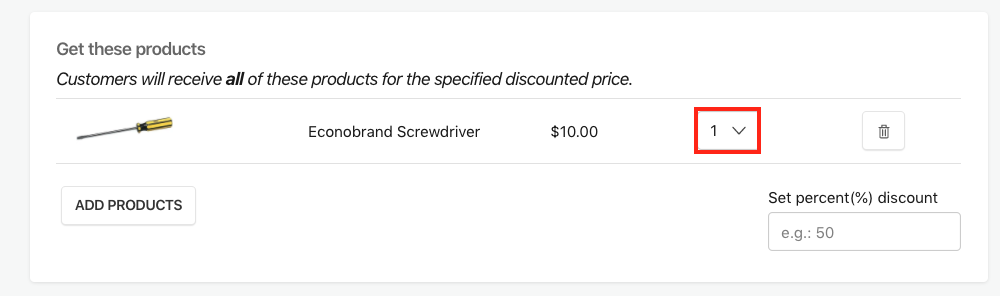
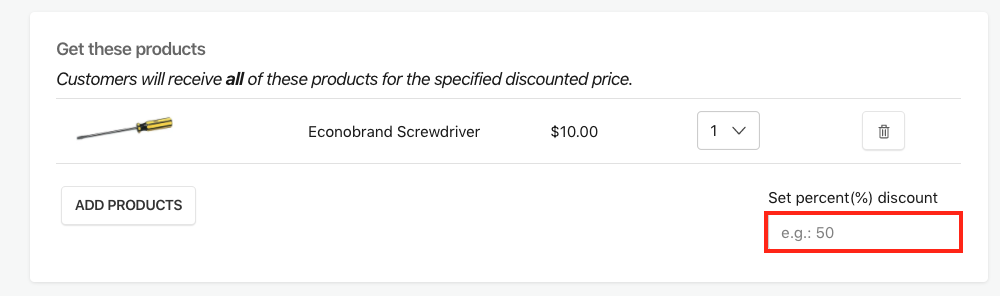
Under Get these products, select Add Products.
Choose your discounted priced product(s) and select Save Selection.
Note: If Bundles is set to the Accelerated Draft Order Method, you will have the option to choose either Products or Collections.
Optional: Select a quantity for each product selected.
Add a partial discount under Set percent(%) discount.
Note: This option is only available while Bundles is set to the Accelerated Draft Order Method. If Bundles is on the Variant Dependant Method or Draft Order Method, the offer products selected will be discounted by 100%.
Enter a Title for the bundle widget.
Optional: Add a Widget Flag Text.
Select a Style for the bundle widget's Add to Cart button.
Edit the Internal Name if needed.
Select Save Bundle.
Edit a Bundle
Alert: In order to avoid syncing issues on your storefront, it is recommended to turn off the bundle before editing.
From the homepage of the Bundles admin, select the ellipsis next to the bundle that you would like to edit.
Select Edit.
Make the adjustments to the bundle on the edit bundle page, then select Save Bundle at the bottom of the page.
Delete a Bundle
Alert: In order to avoid syncing issues on your storefront, it is recommended to turn off the bundle before deleting.
From the homepage of the Bundles admin, select the ellipsis next to the bundle that you would like to delete.
Select Delete.
Select Confirm.
FAQs
Can I add the same product in multiple bundles?
Yes, Bold Bundles allows you to use the same product in multiple bundles on the premium plan. This works across all of the different bundle types you can create (BOGO, Groups, and Mix & Match).
If a customer individually adds the same product to their cart, from different bundle types, the priority of the discounts are applied like so:
BOGOs
Groups
Mix & Match
When a bundle is added to the cart from the widget, the customer only receives the discount associated with that bundle. The cart then locks this customer's bundle pricing so no other bundle discounts are applied on top of these products.
Can I create a bundle group using individual variants?
No, Bundles works on the product level only. All of the variants that exist for the product are included and available to purchase within the bundle.
Can I create my bundles by collection?
Yes, with Mix & Match bundles you can create collection based bundles. Mix & Match ensures customers are required to purchase an item from specific collections in order to qualify for a discount.
Example: Buy any shoes, any pants, and any shirt to get 10% off.
Can I make my bundle products exempt from discount codes?
This can depend on the discounting method Bundles is using. In general, you can't restrict the use of coupons through Bundles' admin.
However, if Bold Bundles is set to the Draft Order or Accelerated Draft Order Method, both of these discount methods use a draft order to apply discounts for bundles in the checkout page. These draft order checkouts do not have the discount code field and as a result, a discount code cannot be used in the checkout page.
If Bold Bundles is set to Variant Dependent Method, your customer is able to use discount codes unless you specifically ensure there are no active discount codes for the products in a bundle.
For more information on how each discount method works with Bold Bundles, please visit Discounting Methods & How-to Switch Methods in Bold Bundles.
Troubleshooting
Blank page with bad request on it after adding bundle to cart
This error message can occur when the code for the bundle widget is within the product page form.
If you are using either of the following versions of Bold Bundles:
Variant Dependent Method (Version 1)
Draft Order Method (Version 2)
Please follow these steps:
From the Shopify admin, click Online Store.
Click "..." next to your theme you are using Bundles with, then click Edit code.
Under Templates, select product.liquid.
Note: Depending on your theme this code may be found within Sections in the product-template.liquid file.
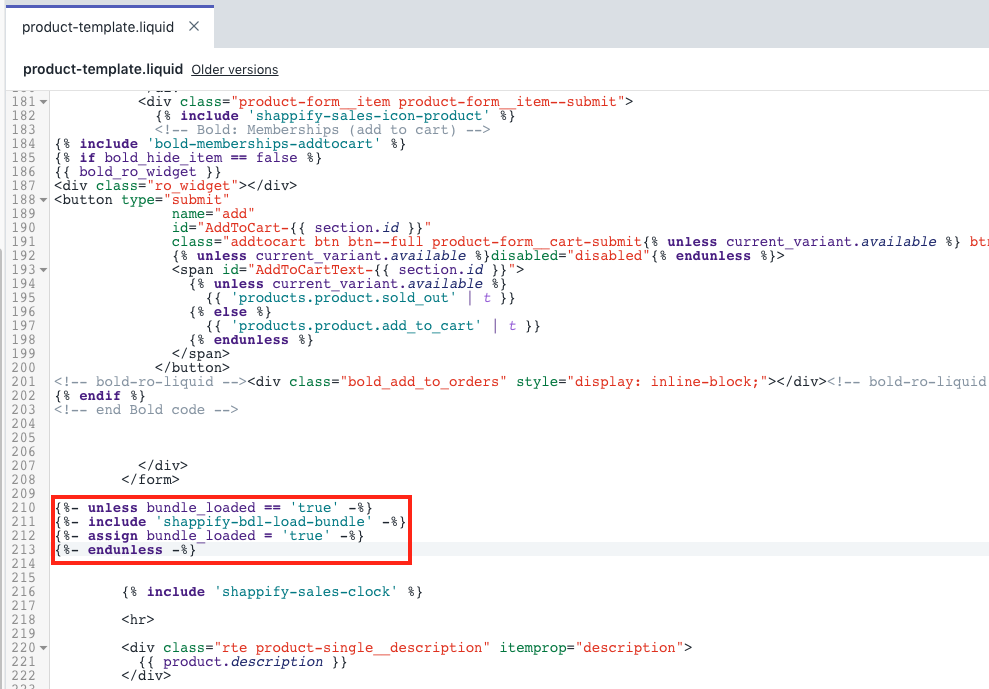
Look within the form tags for this code:
{% unless bundle_loaded == 'true' %}
 {% include'shappify-bdl-load-bundle' %}
 {% assign bundle_loaded = 'true' %}
{% endunless %}
Add this code where you would like the product bundle to display on the product page:
Note: This code must be placed either after the </form> tag or just before the code that outputs the related products. If you can't find the </form> tag in the product.liquid file, check the Snippets folder for a product-form.liquid or short-form.liquid file.
{% unless bundle_loaded == 'true' %}
 {% include 'shappify-bdl-load-bundle %}
 {% assign bundle_loaded = 'true' %}
{% endunless %}
Select Save.
If you are using Bundles on the Accelerated Draft Order Method (Version 3), the steps are the same as above, but you need to look for this code:
{% unless bundle_loaded == 'true' %}
 {% render 'shappify-bdl-load-bundle' %}
 {% assign bundle_loaded = 'true' %}
{% endunless %}
If you are receiving the same error after moving the bundle include code outside of the form tags, please speak to our Customer Success team for assistance.
Bundle discount isn't applying on the storefront
There are 3 common reasons why a bundle discount wouldn't apply on the storefront:
Missing liquid code on your theme - To see your options for adding the necessary liquid code to your theme, please visit Bold Bundles Code Install Instructions.
There is a conflict between Bold Bundles and another app on your store - To check if you have any conflicting apps on your store, please visit Bold Bundles Third Party Conflicts and Bold Bundles Bold Integrations.
Your shop is using CloudFlare - Bold Bundles cannot function properly when two instances of CloudFlare are being run at the same time. To resolve this, please follow the steps below.
Setup
Log into cloudflare.com.
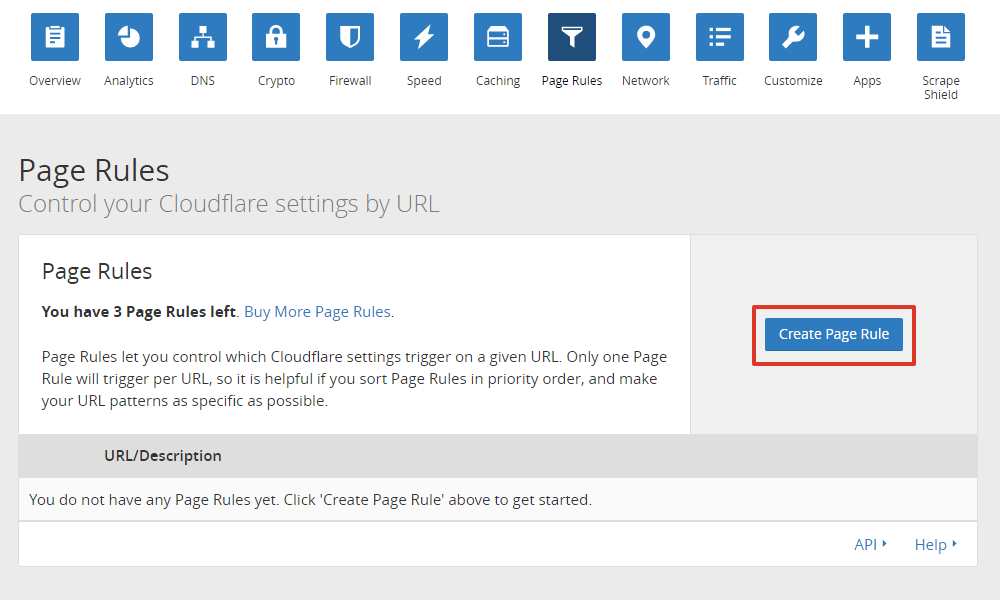
From the homepage of CloudFlare, select Page Rules.
Select Create Page Rule.
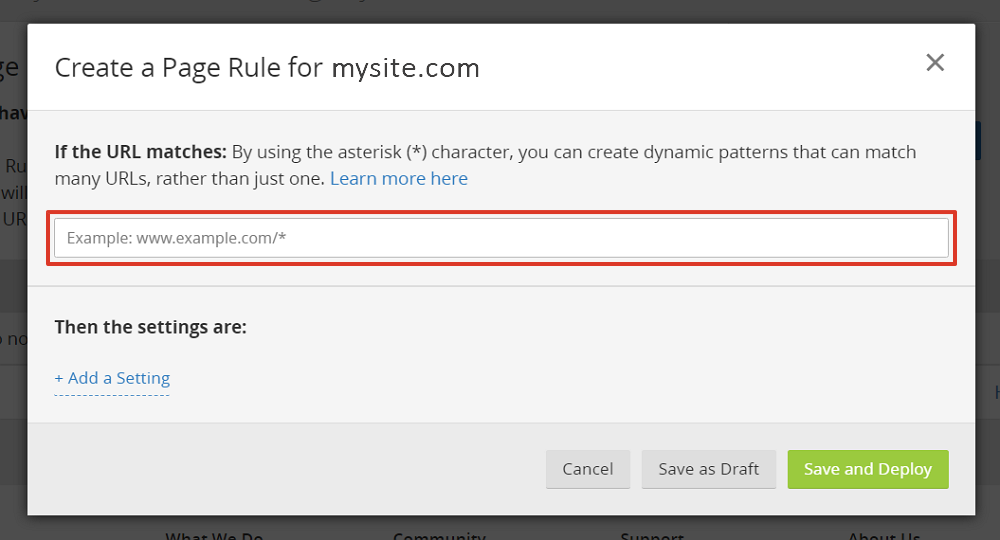
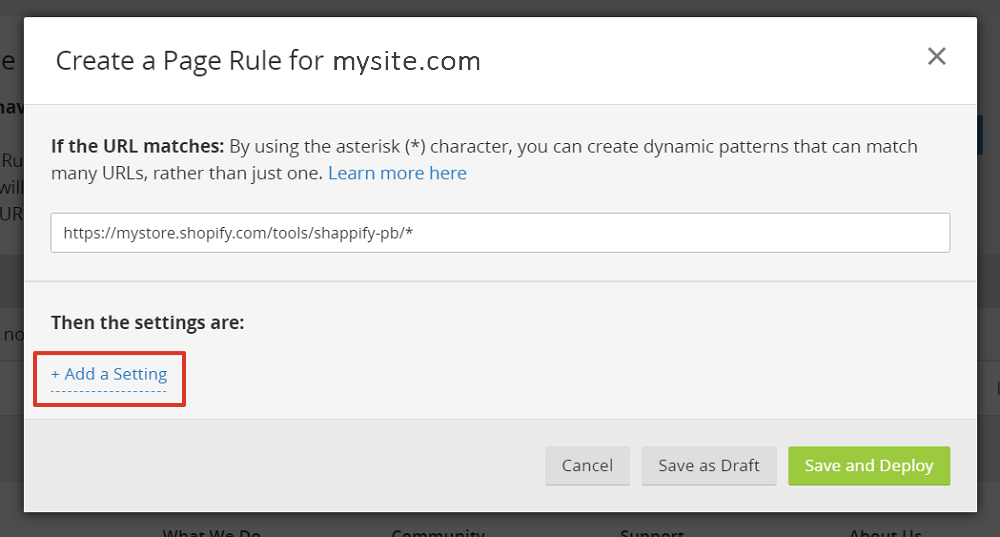
Under If the URL matches:, enter:
https:/(mystore).shopify.com/tools/shappify-pb/*Note: Replace (mystore) with your store name.
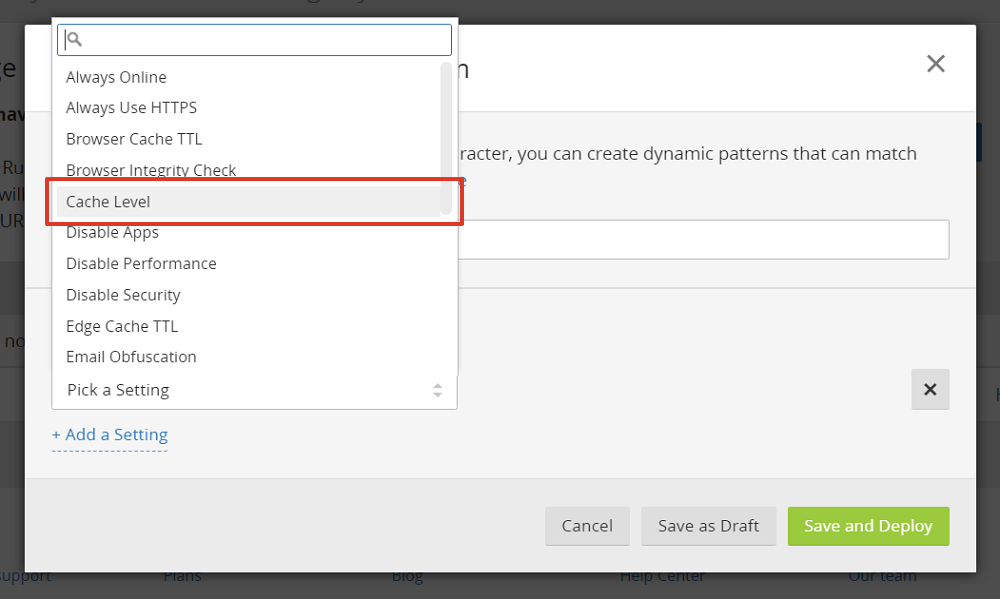
Select Add a Setting.
Under Pick a Setting, select Cache Level.
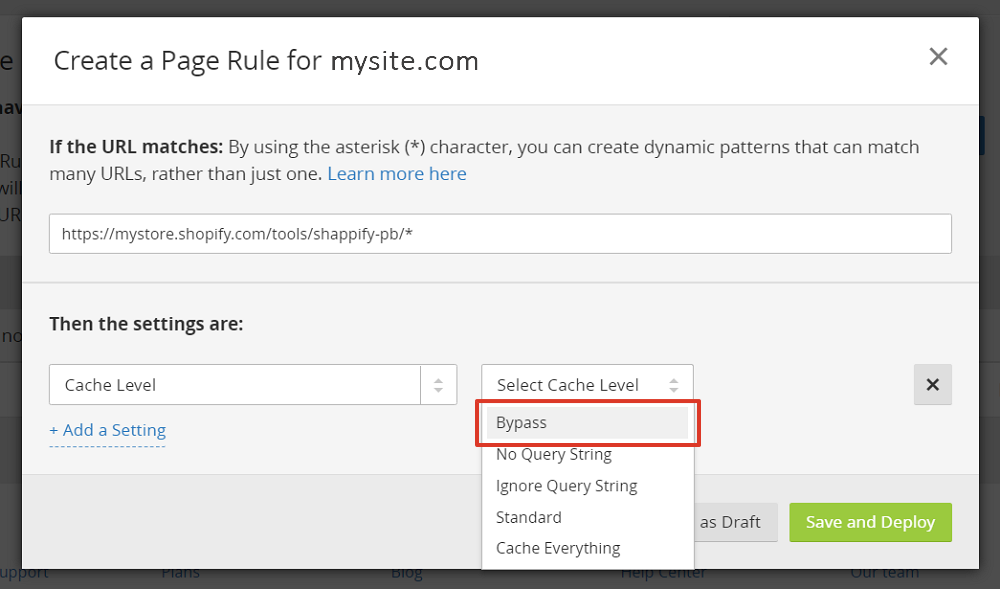
Under Select Cache Level, select Bypass.
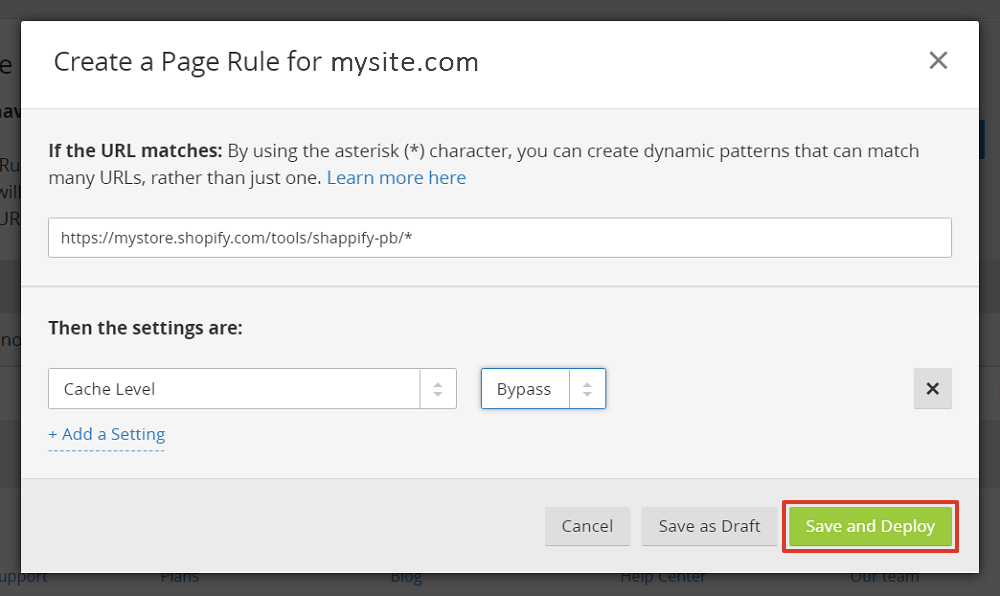
Select Save and Deploy.

From the Bundles app admin, select Product Bundles.
Select the ellipsis beside the offer you're having issues with.
Select Edit.
Under Actions, select the ellipsis beside the product not displaying correctly.
Select Edit product.
Under Image, find the section that says medium and change this to large.
Select Save Bundle.

Bundle product images are pixelated on the storefront
If the image is still pixellated on the storefront, repeat steps 1-5 again. Then, on step 6, remove the size in the image URL.
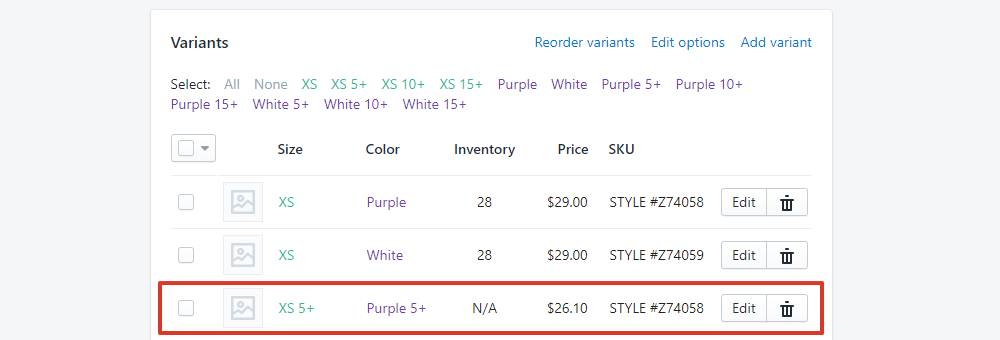
Bundle variants and/or their pricing is showing on the storefront
The most common reason for Bold Bundle variants not showing on the storefront is due to missing liquid code on your theme, or a conflict between Bold Bundles and a third party app.
Among these however, there are several other common reasons why this may occur:
The app's variant was manually modified in the product section of Shopify admin.
An Import was initiated in Shopify without the app being paused first.
The product and its variants were duplicated from another product that had Bundles applied to it.
To fix this, please follow these steps:
From the Bold Bundles app, select Product Bundles.
Select the toggle beside the Product Bundles group to disable.
Wait for the batch process to complete.
From the Shopify admin homepage, select Products.
Find any app variants not removed after pausing the Bundle groups.
Select the app variants that are showing in error.
Select the down arrow.
Select Delete variants.
Returning back to the Bundles admin, select the toggle beside the Product Bundle groups to enable them.
Bundles are not displaying on the storefront
There are 4 common reasons why a bundle wouldn't display on the storefront:
There is missing liquid code on your theme - To see your options for adding the necessary liquid code to your theme, please visit Bold Bundles Code Install Instructions.
There is a conflict between Bold Bundles and a 3rd party app - To check if you have any conflicting apps on your store, please visit Bold Bundles Third Party Conflicts.
Your product is out of stock - Please ensure your product is in stock within Shopify. For help with this, please visit Shopify's help center article Managing your inventory.
Your product is not visible on the storefront - Please ensure your product is active in the online store channel. Please visit Shopify's help center article for information on how to make your products available to your sales channels.
Buy and get products receiving the same discount
This issue typically indicates a sync issue between the bundle discount on the storefront, and the Bold Bundles app.
These issues can be resolved by turning the bundle group off and then back on:
From the Bold Bundles app, select Product Bundles.
Select the green status toggle next to the affected bundle group to disable the bundle group.
Once the group has finished its sync, re-enable the group.
Test the bundle functionality on your storefront.
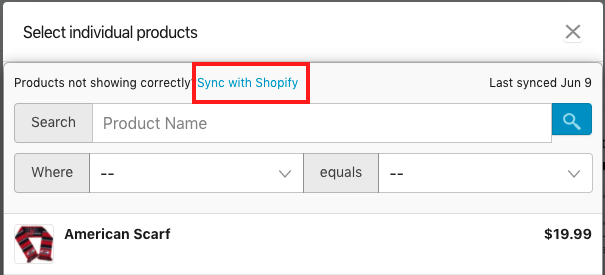
Products not showing in the product selector
In order to make sure all of your products are available in the product selector, you need to ensure your products in Shopify are synced with Bundles.
You can update the product selector by clicking on the blue Sync with Shopify text. Once this is done, the current date is shown at the top right.
Product image changed but not reflecting the new image on bundle widget
When an image for a product is changed in the Shopify admin, the image URL for the product that is used in the bundle needs to be adjusted manually.
In order to obtain the image URL, you first need to add the new product image to your files area in Shopify.
To make this adjustment, please follow the steps below.
Step 1. Add the image to Shopify Files
From within the Shopify admin, navigate to Content > Files.
Select Upload files.
Navigate to the image on your computer and select Open.
Select the Link icon to copy the image URL to your clipboard.
Step 2. Adjust the image URL in Bold Bundles
From within Bold Bundles, select Product Bundles.
Select the ellipsis beside the offer you're having issues with.
Select Edit.
Under Actions, select the ellipsis beside the product not displaying correctly.
Select Edit product.
Under Image, replace this image URL with the new image URL.
Select Save Bundle.
Product(s) missing from a bundle widget
There are a few reasons a product can be missing from a bundle widget on the storefront. They are:
The product has been set as inactive.
The product was removed from the Online Store sales channel.
An import of products was performed in your Shopify admin manually or through a third party inventory app.
In order to bring the missing product back onto the storefront, we recommend ensuring the product is active and on the online sales channel. Once that has been confirmed, you can turn the bundle group off and back on again to resync the bundle.
From within Bold Bundles, select Product Bundles.
Select the green status toggle next to the affected bundle group to disable the bundle group.
Once the group has finished syncing, re-enable the group.
If one of the above three scenarios mentioned does not apply to you, please speak to our Customer Success team for further assistance.
Product images have disappeared after syncing bundles
This issue occurs if you have changed the default image for the products in your bundle. These images are removed after performing a sync, or toggling the bundle off and on. You need to reselect the image within the group settings.