
Create a Membership Plan in Bold Memberships
Bold Memberships allows you to create different types of membership plans. You can create memberships to show exclusive content, such as selected products, collections, pages or more, or basic memberships for offline services such as fitness classes or piano lessons.
Before setting up your membership plan, please ensure
Your Stripe account is connected. If your memberships are free, you can skip this step.
The liquid code is installed. Please visit Bold Memberships Code Install Instructions for more information.
Note: Bold Memberships is designed to take a recurring fee through Stripe to allow your customers to access services or content. Bold Memberships does not create an order for a physical product in Shopify. If you wish to sell physical products on a recurring basis, Bold Subscriptions may be a better solution for you. For more information, please visit What's the Difference Between Bold Memberships & Bold Subscriptions?
To setup your first plan, please follow the steps below.
Video Walkthrough
Setup
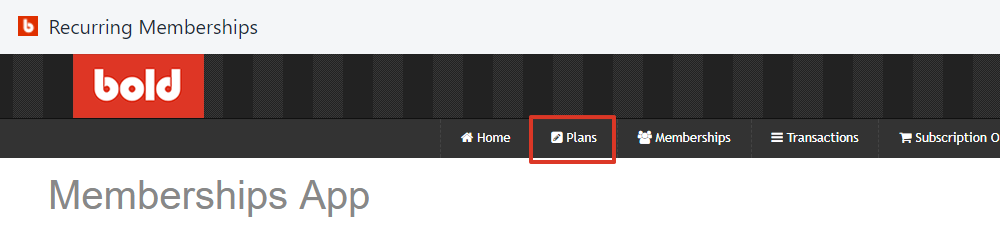
From the Shopify admin, select Apps.
Select Recurring Memberships.
Select Plans.
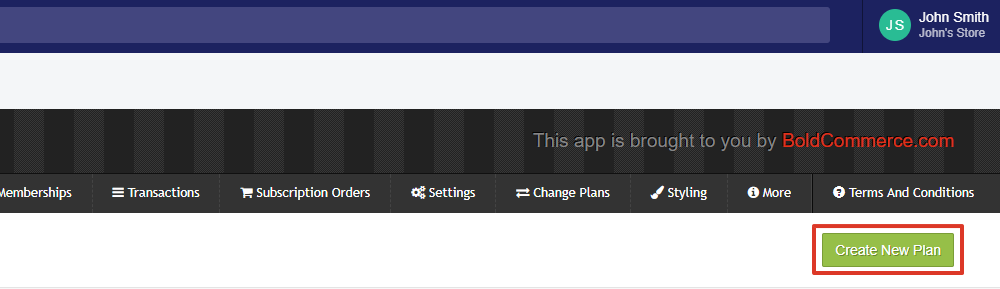
Select Create New Plan.
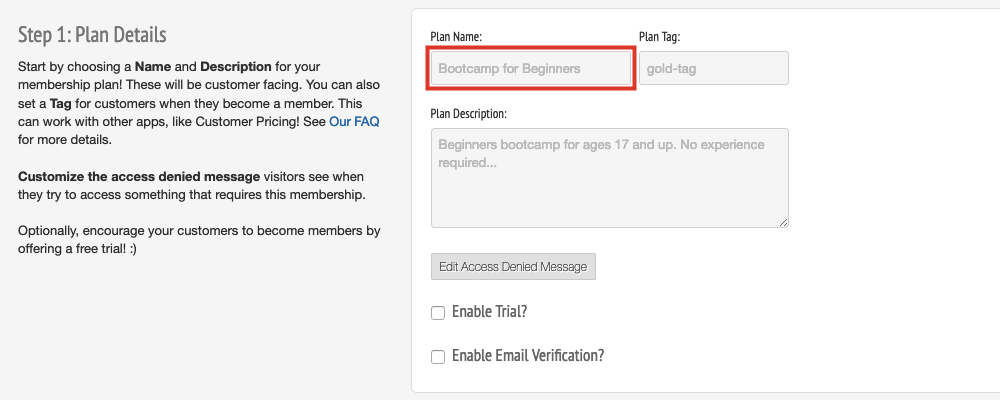
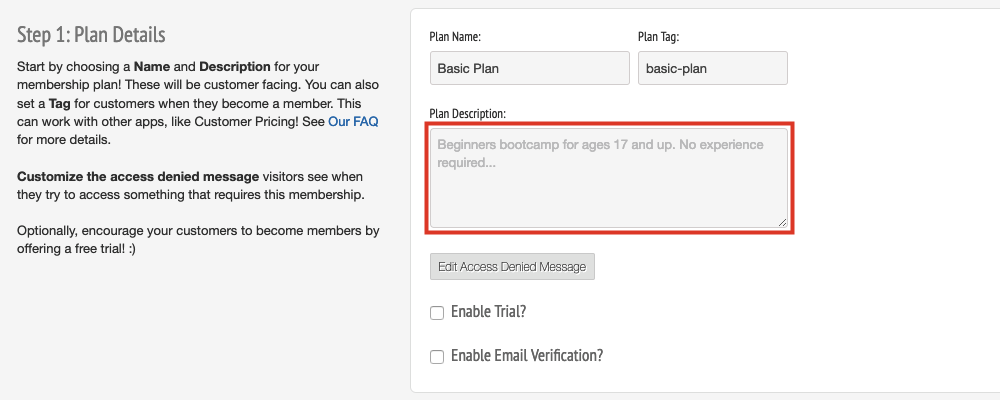
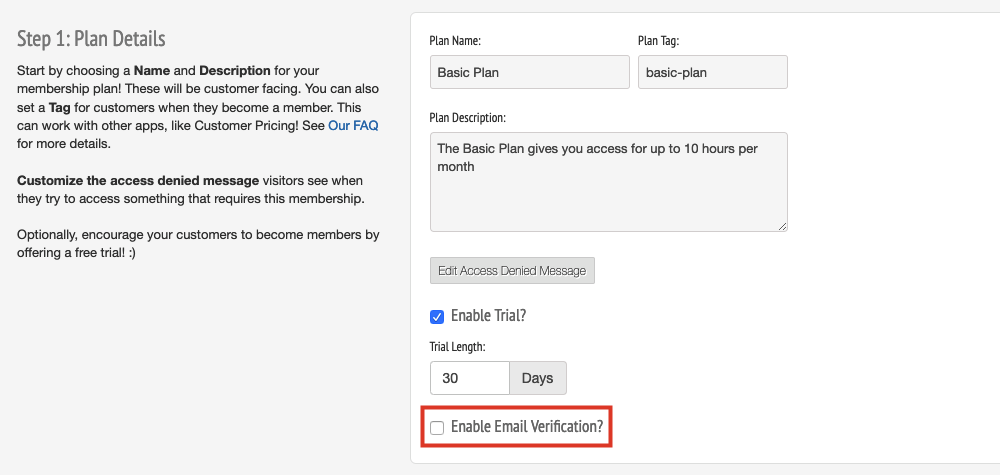
Enter a Plan Name.
Note: This is the name that your customers see. If you intend to offer more than one plan, make sure to create unique titles for each plan (i.e. Bootcamp for Beginners, Intermediate Bootcamp, etc.).
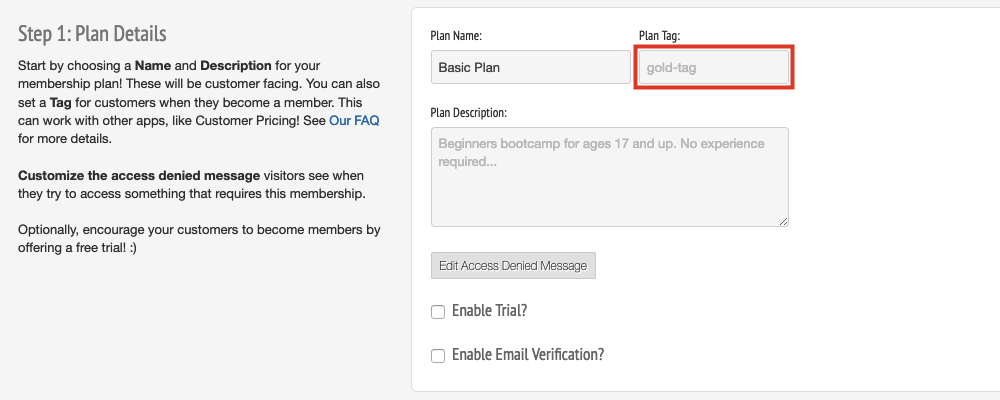
Enter a Plan Tag.
Note: This is the tag that is used to identify which of your customers belong to this plan. Memberships automatically tags your customers within their Shopify customer account when they purchase this plan.
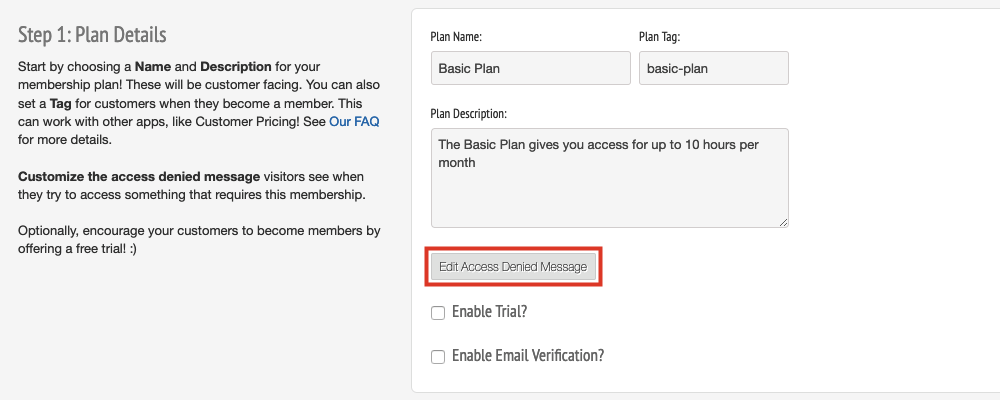
Enter a Plan Description.
Optional: Select Edit Access Denied Message to change the text.
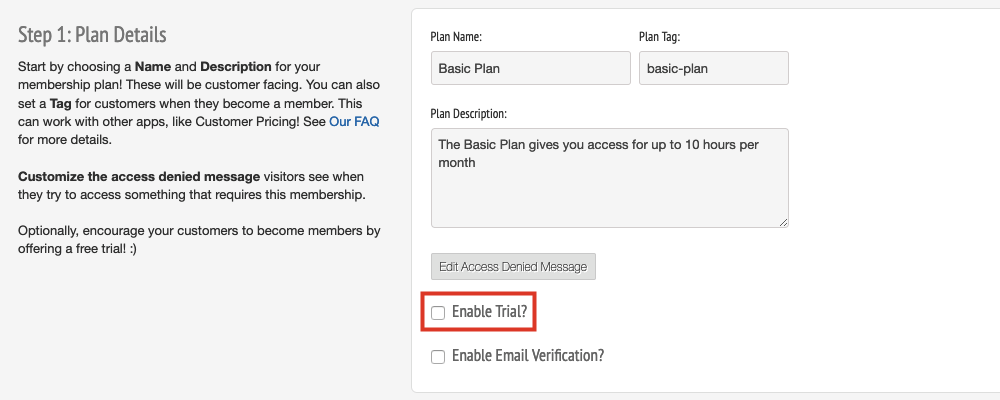
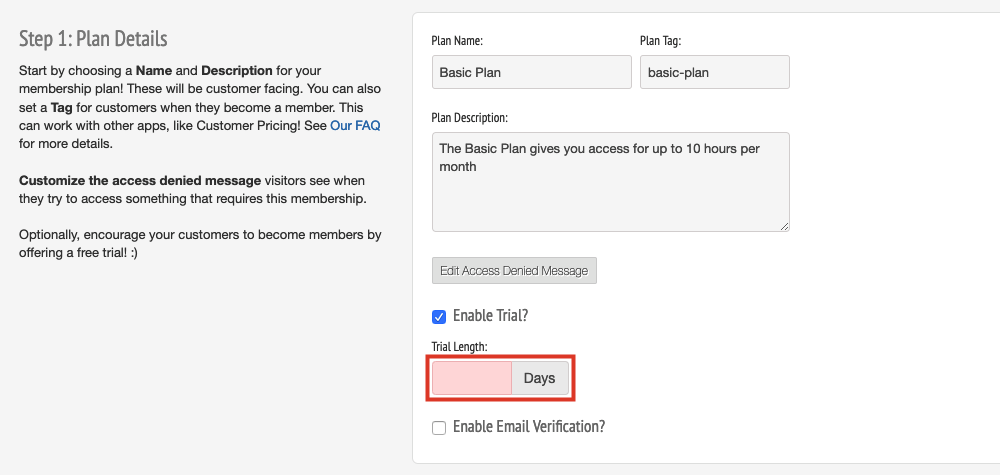
Optional: Select Enable Trial?.
Optional: Enter the Trial Length.
Select Enable Email Verification?.
Note: Enabling this option forces the customer to verify their email address when they go to sign up.
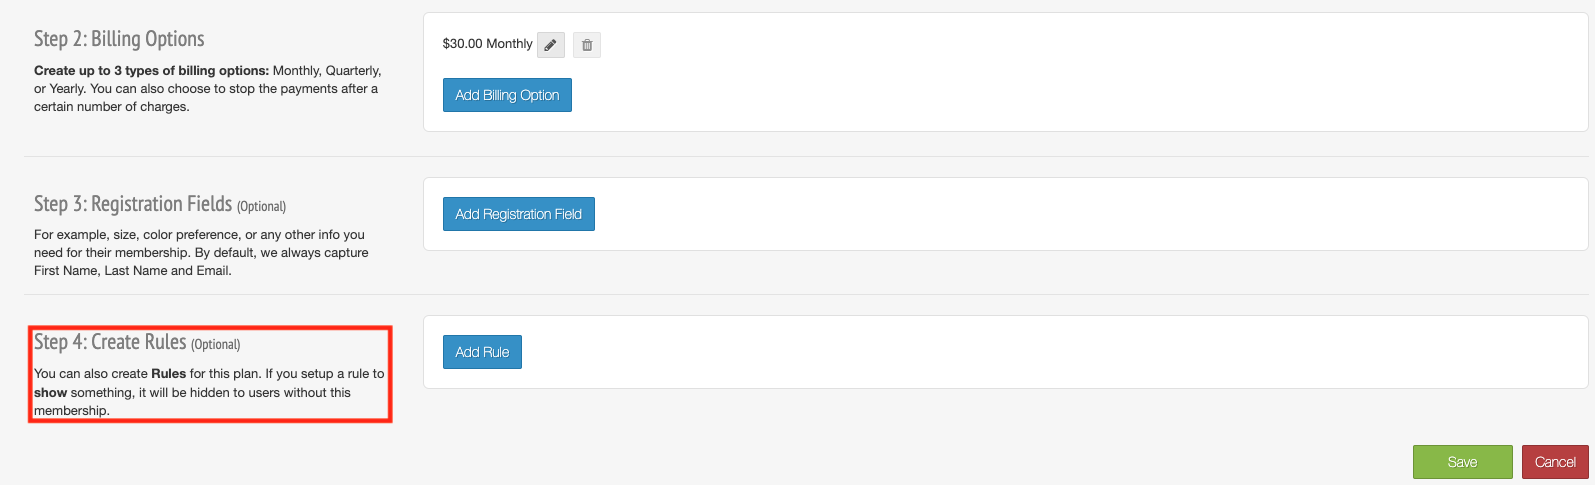
Enter Cycle Pricing to set the fee for this plan.
Note: This is how much your customers pay for this membership upon each billing cycle based on your store's default currency. The dollar ($) symbol appears beside the input box, however, the amount that you enter in reflects on the membership details in your store's default currency. Example: If you enter a value of 10 for a store that the default currency is set to Euros, the membership costs 10 Euros (€10).
Select a Billing Cycle.
Enter How many payments.
Note: Deselect Forever and enter a number in the box to the left of it to limit the number of payments to a specific number. Leave Forever selected to have the payments continue until the subscriber cancels.
Select the Checkmark to add this billing option.
Optional: Select Add Billing Option to add another option.
Repeat Steps 12 - 16 until you have added all billing options.
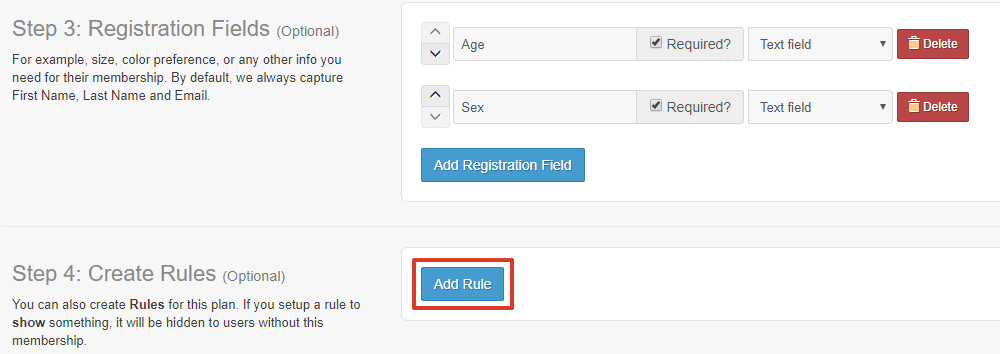
Select Add Registration Field to collect additional information from your subscribers.
Note: Registration fields are only able to be created in the following 2 types: Text Field and Multi-Line Text Area.
First name, last name, and email address automatically appears, so they don't need to be added with registration fields. You are not able to adjust these fields, however you can re-order your created fields.
Optional: Select Add Rule to add rules to the plan.
Note: This can be used to show specific products, collections, etc. to these members only. The plan rules are set from the perspective of a member. This means that if you want to hide content from non-members, you need to create a Show rule for the members.
Please visit Create Members Only Content in Bold Memberships for more information on which rules are available and steps for setting up each rule within a membership plan.
Select Save.
Note: You can test your plan rules by inviting yourself to a free membership plan.


Once your plan is set up, add a membership Widget or Buy Button to a page so your customers can sign up. For more information, please visit:
FAQs
Can I charge an initial amount for our Memberships plans?
This can only be done by manually changing the customer's plan. The customer would then have to accept the new billing on their end in order to continue being charged.
For example: If you want to charge $5 for the first month, then $10 per month afterwards, you can set the plan cost to 5 dollars per month when creating your plans. After the customer has been charged for their first month, you can manually change the customer's billing within Memberships under the Memberships tab.
Can I hide pages from some customers and let others see those pages?
Bold Memberships allows you to create rules that are referred to as Show and Hide rules in each membership plan created within the app. These rules allow you to either show or hide content based on if a customer is tagged or not tagged with a tag that is used in the membership plan.
When creating or editing a membership plan, a show or hide rule can be created under Step 4: Create Rules.
Show rule - When a Show rule is used in a membership plan, only logged in customers with the tag for this plan are able to see the rules selected. All other customers are not able to see the content. The tag is added to the customer's account either upon successful signup or when manually invited to a free membership plan.
Hide rule - When a Hide rule is used in a membership plan, only logged in customers with the tag for this plan are not able to see the content. The content is visible to all others. The tag is added to the customer's account either upon successful signup or when manually invited to a free membership plan.
Please visit Create Members Only Content in Bold Memberships for more information and steps on creating members only content rules within Bold Memberships.
Where do active members login on my storefront?
Customers can access their membership by simply logging into their Shopify customer account on your storefront, using the same email address that was used when purchasing the membership, or when receiving the free membership.
Please ensure your Shopify customer accounts are set to optional or required on your storefront so this option is available to your customers.
Bold Memberships does not require a separate login page for members to log into their account on your storefront, as the membership details are controlled through a customer tag which shows or hides content on your storefront.
For more information on enabling Shopify customer accounts, please visit Shopify's help article Enabling or disabling customer accounts.