Legacy Liquid Code Installation Instructions
The instructions on this page are to be used as a record for stores who have installed Bold Discount's features using Liquid code in the past, generally before December 2023.
If you are installing Bold Discount's features for the first time, please use the instructions outlined in our Installation Guide for Bold Discounts.
Note: Bold Discounts does not require an installation to place your products on sale. These steps were only necessary if you wanted to use the Sales Icons, Sales Clocks, or the Duplicate & Hide feature for the Bold Upsell integration.
Legacy Liquid code install instructions
Install the Sales Clock (vintage themes)
Step 1: Add Snippet File
From the Shopify admin, select Online Store.
Select Actions.
Duplicate the theme you would like the installation completed on.
Select Edit Code on the duplicated theme.
Under Snippets, find the shappify-sales-clock.liquid file.
If the file does not exist:
Select Add a new snippet.
Enter the correct snippet name.
Select Create snippet.
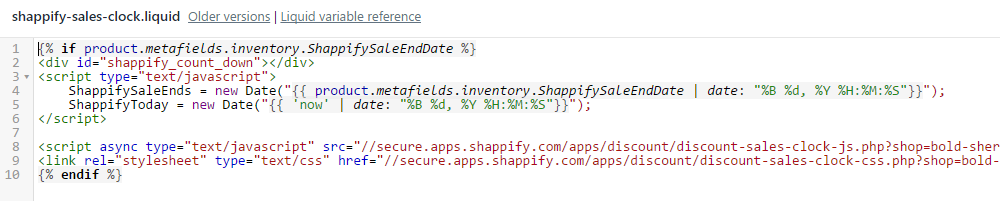
Copy and paste the shappify-sales-clock code into the file.
{% if product.metafields.inventory.ShappifySaleEndDate %}
<div id="shappify_count_down"></div>
<script type="text/javascript">
	ShappifySaleEnds = new Date("{{ product.metafields.inventory.ShappifySaleEndDate | date: "%B %d, %Y %H:%M:%S"}}");
	ShappifyToday = new Date("{{ 'now' | date: "%B %d, %Y %H:%M:%S"}}");
</script>

<script async type="text/javascript" src="//secure.apps.shappify.com/apps/discount/discount-sales-clock-js.php?shop={{ shop.permanent_domain }}"></script>
<link rel="stylesheet" type="text/css" href="//secure.apps.shappify.com/apps/discount/discount-sales-clock-css.php?shop={{ shop.permanent_domain }}" />
{% endif %}
Select Save.
Step 2: Place the Sales Clock
Under Templates, select product.liquid.
Note: If your theme contains Sections, you may find this code within product-template.liquid under Sections instead.
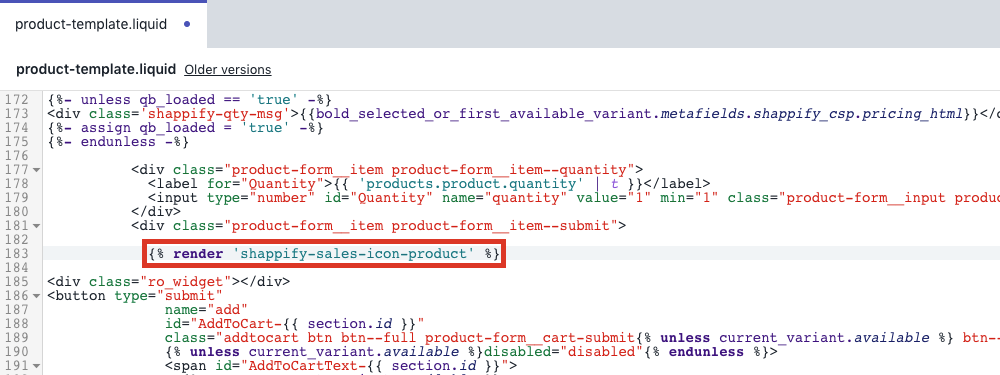
Copy and paste this code where you would like the countdown timer to appear:
{% render 'shappify-sales-clock' %}Note: This code can be placed anywhere, but we recommend it be placed above the product title, below the product price or the Add to Cart button.
Select Save.

Install the Sales Icon (legacy)
Step 1: Add Snippet Files
From the Shopify admin, select Online Store.
Select Actions.
Select Edit code.
Under Snippets, look for the shappify-sales-icon-product and shappify-sales-icon-collection liquid files.
If a file does not exist:
Select Add a new snippet.
Enter the correct snippet name.
Select Create snippet.
Copy and paste the code for each snippet file:
{% if product.metafields.inventory.ShappifySale == "true" %}
<img class='shappify-sales-icon-product' src='//secure.apps.shappify.com/apps/discount/icons/default/sale8.png' /><style>
.shappify-sales-icon-product{
 }
</style>
{% endif %}
{% if product.metafields.inventory.ShappifySale == "true" %} <img class='shappify-sales-icon-collection' src='//secure.apps.shappify.com/apps/discount/icons/default/sale10.png' /><style> .shappify-sales-icon-collection{ } </style> {% endif %}Select Save.

Step 2: Place the Sales Icon
Under Templates, select product.liquid.
Note: If your theme contains Sections, you may find this code within product-template.liquid under Sections instead.
Copy and paste this code where you would like the icon to appear:
{% render 'shappify-sales-icon-product' %}Note: You can place this code anywhere in the theme file. We strongly recommend placing it above the product image.
Select Save.
Under Templates, select collection.liquid.
Note: If your theme contains Sections, you may find this code within collection-template.liquid under Sections instead.
Copy and paste this code where you would like the icon to appear:
{% render 'shappify-sales-icon-collection' %}Note: You can place this code anywhere in the theme file. We strongly recommend placing it above the product image.
Select Save.
Step 3: Add CSS Styling in Bold Discounts
From within the Bold Discounts app admin, select Sales Icon.
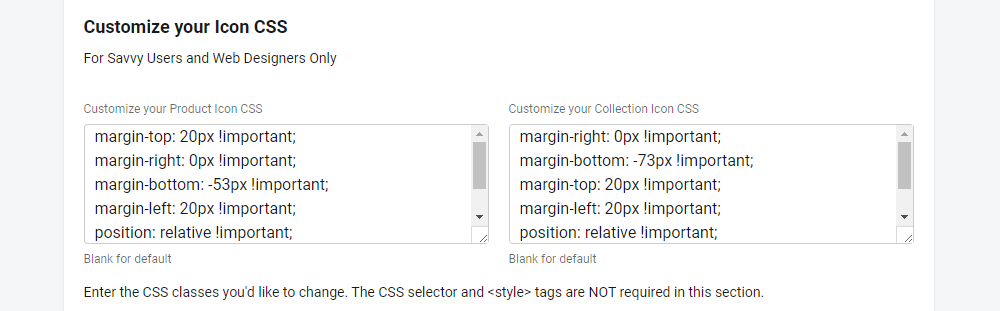
Under Customize Your Icon CSS, add your custom code:
Note: We recommend using this code if your icon is over-top of the image. It is otherwise customizable if you are comfortable with CSS code.
Product Icon CSS
margin-top: 20px !important;
margin-right: 0px !important;
margin-bottom: -53px !important;
margin-left: 20px !important;
position: relative !important;
float: left;
z-index: 1000 !important;
Collection Icon CSS
margin-right: 0px !important;
margin-bottom: -73px !important;
margin-top: 20px !important;
margin-left: 20px !important;
position: relative !important;
float: left;
z-index: 1000 !important;
Select Save.
Install the Duplicate and Hide (legacy)
Step 1: Edit search.liquid
From the Shopify admin, select Online Store.
Select Actions.
Select Edit code.
Under Templates, select search.liquid.
Note: If your theme contains Sections, you may find this code within search-template.liquid under Sections instead.
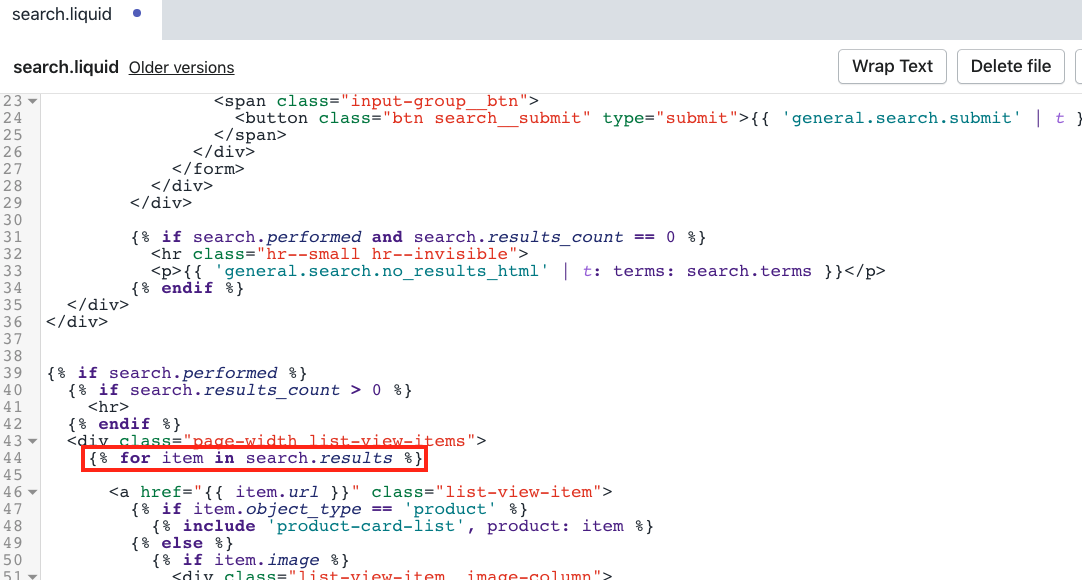
Find each instance of this code:
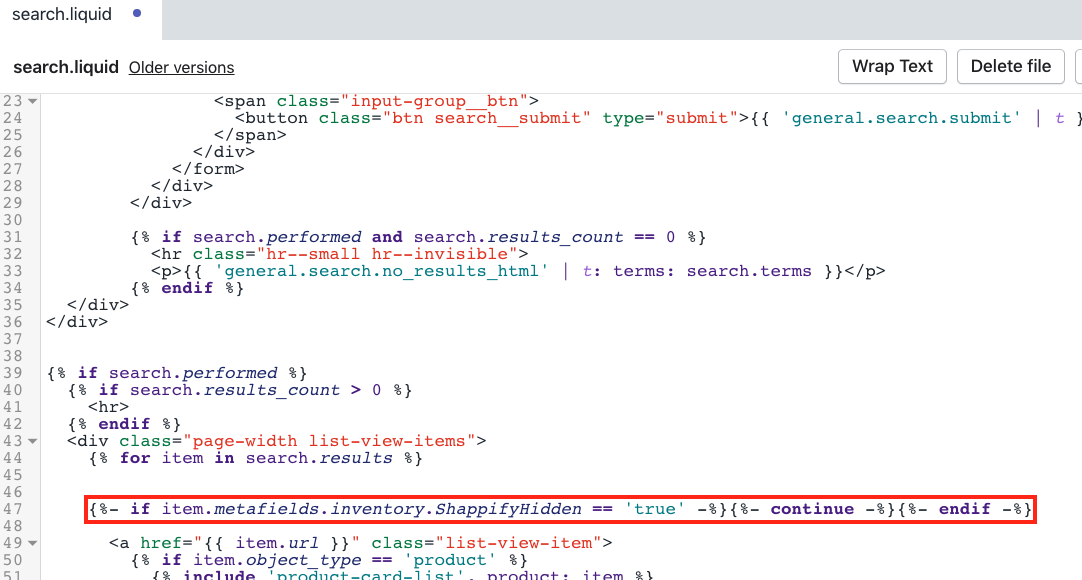
{% for item in search.results %}Add this code below each instance:
{%- if item.metafields.inventory.ShappifyHidden == 'true' -%}{%- continue -%}{%- endif -%}Select Save.
Step 2: Edit collection.liquid
From the Shopify admin, select Online Store.
Select Actions.
Select Edit code.
Select collection.liquid under Templates.
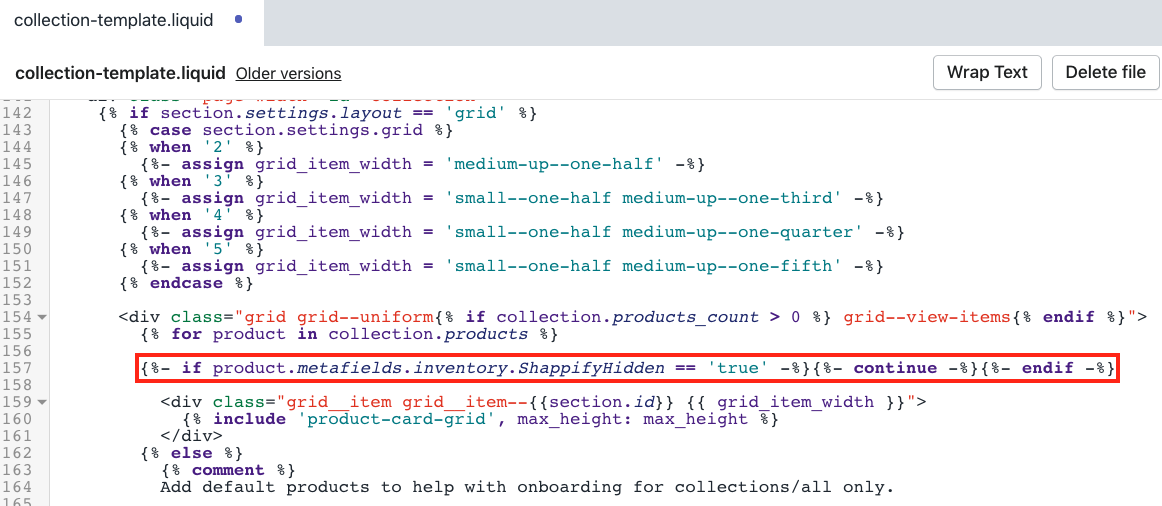
Note: If your theme contains Sections, you may find this code within collection-template.liquid under Sections instead.
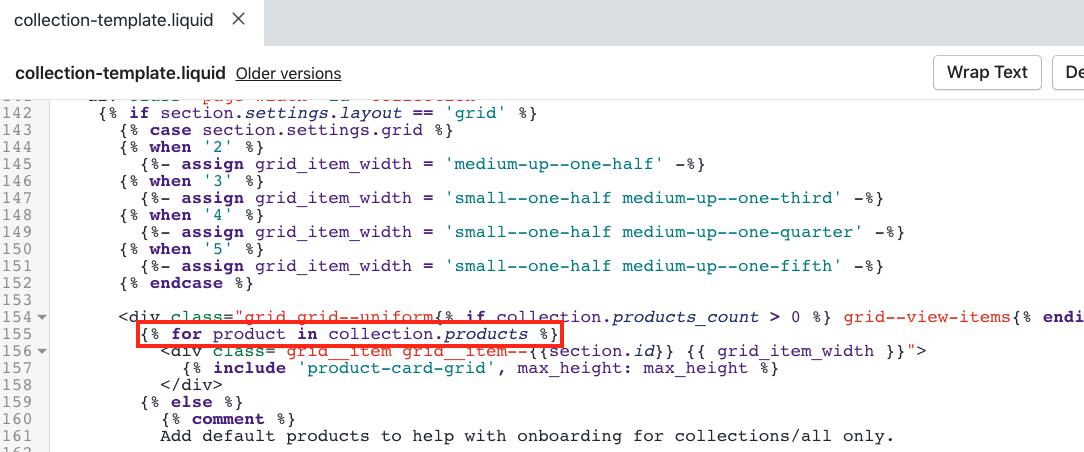
Find each instance of this code:
{% for product in collection.products %}Some themes will use a slight variation of this code. If you can't find it, try looking for the following instead:
{% for prod in collection.products %}
{% for product in collections.all.products %}
{% for product in products limit: limit %}
{% for product in product-list.products limit: for_limit %}
{% for product in collection.products limit: settings.pagination_limit %}
{% for product in collection.products limit: number_of_products_to_fetch %}
{% for product in collection.products limit: number_of_related_products %}
{% for product in collections[settings.frontpage_collection].products offset:1 %}
{% for product in collection.products limit: settings.products-per-page %}
Some themes will have this code in a file that is included into the collection.liquid file. Look to see if the theme has a product-loop.liquid or product-list.liquid in the Snippets folder, and see if the code is in there.
Add the following code below each instance:
{%- if product.metafields.inventory.ShappifyHidden == 'true' -%}{%- continue -%}{%- endif -%}Select Save.
Repeat Step 2.5 - 2.7 if this code exists within the index.liquid and related-products.liquid files.
Step 3: Edit product.liquid
From the Shopify admin, select Online Store.
Select Actions.
Select Edit code.
Select product.liquid under Templates.
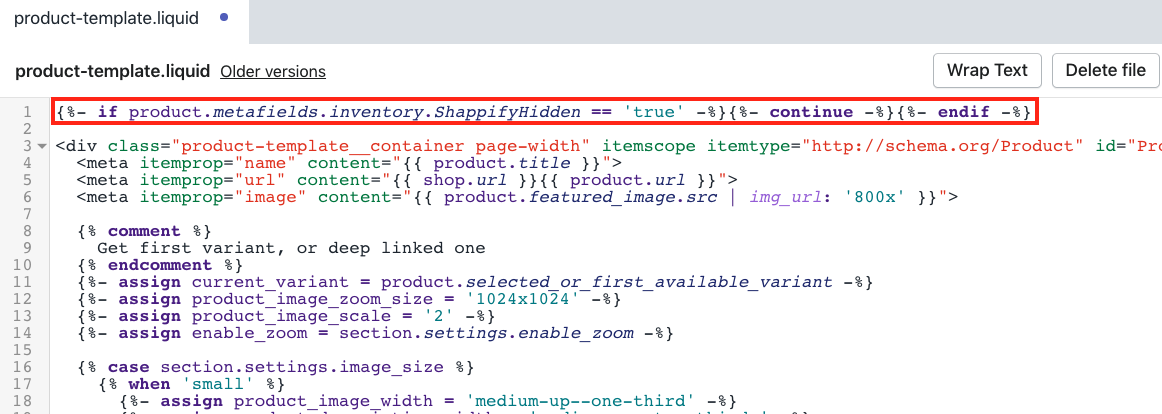
Note: If your theme contains Sections, you may find this code within product-template.liquid under Sections instead.
Add the following code to the top of the file:
{%- if product.metafields.inventory.ShappifyHidden == 'true' -%}{%- continue -%}{%- endif -%}Select Save.
Step 4: Edit theme.liquid
From the Shopify admin, select Online Store.
Select Actions.
Select Edit code.
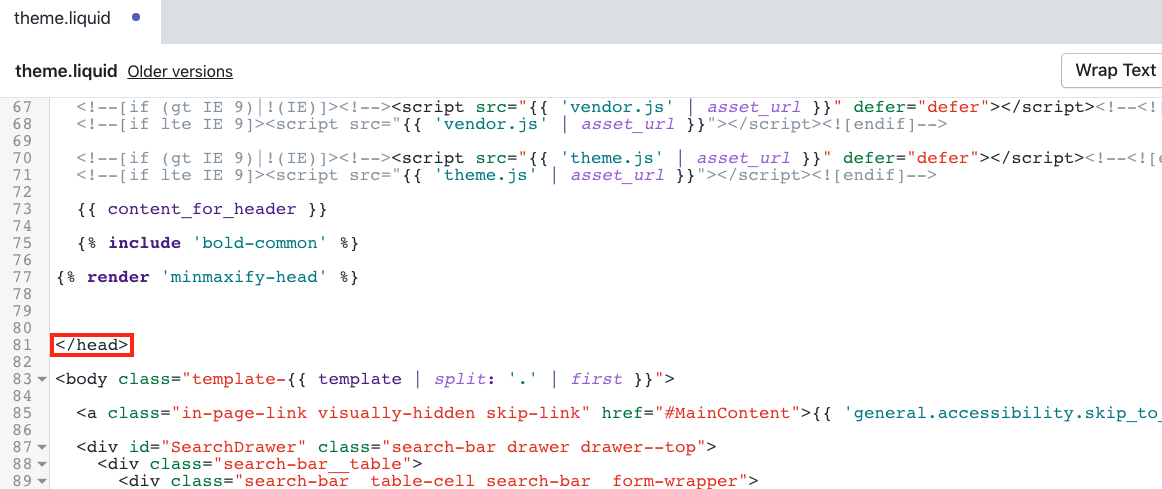
Select theme.liquid under Layout.
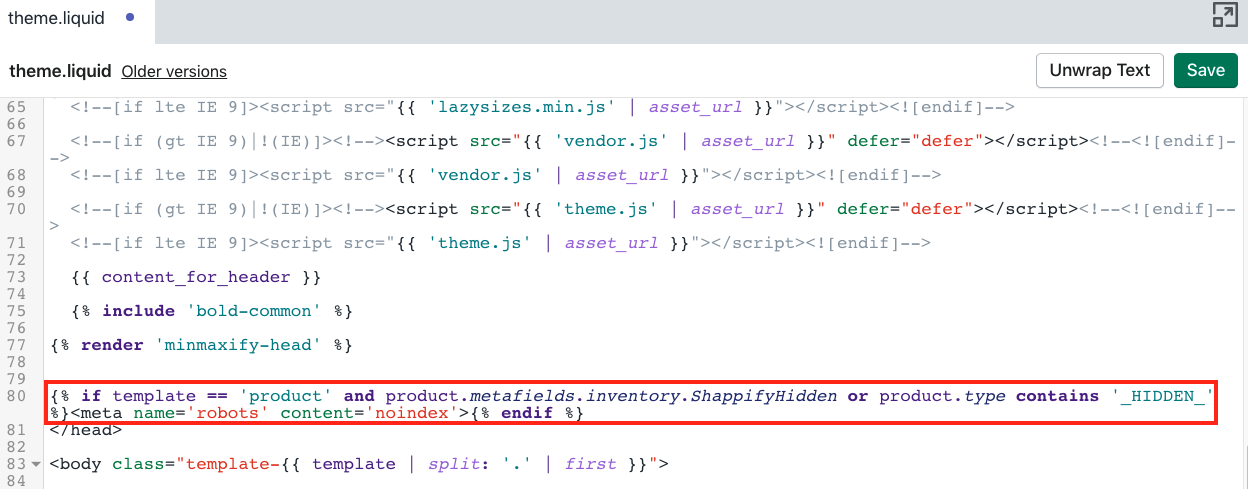
Find the </head> tag.
Add this code above it:
{% if template == 'product' and product.metafields.inventory.ShappifyHidden or product.type contains '_HIDDEN_' %}<meta name='robots' content='noindex'>{% endif %}Select Save.
Step 5: Edit cart.liquid
From the Shopify admin, select Online Store.
Select Actions.
Select Edit code.
Select cart.liquid under Templates.
Note: If your theme contains section you may find this code within cart-template.liquid under Sections instead.
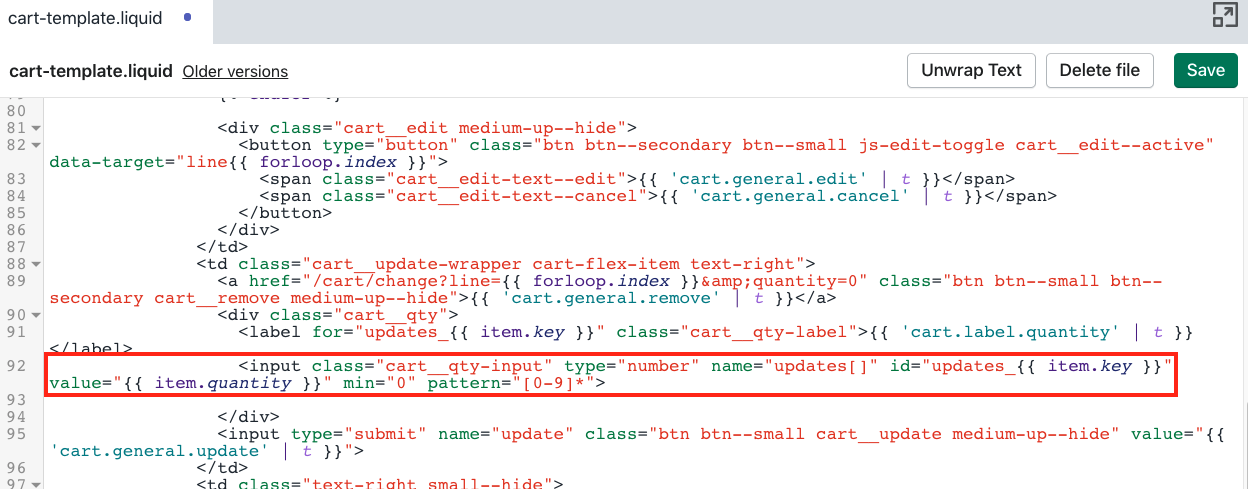
Look for a line that starts with <input containing value="{{ item.quantity }}
This code will be slightly different depending on the theme, but most of the time the line is an input element and has a name, class, type, and id.
Here are some examples of how this could look:
<input type="number" class="cart__quantity-selector" name="updates[]" id="updates_{{ item.id }}" value="{{ item.quantity }}" min="0" />
<input type="text" size="4" name="updates[]" id="updates_{{ item.id }}" value="{{ item.quantity }}" onfocus="this.select();" class="tc item-quantity" />
<input type="number" name="updates[]" id="Updates_{{ item.id }}" class="cart__quantity" value="{{ item.quantity }}" min="0" data-line="{{ forloop.index }}" />
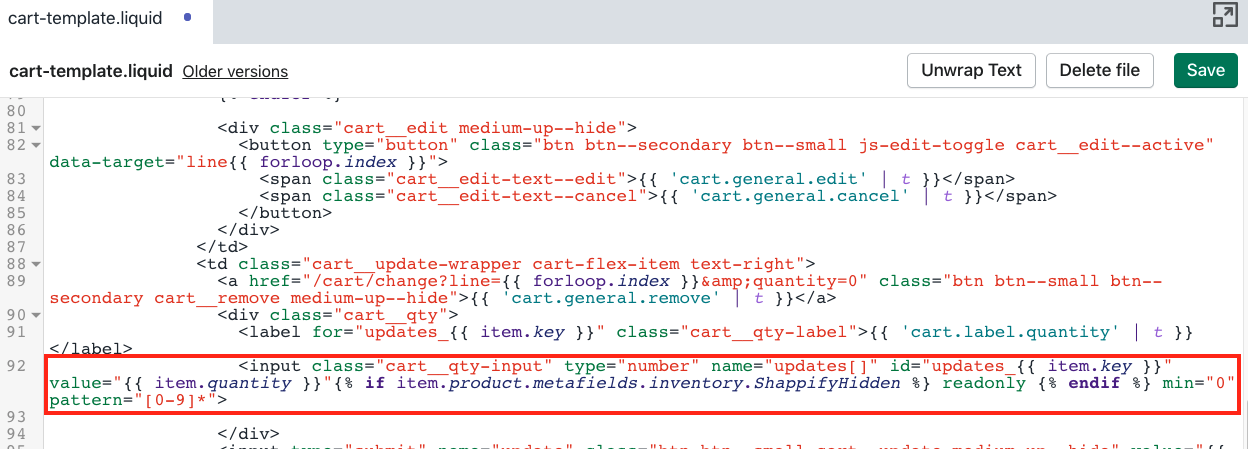
Right before the /> add this code:
{% if item.product.metafields.inventory.ShappifyHidden %} readonly {% endif %}The result should look something like this:
<input value="{{ item.quantity }}"{% if item.product.metafields.inventory.ShappifyHidden == "true" %} readonly {% endif %} />Select Save.