
Create a Funnel Offer
Funnels let you string offers together into a sequence. When a shopper accepts or declines the first offer, Bold Upsell automatically shows the next offer you have configured for that branch. This is the highest converting way to use Bold Upsell because every shopper sees an offer tailored to what they have already done in the cart.
When to use a funnel
Use a funnel when you want to:
Show a follow up offer if the shopper accepts the first one, such as a complementary product or a larger size.
Show a downgrade or alternative offer if the shopper declines the first one, such as a cheaper version or a small free gift.
Recover revenue from shoppers who say no to the initial offer.
Before you start
Make sure the Bold Upsell app embed is enabled on your active theme. See Activate Bold Upsell.
How funnels work
A funnel always starts with Step 1, which is the offer the shopper sees first. From there each step has two branches:
Accept branch - what to show if the shopper adds the previous offer to their cart.
Decline branch - what to show if the shopper closes or rejects the previous offer.
You can add another offer on either branch, or you can end the branch. A branch that ends simply returns the shopper to their normal cart or checkout flow. You can build up to the maximum number of steps allowed by your plan, with different products and discounts at each step.
Step 1: Start the funnel
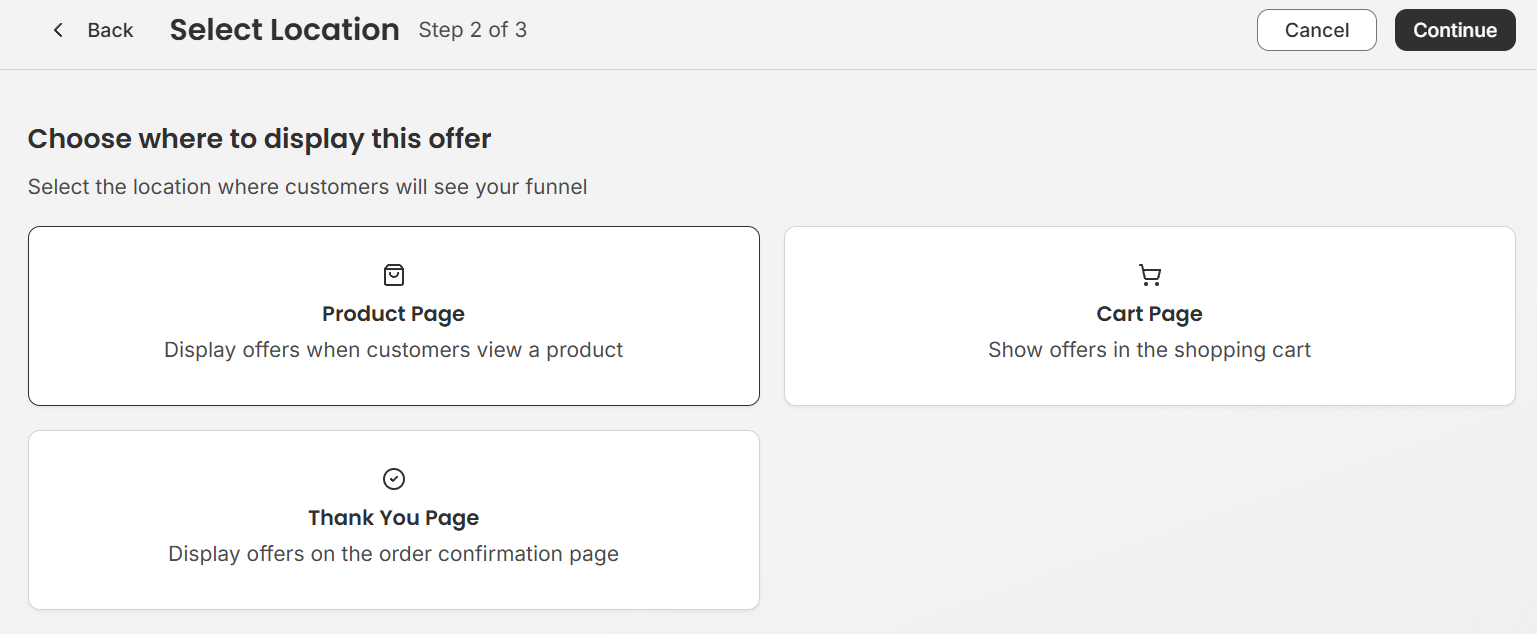
From the Manual Offers page, click Create Offer. Select Funnel as the offer type and choose the location where customers will see your funnel.
Step 2: Configure the funnel flow
On the Funnel configuration page, fill in the following details.
Name your offer
Give the offer an internal name so you can identify it later in the Manual offers list. Shoppers will never see this name.
Trigger
The trigger is the product(s) the shopper must be viewing for the funnel to appear.
Click Select Products.
Pick one or more products, specific variants, or an entire collection.
Click Select.
Funnel offers
Inside the funnel builder, click into the Offer 1 card and configure the first offer the shopper will see.
Each step has an Accept arrow and a Decline arrow leading out of it.
On the Accept branch, add an offer the shopper is likely to want next. Common patterns:
Add the matching accessory after the main item is accepted.
Add a warranty or care kit after a higher value item is accepted.
Offer a larger size or quantity for an additional discount.
On the Decline branch, add a softer or cheaper offer to try to recover the sale. Common patterns:
A lower price alternative to the original offer.
A free gift with a minimum cart value.
A small bundle discount instead of a single product upsell.
Step 3: Configure the funnel settings
Click the Settings tab where you can configure your settings for the offer. This includes
Title and description - You can choose to use the default copy or write your own. Write a clear, compelling title (e.g., "Customers also bought") and an optional short description to explain the offer.
Allow quantity selection - let customers choose how many of the offer product to add.
Allow customers to add more than one offer product - when the pop-up style is chosen, this setting keeps the pop-up offer open so that customers can accept multiple offer products at once instead of closing the pop-up after the first offer is accepted.
Display style - If you select the cart or product page location, you can choose between the carousel and list styles of the offer. These locations can only display the funnel offer as a pop up.
Note: If you select the post purchase location then you will have the default post purchase styling.
Step 4: Save and publish
When the funnel is complete, click Create Offer. The funnel becomes active immediately for the trigger you configured. You can pause it at any time from the Offers table by toggling its status off.
Editing or disabling a funnel
Open the Manual Offers page, find the funnel by name, and click Actions icon > Edit to change any step, trigger, or branch. To pause it, toggle the funnel off in the Manual offer page under Actions > Deactivate. To remove it permanently, use Delete from the row actions menu. Edits take effect immediately for new shoppers.
Tips for high performing funnels
Keep Offer 1 generous, since accepting Offer 1 unlocks the rest of the funnel for that shopper.
Use the Decline branch as a recovery tool. A small thank you offer on decline often outperforms a heavy discount.
Preview the funnel using the Offer and Trigger preview buttons in the Offers table to confirm every step has the right products.