
Create an Offer
Every offer in Bold Upsell is built using the same three-step flow: pick an offer type, choose where it shows up, and configure the details. This article walks through that flow so you can create any kind of manual offer with confidence.
Pro-Tip: If you want Bold to generate offers for you automatically using AI, use Smart Offers instead.
Before you start
-
Bold Upsell is installed and the app embed is enabled in your theme. See Activate Bold Upsell.
-
You are on a plan that includes the offer type you want to create. See Offer Types Overview.
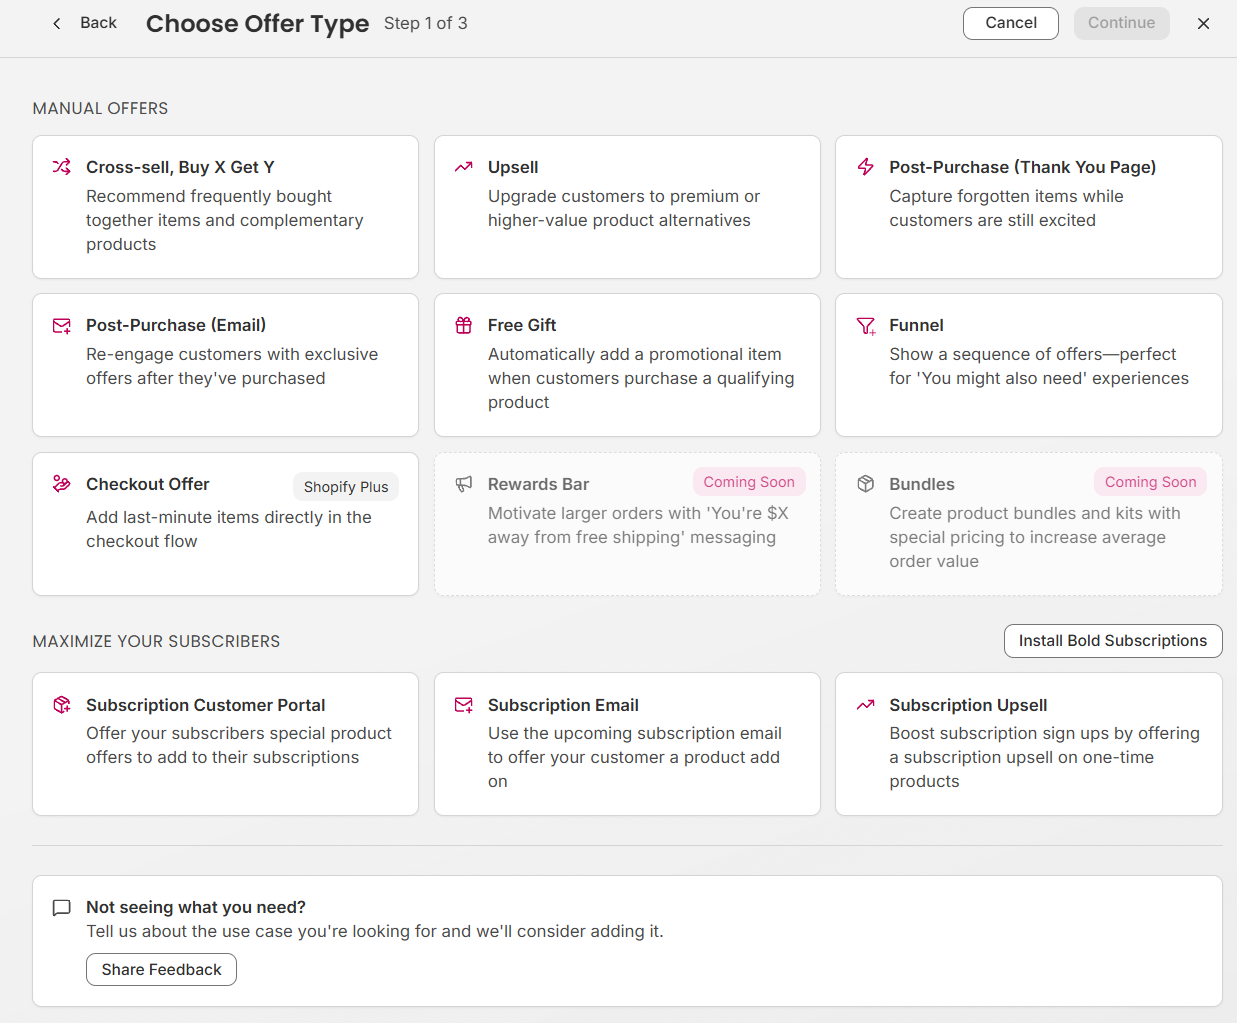
Step 1: Choose an offer type
From the Bold Upsell dashboard, go to Manual Offers and click Create New Offer. Pick the type that matches the experience you want to create:
-
Upsell - replace a product in the cart with a higher-value version.
-
Cross-sell or Buy X Get Y - recommend a complementary product alongside what the customer is buying.
-
Free Gift - automatically add a free or discounted product when conditions are met. Note if you want to offer a choice of free gifts then please create a Cross-sell/Buy X Get Y and set the discount to Free.
-
Funnel - chain multiple offers together based on whether the customer accepts or declines.
-
Post-purchase - show an offer on the order confirmation page after checkout.
-
In-checkout - show an offer directly inside Shopify checkout.
-
Subscription Upsell - encourage customers to upgrade a one-time purchase to a subscription.
See Offer Types Overview for full details on each type.
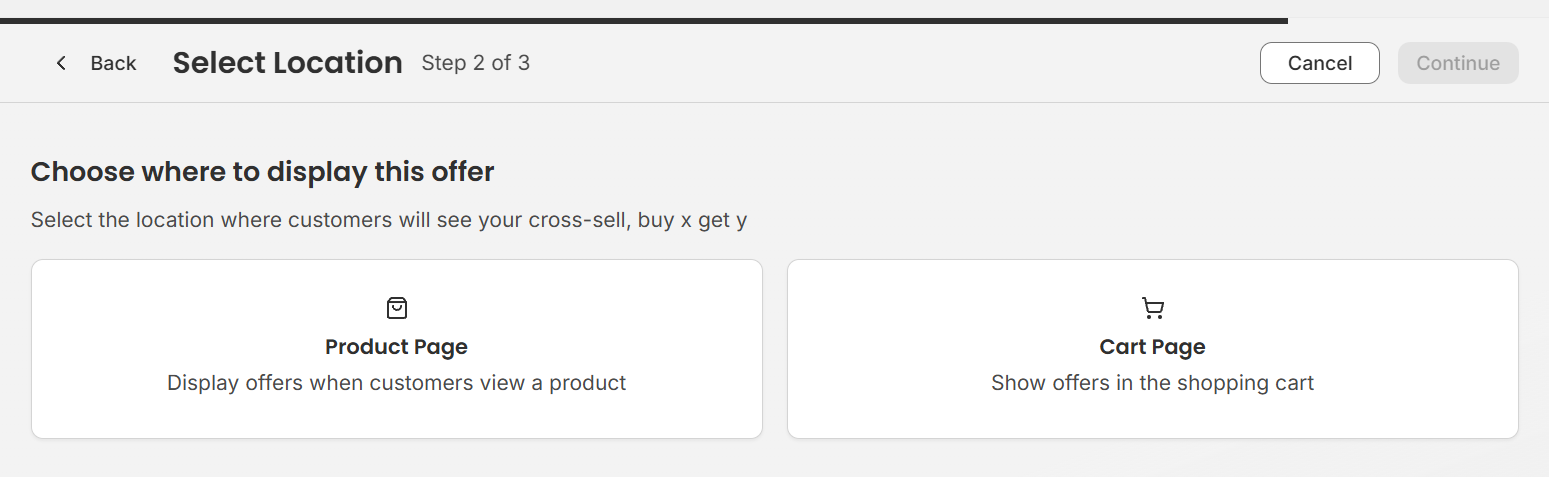
Step 2: Choose a location
The location controls where on your store the offer appears. Available locations depend on the offer type you picked - for example, true upsells only run on the product page pop-up, while cross-sells can run in many places.
Common locations include:
-
Product page pop-up - appears when a customer adds a triggering product to their cart.
-
Product page embedded - displays inline on the product page.
-
Cart drawer - shows inside the cart drawer alongside cart items.
-
Cart page - shows on the dedicated cart page.
-
In-checkout - shows during Shopify checkout.
-
Post-purchase - shows on the order confirmation page.
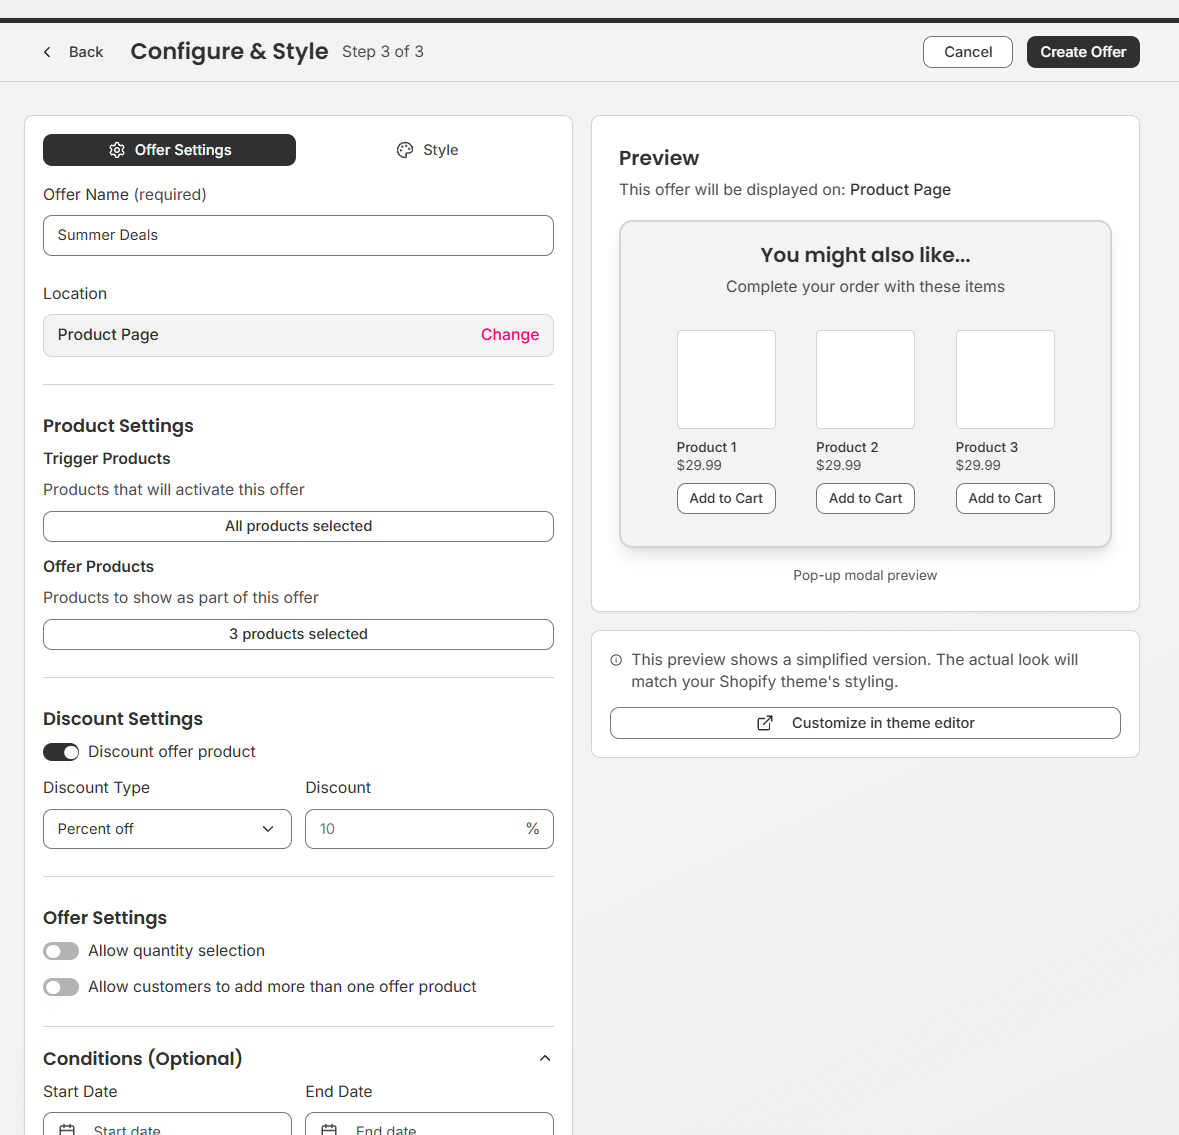
Step 3: Configure and publish
Give your offer a name, set its trigger, and choose the products it should recommend.
-
Internal name - only visible to you in the offers list.
-
Trigger products - the products, variants, or collection that cause the offer to appear.
-
Offer products - what you want to recommend, upsell, or cross-sell.
-
Title and description - the customer-facing text shown in the offer.
-
Optional settings - date range, discounts, quantity matching, and other type-specific options.
Use the live preview on the right to see how the offer will look on your storefront. When everything looks right, click Save Offer to publish it.
Note: New offers go live immediately on your storefront once saved, provided the Bold Upsell app embed is enabled.
Managing your offers
All offers you create are listed under Manual Offers. From there you can enable or disable an offer, edit it, duplicate it, or delete it.
What's next
-
Pick the right type for your goal - see Offer Types Overview.