
Create an In-Checkout Offer
In-Checkout offers allow you to display a cross-sell offer in the Shopify checkout. These offers can be customized using your theme editor, and can be displayed in a checkout location of your choice.
This article will guide you, step-by-step, on how to properly create an In-Checkout offer.
Note: This feature is only available to Shopify Plus stores on a Complete or Unlimited Upsell plan.
Video Walkthrough
Step 1: Add the In-Checkout App Block to your Theme
-
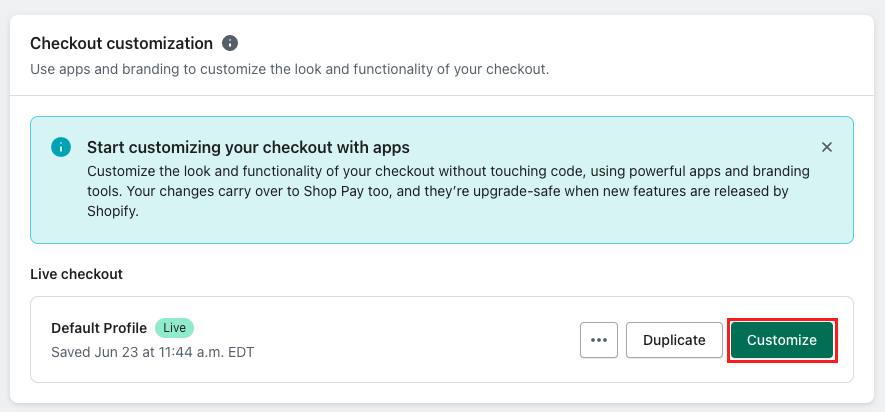
From within your Shopify admin, navigate to Settings > Checkout.
-
In the Checkout customization section, select Customize.
-
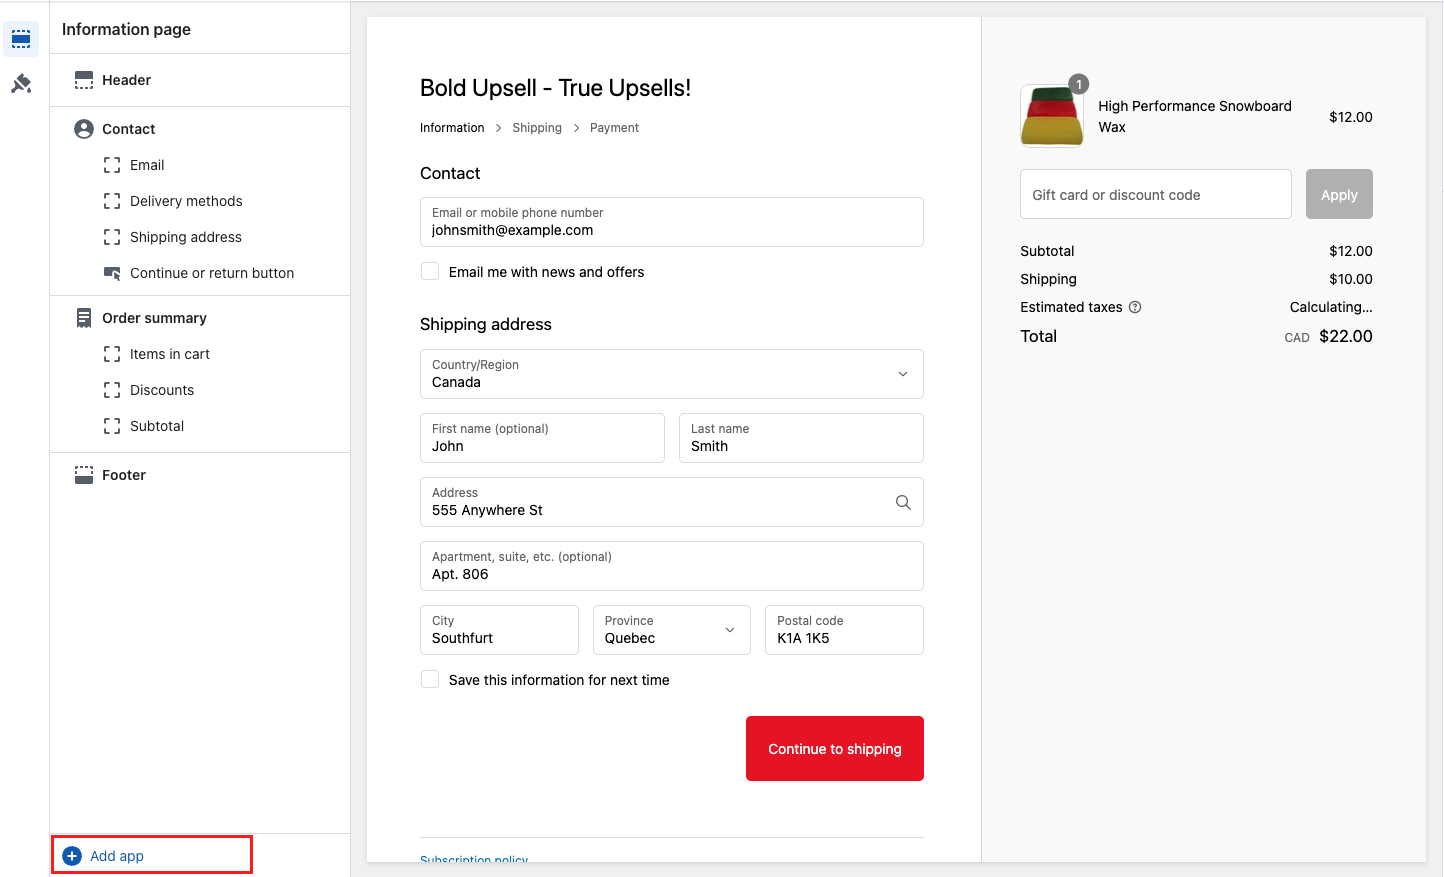
On the customization page in the bottom left corner, select Add app.
-
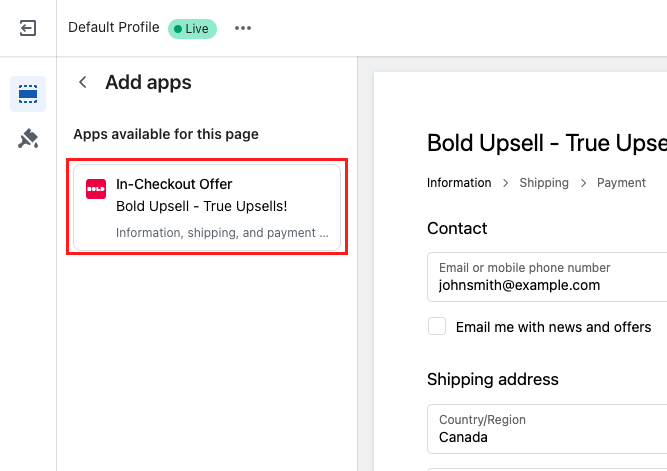
Select In-Checkout Offer.
-
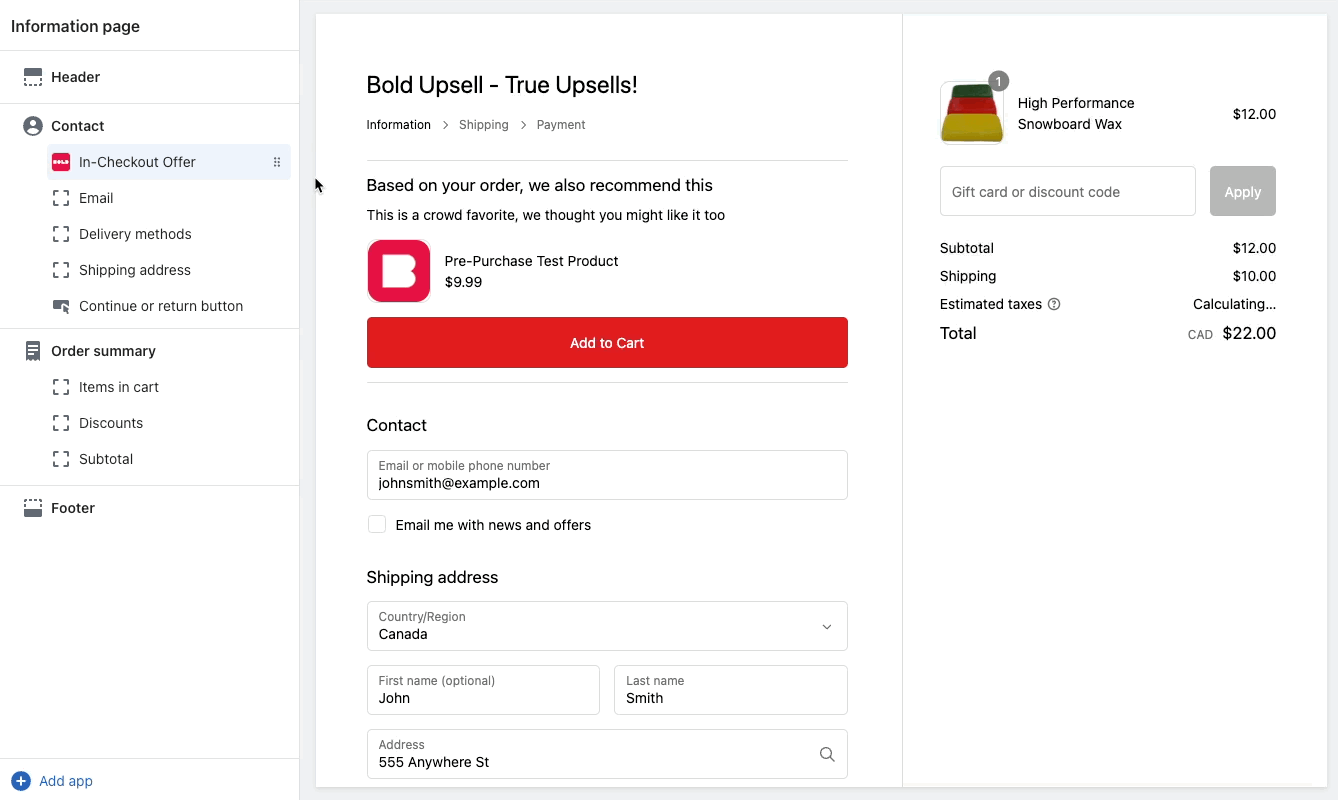
Optional: Change the location of your offer by dragging and dropping the app block to the position you’d like it to be displayed.
-
Optional: Customize your Offer title, Offer description, and Quantity Selector.
Note: The title and description entered here is displayed only if multiple In-Checkout offers are present, or if a title and description are not entered in your individual offer as shown in Step 2 below. The Quantity Selector displays if it is set to true here, or if quantity selection is enabled in the individual offer.
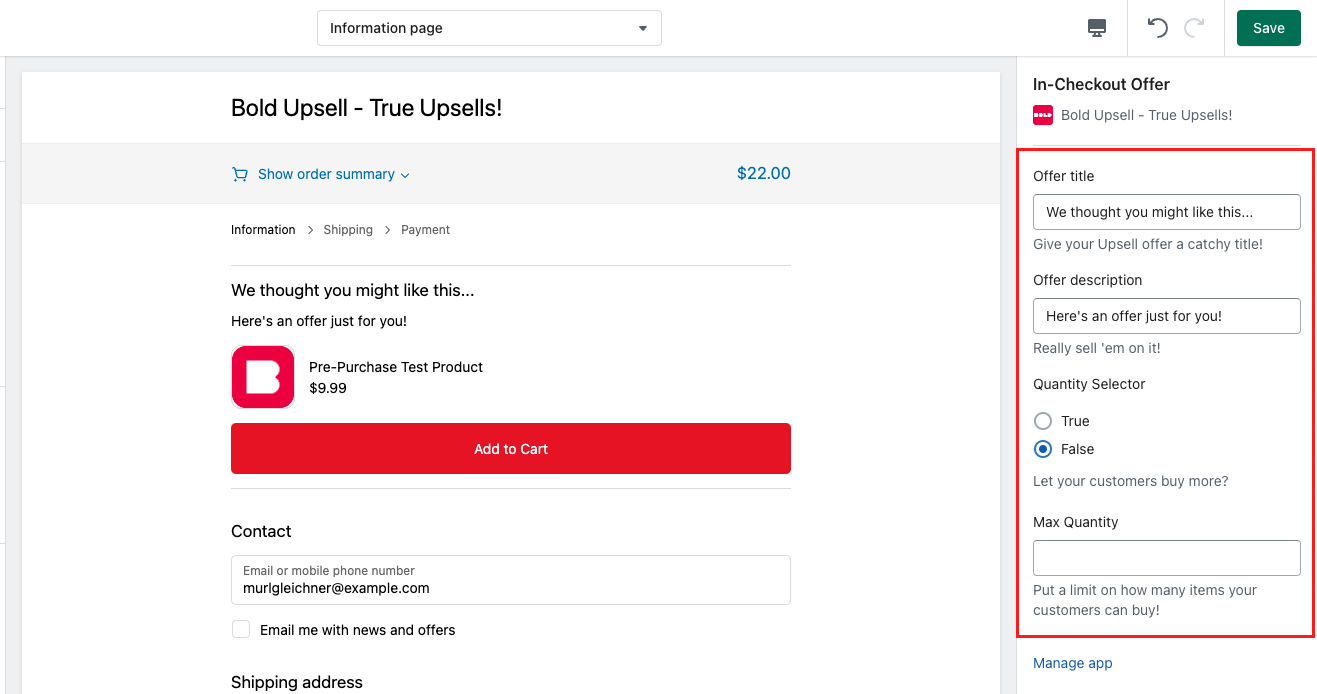
Step 2: Create the Offer
-
In Bold Upsell, navigate to Manual Offers, and click Create New Offer.
-
Enter an internal name for your offer.
-
Click Set a trigger.
-
Ensure the Trigger Preset field is set to Custom Upsell Trigger.
-
Expand the Trigger location dropdown menu, and select In-Checkout Widget.
-
Under Trigger products, select one of the two options:
-
Trigger an upsell on specific products: This allows you to select specific products to act as the trigger product. If this option is selected, proceed to step #7.
-
Trigger an upsell on every product: This sets all the products on your store as a trigger for the offer. If this option is selected, skip to step #10.
-
-
Click Select Products, and select your products, variants or collections you would like to trigger.
-
Click Review Selection, then Save Selection.
-
Optional: Enter a Trigger quantity.
Note: This only shows the offer if your customer has this amount of trigger products in the checkout.
-
Click Set an offer.
-
Enter a Title and Description.
-
Click Select Products, and select your products, variants or collection.
Note: For ease of viewing in the checkout, we recommend choosing three or fewer offer products.
-
Click Review Selection, then Save Selection.
-
Optional: Enable Allow customers to set quantities in the offer.
-
Optional: Click Set date range and enter a Start and End date.
-
Optional: Click Set cart price and enter a Min cart total and Max cart total.
-
Optional: Apply any of the Additional Options.
Note: Read more about these settings in Upsell Offers Overview.
-
Click Save Offer.