Bulk Import Prices with Quantity Breaks into Custom Pricing
Custom Pricing provides you with the flexibility of bulk importing your wholesale discounts and Quantity Breaks into Detailed Pricing.
Using the Shopify product export feature and a spreadsheet editing program (Excel, Google Sheets, etc.), you can map out your discounts for each price tier, tag, and product, and then upload your pricing using a CSV file.
Requirements
All products must have a SKU entered before beginning.
To import prices with Quantity Breaks, you must be on the Complete plan.
Important considerations
Uploading a CSV file creates a queue in Custom Pricing to synchronize prices for each line in the CSV file. Any other updates made in Custom Pricing after uploading a CSV file will be added to the end of the queue and will complete in the order it was actioned. Updates can take significantly longer to complete with very large CSV files.
Video Walkthrough
Setup
Step 1: Export and prepare your spreadsheet
In your Shopify admin, go to Products, then click the Export button.
Under Export, select All products.
Under Export as, select .CSV for Excel, Numbers, or other spreadsheet programs.
Click Export products.
Note: Shopify will email you the file.
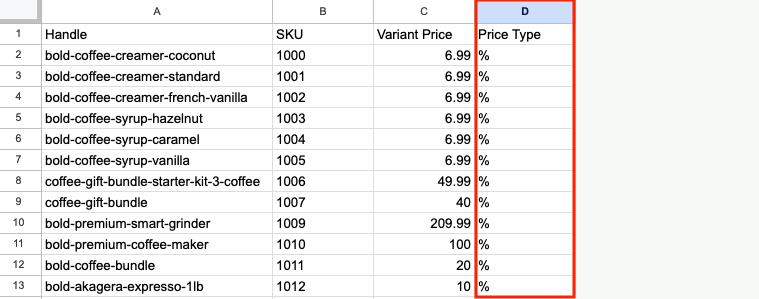
Open the CSV file in a spreadsheet program like Excel or Google Sheets.
Delete all columns, except Handle, Variant SKU, and Variant Price.
Change the name of the Variant SKU column to SKU.
Add a Price Type column to the right of the SKU column, and choose how your discounts will be calculated for each product:
Use % for a percentage discount.
Use - for a fixed amount off the original price.
Use $ for a fixed price (the new, lower price).
Note: Fixed prices that are higher than the original price will be ignored.
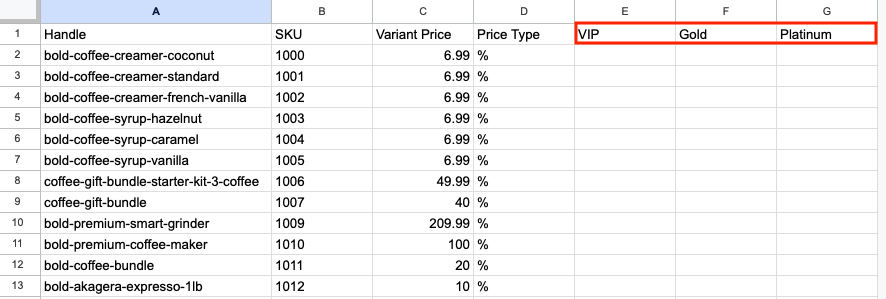
To the right of the Variant Price column, add additional columns for each customer tag.
Note: If you have one tag (Wholesale), add one column. If you have three tags (Gold, Silver, Bronze), add three columns.
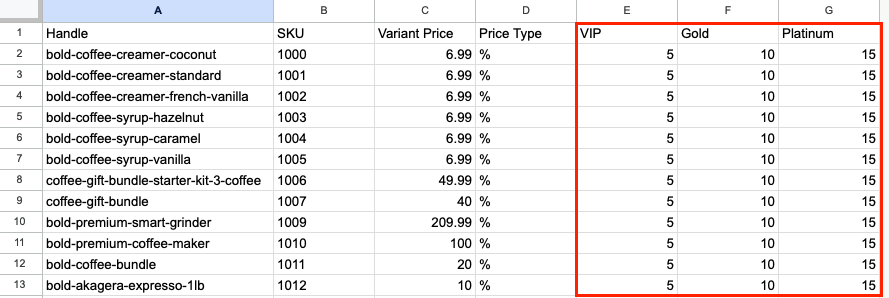
Based on the Price Type you’ve selected, enter the discount amount for each product variant and tag.
Note: If your Price Type is $ enter the new (lower) fixed price. If it’s %, enter the percentage to be discounted. If it’s -, enter the amount to be discounted.

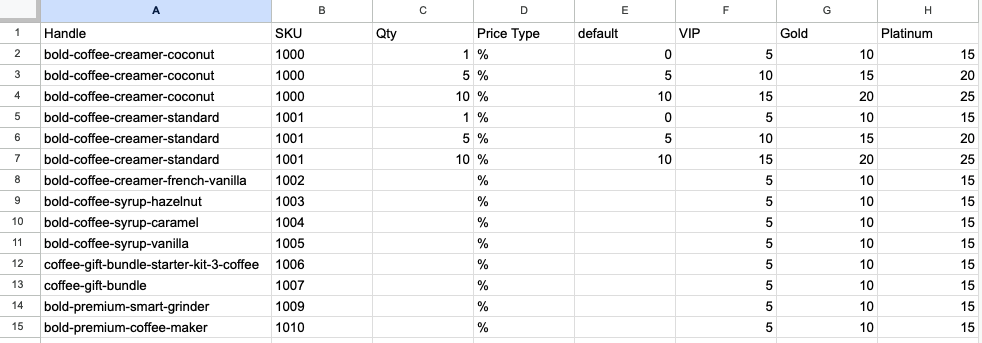
Step 2: Add Quantity Breaks
If you want to offer Quantity Breaks volume based discounts, follow the steps below.
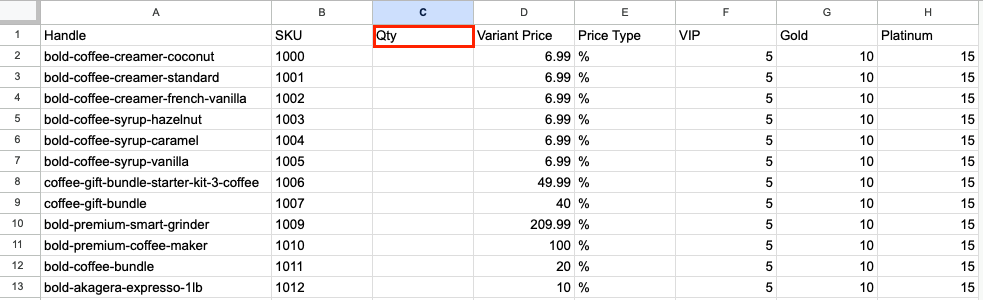
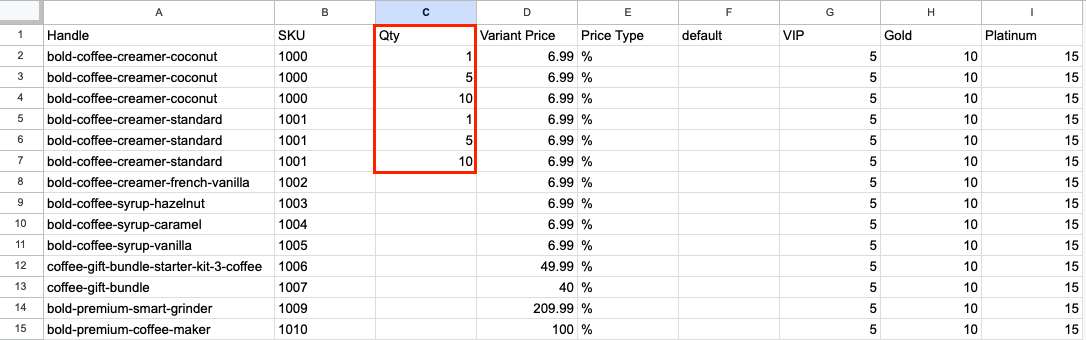
Insert a Qty column to the right of the Variant SKU column.
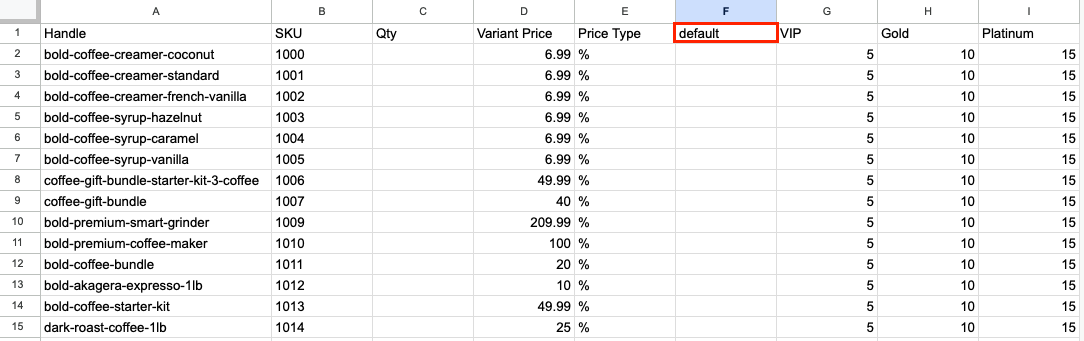
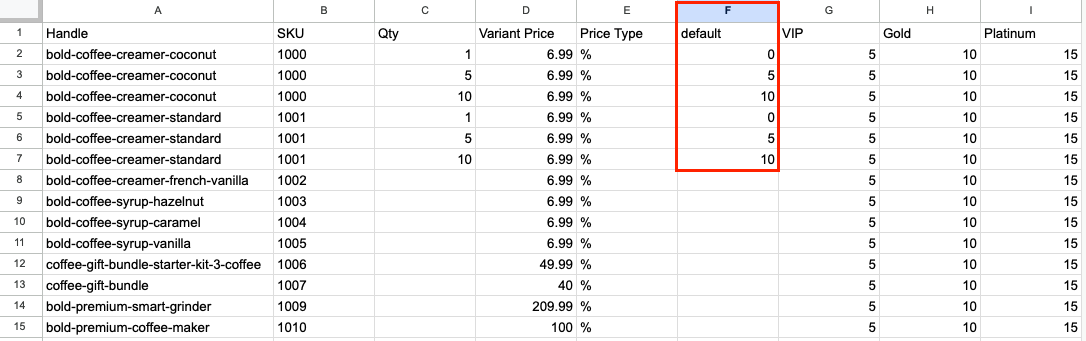
If you want to offer Quantity Breaks to customers without tags, insert a default column to the right of the Price Type column.
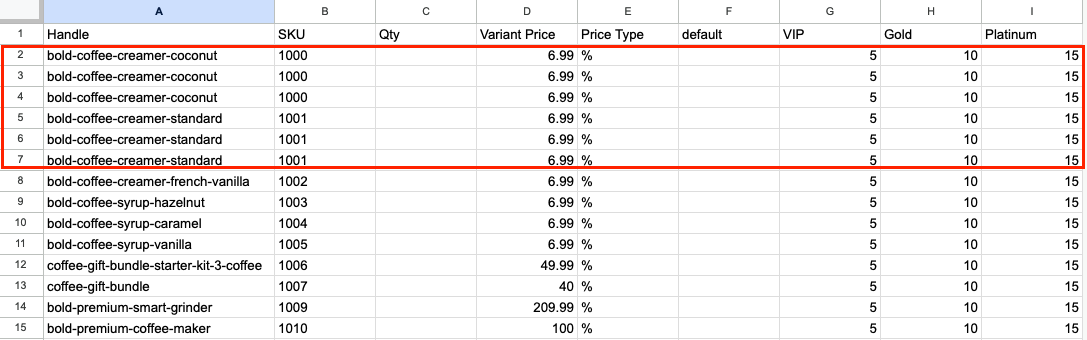
Duplicate each product row for each Quantity Break tier you want to offer.
In the Qty column, enter the minimum quantity of products needed for each Quantity Break tier.
If you added a default column, enter the Quantity Break discount amount that non-tagged customers will receive (based on your Price Type).
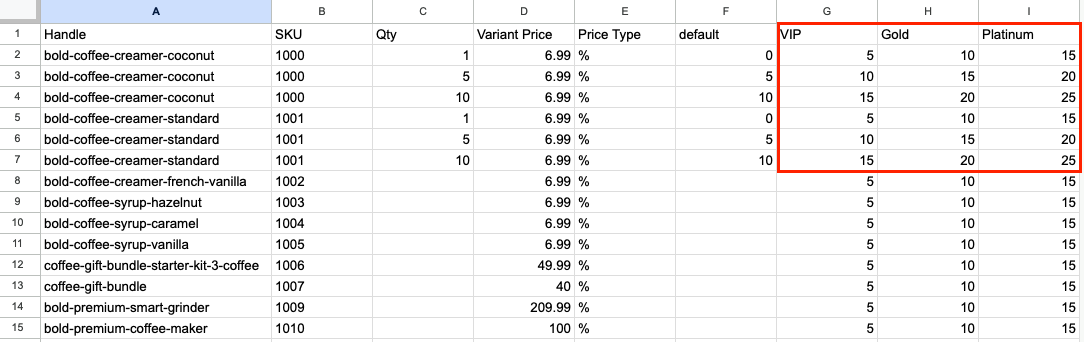
Edit the Quantity Break discount amounts for the remaining tags.
Step 3: Finalize and import your file into Custom Pricing
Delete the Variant Price column.
Save your spreadsheet and export/download it to a CSV file.
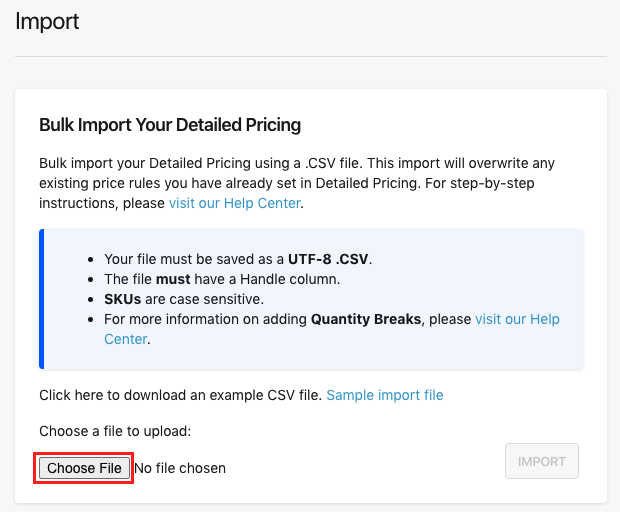
In Custom Pricing, go to Import/Export.
Click Choose File.
Select the .CSV file and click Open.
Click Import.
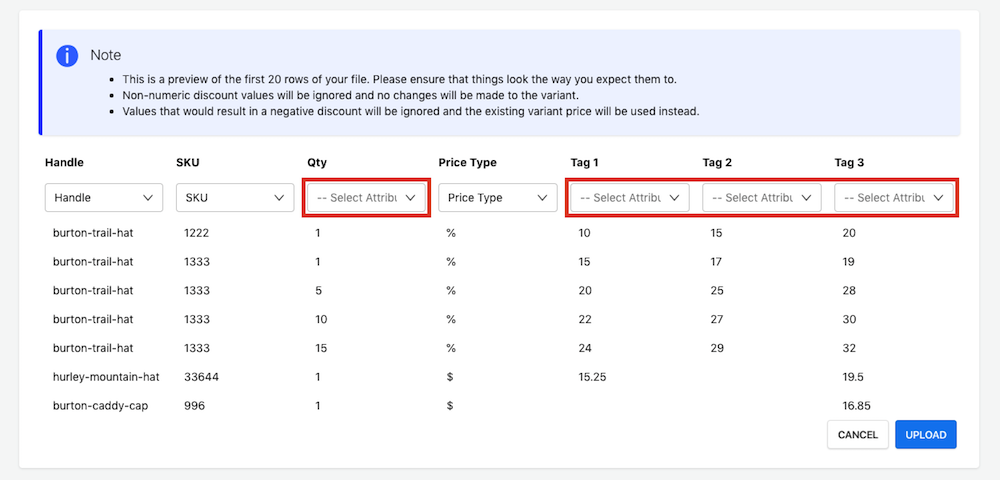
In the preview screen, ensure the correct attribute is selected for each column.
Note: If the preview has any empty columns, mark these columns as -Do Not Import-.
Click Upload.
Note: A process begins to synchronize the new pricing. This can take some time, especially for large files. Pricing syncs at about 1000 variants per hour.