Subscription Management: Customer Perspective
After purchasing a subscription product on your store, your customers can make adjustments to their subscriptions in the customer portal. Some of the adjustments they have access to depend on the customer portal settings you have enabled.
Pro-Tip: If your customer forgets their password they can click the forgot password link on the login page. Shopify sends an email with instructions to reset their password. If your customer is unable to login, they may not have signed up for their account yet. In this case, you can send an account invite from within their customer profile in Shopify. For more information about managing your customer's account, please visit Shopify's help center article.
This article will outline the changes that a customer can make to their subscriptions, as well as list the steps they can take to make those changes.
Change upcoming order date
Allowing customers to change their next order date reduces the number of canceled subscriptions on your store (churn). When this permission is enabled, your customers can choose a new date for their next order from within the customer portal.
Your customers have two options when changing the upcoming order date:
Only update next order date: This option updates the next order date in the cycle and skips the previously scheduled next order date. For example, if a subscription generates monthly on the 15th, and the next order date is changed from September 15th to September 10th, the next order will generate on September 10th and then will be skipped on September 15th. All future orders remain set to recur on the 15th.
Update all future orders based on the selected date: This option changes the next order date as well as the future order dates. For example, if a subscription generates monthly on the 15th, and the next order date is changed to the 10th, the next order will generate on the 10th as will all future recurring orders.
Orders changed to today's date can take up to 60 minutes to process as Bold Subscriptions runs batches for recurring orders every hour starting at midnight.
Setup
To allow your customers to change change their next order date, please follow the steps below.
In Bold Subscriptions, navigate to Settings > Customer portal.
Enable Customer can change their next order date by moving the toggle to the right.
To change the next order date, your customers can follow the steps below.
Log in to the customer portal.
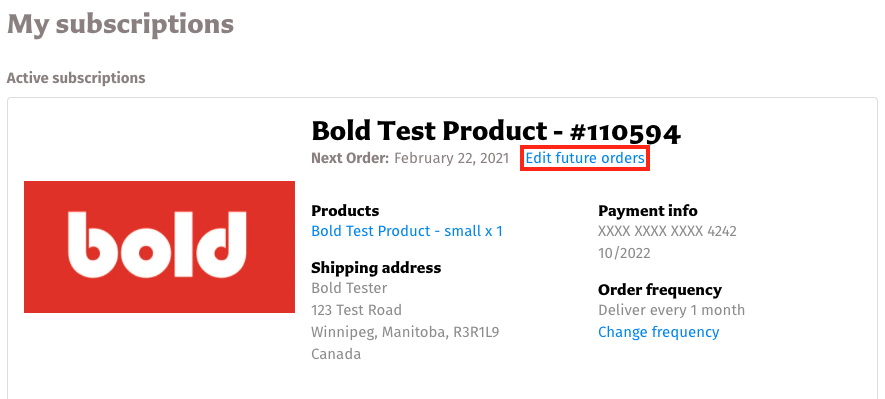
Under Active subscriptions, click Edit future orders under the product that you would like to adjust the order date for.
Click on the existing order date and select a new order date.
Select Only update next order date or Update all future orders based on selected date.
Click Save Changes.
Generate the next subscription order now
If your customer runs out of product and would like to process their next order right away, you can allow them to use the Order now button in the customer portal. When this button is clicked, a subscription order processes within 60 minutes, and the original next order date is automatically marked as skipped. If your customer would like the original next order as well, they can recover the skipped shipment.
Note: While the order is processing, the next order date temporarily updates to the current date, and your customer will not be able to place an additional order until the order completes.
Setup
To allow your customer to use the Order now button, follow the steps below.
In Bold Subscriptions, navigate to Settings > Customer portal.
Enable the Customer can create an additional order setting by moving the toggle to the right.
To generate a subscription order now, your customer can follow the steps below.
Log into the customer portal.
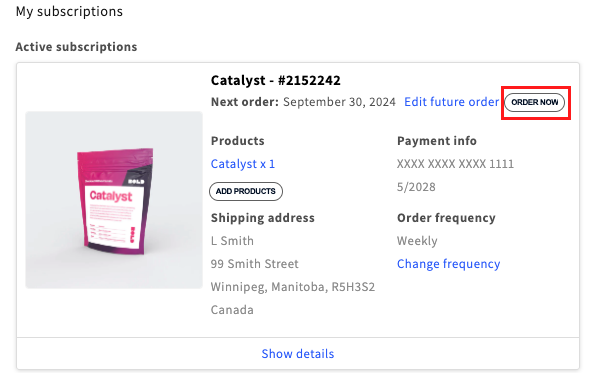
Under Active subscriptions, click the Order now button.
In the pop-up confirmation window, click Ok.
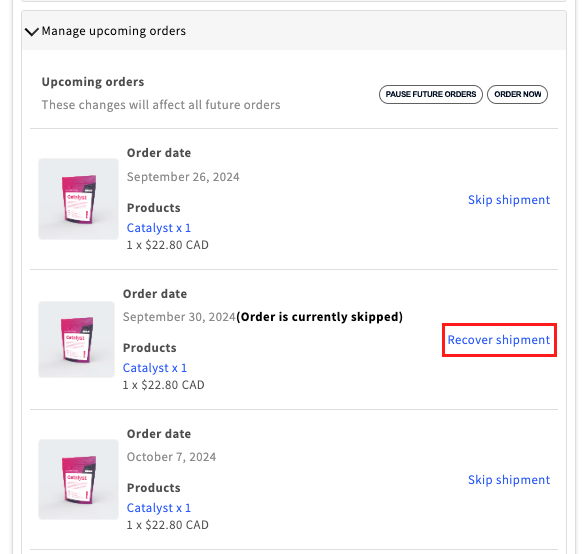
Optional: To recover the original next order, expand the Manage upcoming orders section, and click Recover shipment.
Change order frequency
Active subscribers may need to change the order frequency for their active subscription on your store. For example, your customer may wish to adjust an order frequency from recurring every two weeks to every week to receive more of a product.
Customers can only select from the frequency options that are built into the existing subscription groups.
Note: Changing the order frequency does not update the next order date. Frequency changes come into effect once the next order has passed. To change the next order date as well, please refer to the instructions under Change upcoming order date.
Setup
To allow your customers to change their order frequency , please follow the steps below.
In Bold Subscriptions, navigate to Settings > Customer portal.
Enable Customer can change their order frequency by moving the toggle to the right.
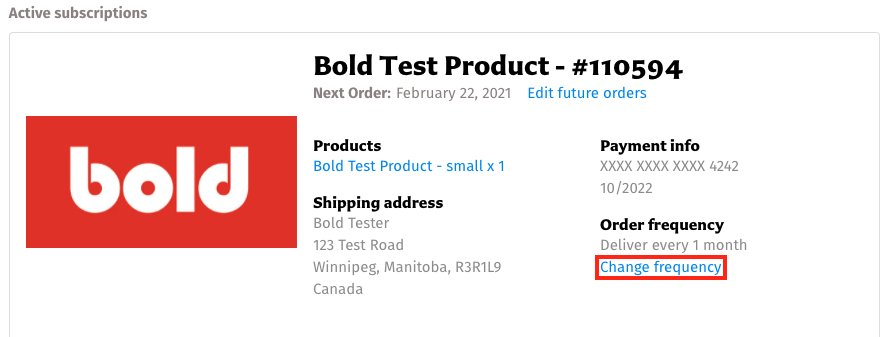
To adjust the order frequency of their subscription, your customers can follow the steps below.
Log in to the customer portal.
Under Order frequency, click Change frequency.
Use the dropdown menu to select a new frequency.
Click Save.
Once the order frequency has been updated, it's best to check the upcoming order dates to ensure they are correct and match the new frequency selected.
Pause and resume a subscription
Within Bold Subscriptions, you can allow your subscribers to pause and resume their recurring orders. This gives your subscribers the ability to put their subscriptions on hold whenever they need to, for as long as they need.
During this time, they will not be billed or receive any orders that have not already been sent.
This helps to reduce churn for subscription orders as it gives your customers the flexibility to temporarily stop their subscriptions instead of cancelling.
Setup
To enable the pause/resume feature for your customers, please follow the steps below.
In Bold Subscriptions, navigate to Settings > Customer portal.
Enable the setting Customers can pause and resume their subscriptions by moving the toggle to the right.
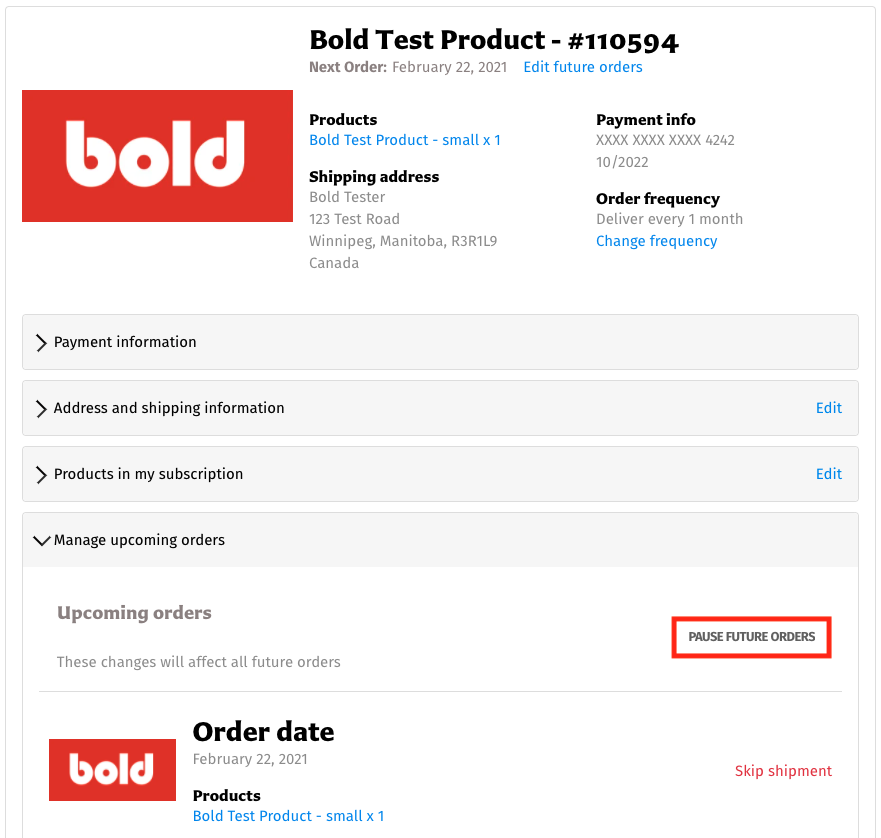
To pause or resume a subscription, your customers can follow the steps below.
Log in to the customer portal.
If you have more than one subscription, click Show details under the one that you would like to pause.
Click Manage upcoming orders.
Click Pause Future Orders.
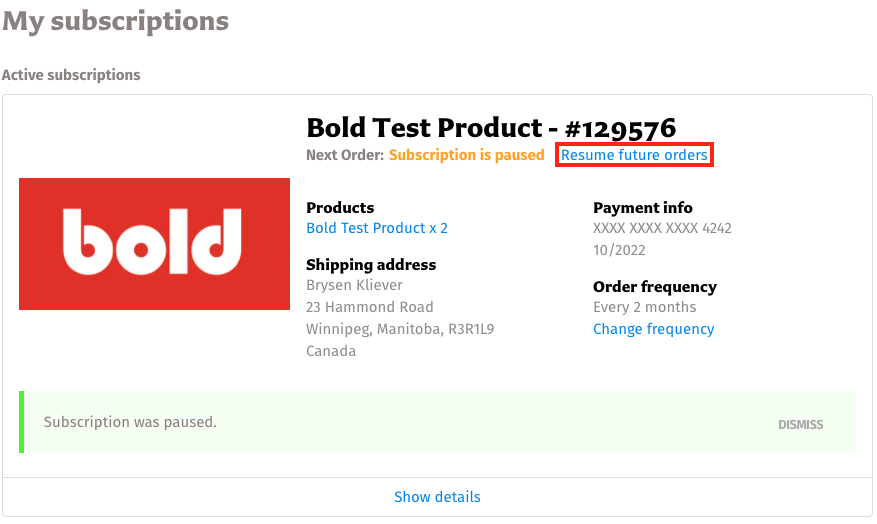
If your customer would like to resume their subscription, this can be done by selecting Resume future orders near the top of the subscription details:
Change product quantity
Note: Only an admin can update the quantity of a product for an existing prepaid subscription. For more information, please see Subscription Management: Merchant Perspective.
Customers can adjust the quantity for a product on a subscription from within the customer portal. This allows existing subscribers to easy increase or decrease the amount of products they are receiving, without the need to make another purchase.
Setup
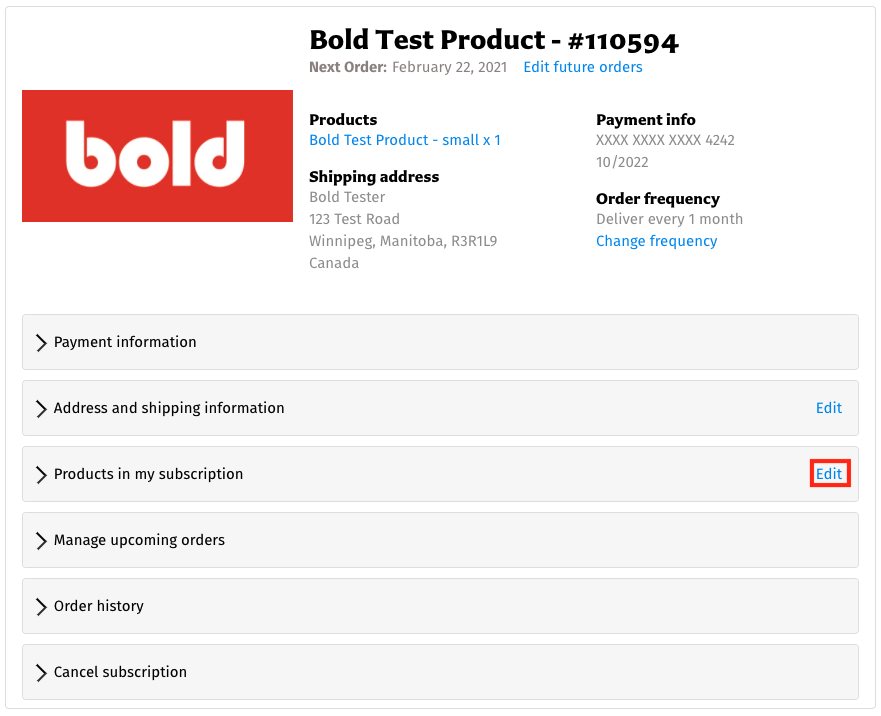
To update the product quantity within an existing subscription, your customer can follow the steps below.
Log in to the customer portal.
If there are multiple subscriptions, click Show details under the subscription you would like to change.
Click Edit next to Products in my subscription.
Adjust the quantity to the desired amount for each product that is in the existing subscription.
Click Save.
Cancel a subscription
Alert: Prepaid subscriptions can be canceled at the end of the prepaid cycle by changing the renewal method. Otherwise, only an admin can cancel a prepaid subscription in the middle of a prepaid cycle. For more information, please visit Subscription Management: Merchant Perspective.
If a customer needs to cancel their existing subscription, you can allow them to complete this within the customer portal.
Setup
To allow your customers to cancel their orders, please follow the steps below.
In Bold Subscriptions, navigate to Settings > Customer portal.
Enable the Customers can cancel their subscriptions setting by moving the toggle to the right.
To cancel an existing subscription within the customer portal, your customer can follow the steps below.
Log in to the customer portal.
If there are multiple subscriptions, click Show details under the subscription that needs to be canceled.
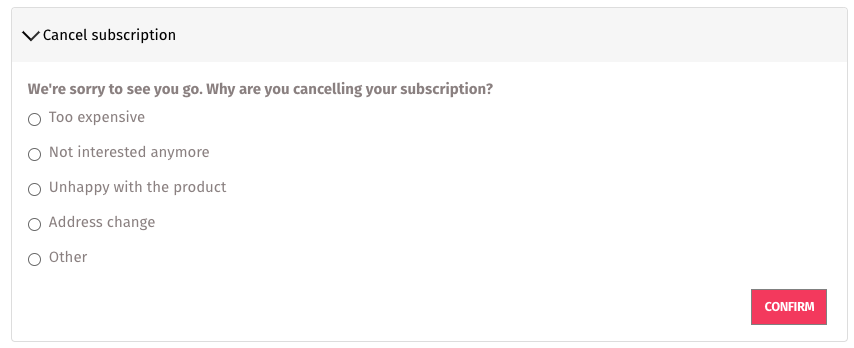
Click Cancel Subscription three times.
If you have set up a cancellation flow, your customer will need to either choose a cancellation reason, or follow the instructions you've provided. If you have not enabled a cancellation flow, your customer will be able to cancel without selecting any further options.
Note: For more information, please visit Cancellation & Dunning Management in Subscriptions for Shopify Checkout.
Click Confirm.
Reactivate a subscription
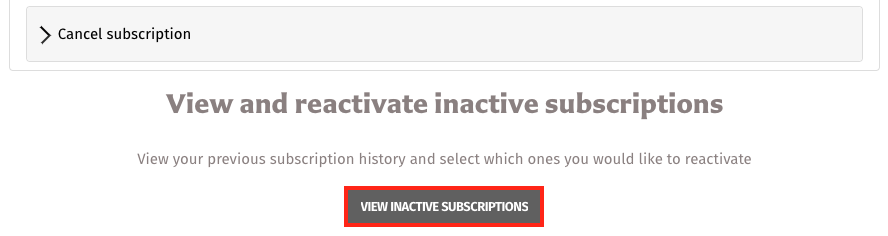
If your customer would like to reactivate a previously canceled subscription, they can follow the steps below.
Log into the customer portal and select View Inactive Subscriptions at the bottom of the page.
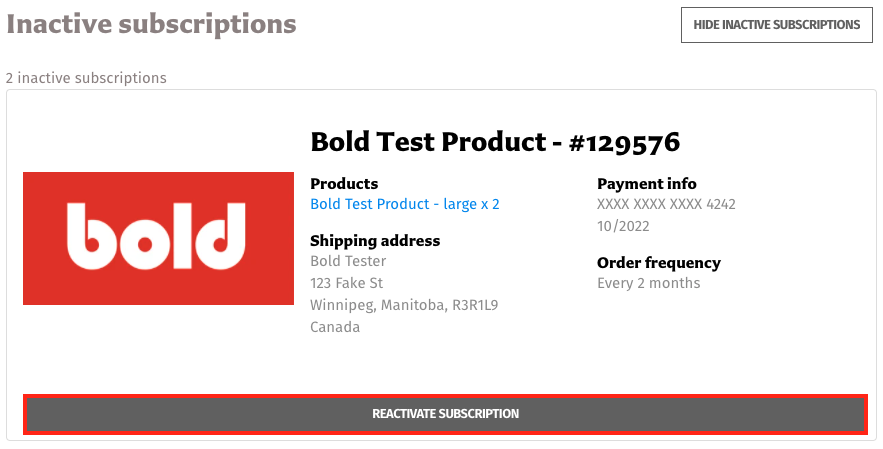
Under the desired subscription, click Reactivate Subscription.
Click Yes, Reactivate Subscription.
Update account information (name, email, phone number)
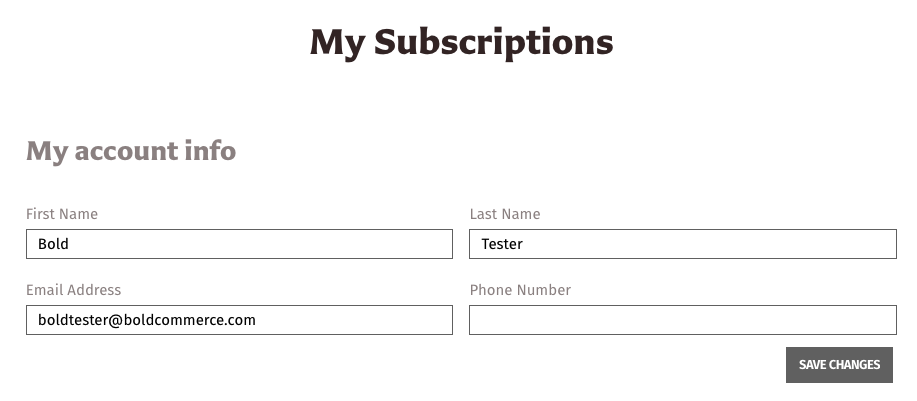
Subscribers are able to change their account information within the customer portal. This includes updating their email address, first name, last name and phone number.
Updating information within the customer portal also changes the information within their customer account in Shopify.
Note: If your customer changes their email address in the customer portal, they must then use the new email address to log into their account going forward.
Setup
To change their account information, your customers can follow the steps below.
Log in to the customer portal.
Near the top of the page under My account info, make the necessary adjustments.
Click Save Changes.
Update payment method or billing address
Alert: Payment information, including billing address and payment method, is stored and verified with Shopify, and not Bold Subscriptions. Bold makes it easy to update this information, however, all validation is handled by Shopify.
If a customer's payment method or billing address needs to be updated, they can start this change in the customer portal by clicking Change payment information. This triggers a Shopify email that contains a link that they can use to update their payment method in Shopify. Please refer to Shopify's article for the most up-to-date information on their process.
It is important that your customers know that they have the ability to update their payment details as their subscription may be canceled depending on your store's failed transaction handling in the Cancellation and Dunning Management settings.
Setup
Customers can start the process of updating their payment method or billing address in Shopify by using the steps below.
Log in to the customer portal.
If there are multiple subscriptions, select Show details under the subscription you would like to update the payment method or billing address for.
Click Payment information.
Click Change Payment Information.
Check the email that is registered to the subscription account.
Note: If you are having issues receiving the email, please check your spam and junk folders.
Update delivery/shipping method
Alert:
Shipping methods cannot be updated on prepaid subscriptions.
Disabling a pickup location in Shopify that is attached to an existing subscription will cause the recurring order to fail with a payment failed message. Our team is working on updating this message.
Only the cheapest shipping method is displayed to customers who have purchased their subscription in a currency different from the store’s default currency.
Your customers can change their subscription delivery and shipping method from within the customer portal. The new method will apply to all future recurring orders, provided it is still valid for the products and address.
There are two types of delivery methods: Ship and Pickup. Please consider the following when making an update:
Shipping: All qualifying rates that you have set up in Shopify appear for selection unless fixed shipping is enabled for the subscriber’s country. If so, then this is the only method that appears.
Local delivery: If enabled in Shopify and the subscriber's shipping address is within the acceptable area, this delivery method appears alongside other shipping methods including fixed shipping. Subscribers must have a phone number included in their shipping address before they switch to local delivery.
Pickup: All pickup locations are available for selection. If pickup was selected on initial checkout, a shipping address must be added before switching to a shipping method.
Setup
To change the shipping method for an existing subscription, your customer can follow the steps below.
Log in to the customer portal.
If there are more multiple subscriptions, click on Show details under the subscription you would like to update the shipping method for.
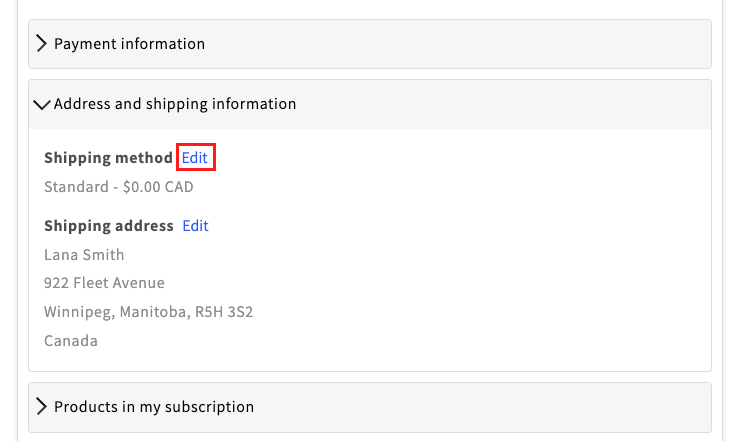
Click on Address and shipping information.
Click Edit next to Shipping method.
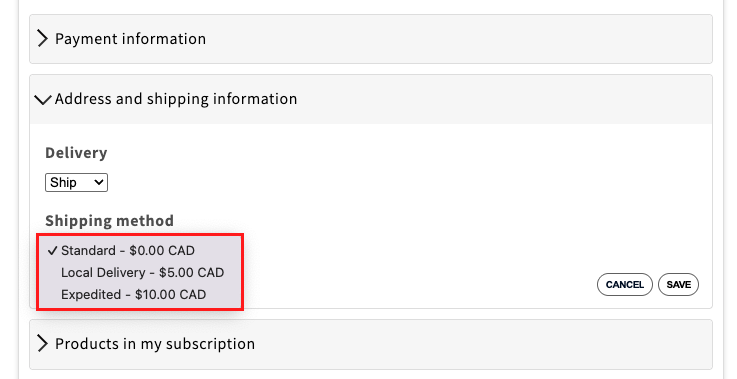
Expand the dropdown menu under Delivery, and select the desired delivery method.
Note: This dropdown only appears if you offer both pickup and shipping.
If Ship is selected, expand the dropdown menu under Shipping method and select the desired shipping method.
Note: Before switching to local delivery, a phone number must be present on the customer's shipping address. When switching from pickup to shipping, a shipping address must be added to the customer's profile first.
If Pickup is selected, expand the dropdown menu under Pickup locations, and select the desired location.
Click Save.
Update shipping address
Alert: When updating the shipping address on a prepaid subscription, customers are not automatically billed or refunded any differences in shipping costs on orders they’ve already paid for. Any costs associated with shipping updates take effect on the next prepaid cycle if it is set to continue.
Customers are able to adjust their shipping address and information directly within the customer portal.
Setup
To update their shipping address, your customer can follow the steps below.
Log in to the customer portal.
If there are multiple subscriptions, click Show details under the subscription you would like to update the shipping address for.
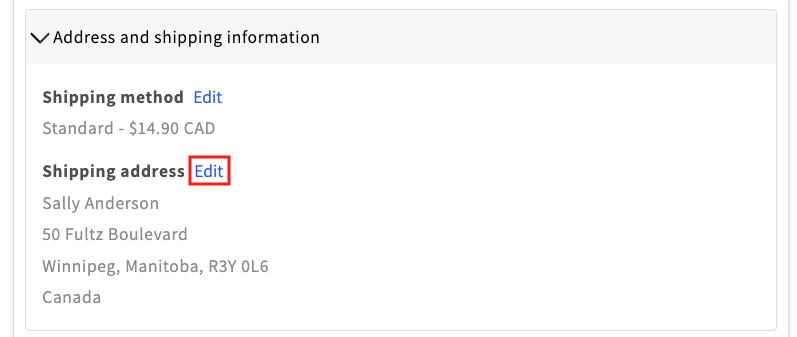
Click on Address and shipping information.
Click Edit next to Shipping address.
Select an existing address or enter a new address.
Click Save Changes.
Swap a subscription product
Alert:
Only an admin can swap products in an existing prepaid subscription. For more information, please visit Subscription Management: Merchant Perspective.
Swapping is unavailable for for customers who are using a currency that is different from your store's base currency.
Swapped products do not receive discounts when dynamic discounts are enabled.
Products must belong to the same subscription group in order to be swapped. As the admin, you can change the subscription group the product belongs to.
Due to a Shopify limitation, product-specific discount codes are automatically removed when swapping. Product-specific discount codes must be reapplied after a swap is completed. Please see Add a discount code code for instructions.
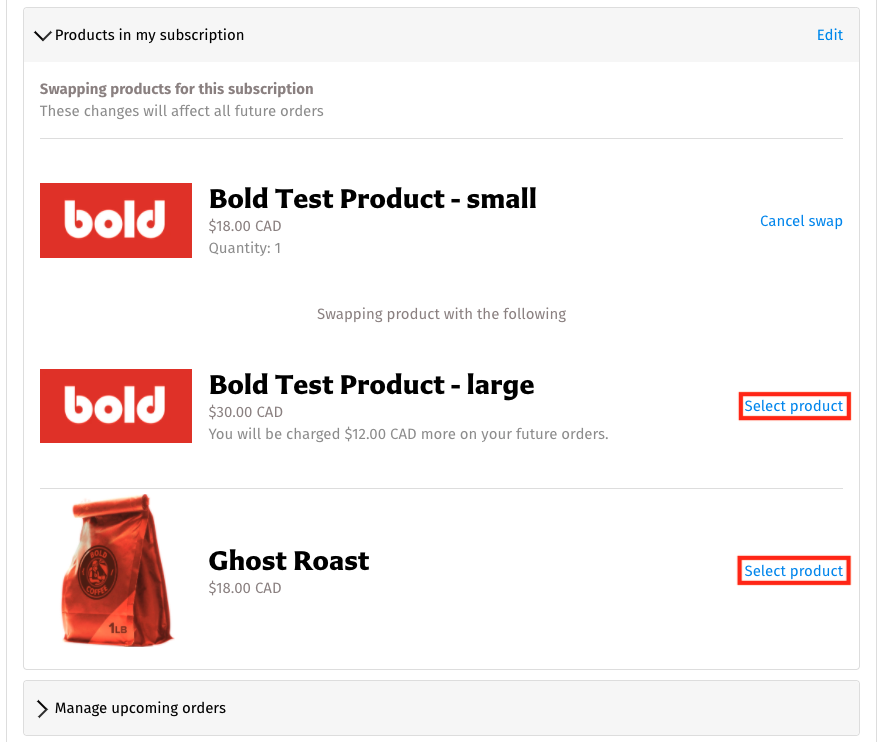
If a customer would like to subscribe to a different product, they can swap their current product with a new one. This allows them to avoid cancelling and resubscribing.
Setup
To swap a product, your customer can follow the steps below.
Log in to the customer portal.
If multiple subscriptions are present, click Show details under the subscription you would like to swap.
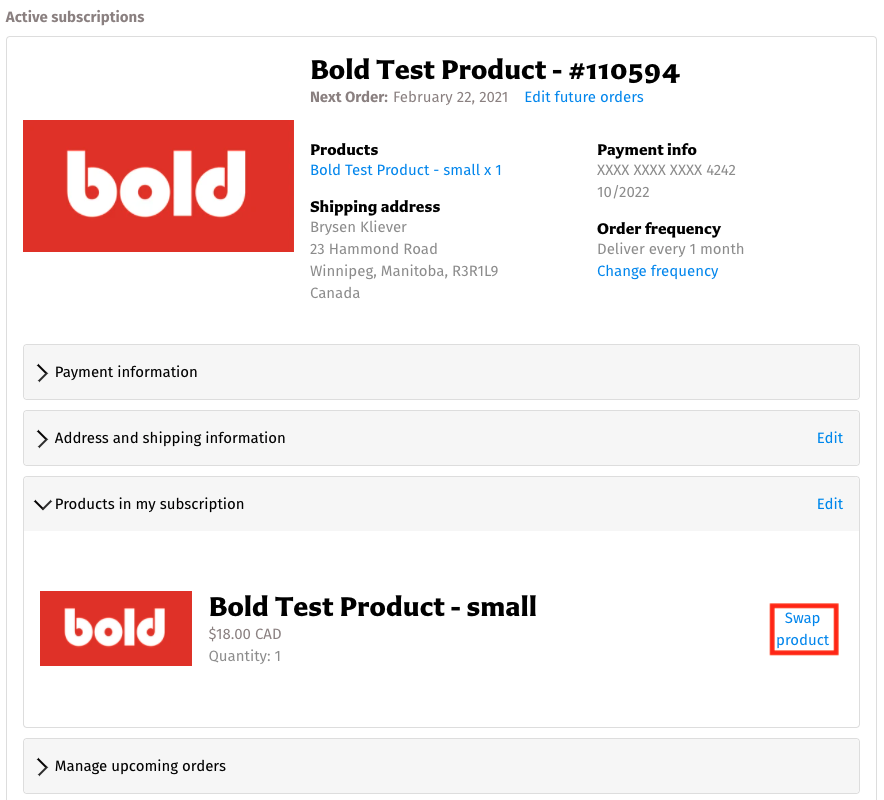
Click Products in my subscription.
Select Swap product next to the product you want to swap with.
Click Select product next to a product you would like to swap the original product with.
Select OK.
Add a discount code
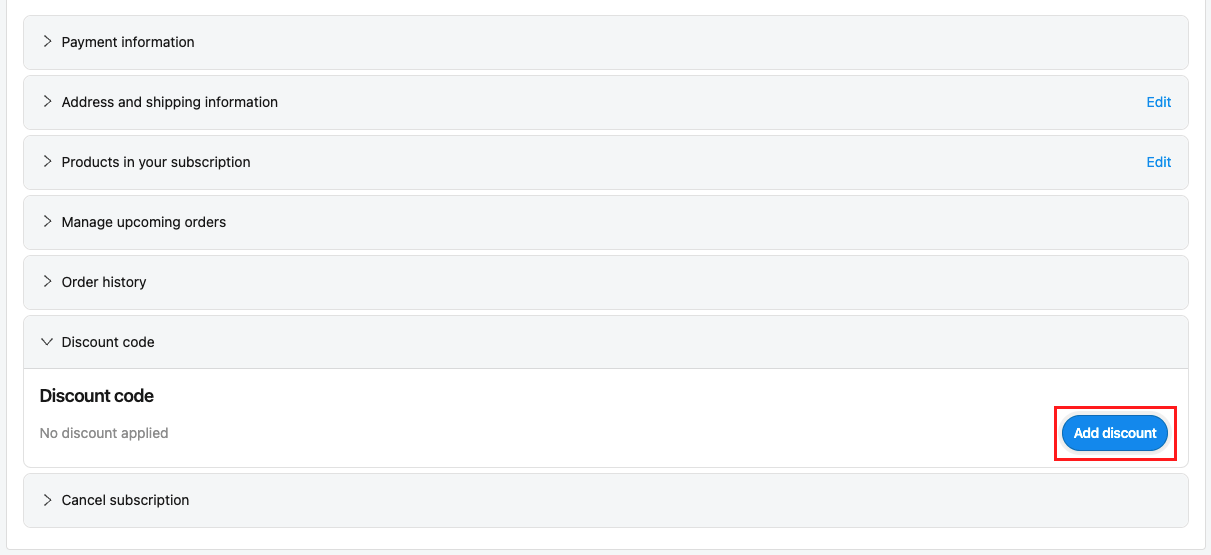
You can provide subscribers with a discount code at any time. Your existing subscribers can add a discount code to their order from within the customer portal. When a discount code is applied to a subscription, the price is not noted as discounted in the customer portal—it simply reflects the new amount.
If a discount code is already applied to the subscription, then the customer will need to remove it before applying a new one. For step-by-step instructions, please see Remove a discount code below.
Note: Discount codes which are limited to the initial order cannot be added to an existing subscription, since the initial order has already passed. In addition, automatic discount codes cannot be added to existing subscriptions—only removed. For more information and other important considerations, please visit Discount Codes in Subscriptions for Shopify Checkout.
Setup
To add a discount code, your customer can follow the steps below.
Log in to the customer portal.
If there are multiple subscriptions, click Show details under the subscription you would like to add the discount code to.
Click Discount code, then Add discount.
Enter the discount code and then click Apply.
Remove a discount code
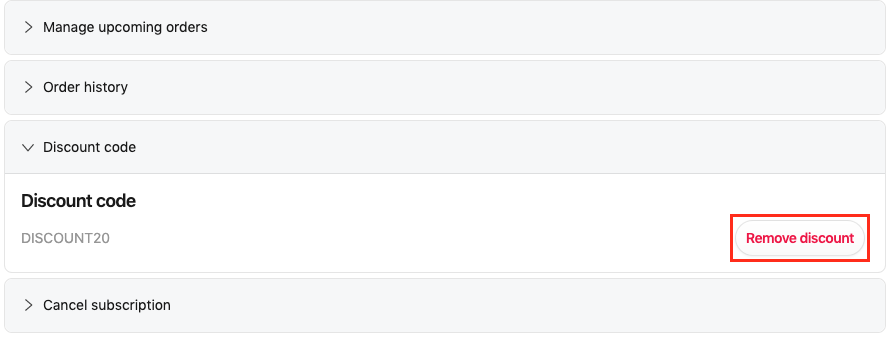
Only one discount code can be applied to a subscription at a time. If there is an existing discount code on your customer's subscription and they would like to add a new discount code, they will need to remove the existing discount code first.
Setup
To remove a discount code, your customer can follow the steps below.
Log in to the customer portal.
Click Discount code, then Remove discount.
Skip an upcoming order
Customers can skip an upcoming order within the customer portal. If they change their mind at a later date, they can also recover the order.
Some possible reasons a customer may want to skip an upcoming order are as follows:
Insufficient funds in the payment method on file.
They are moving.
They just need some extra time between orders.
Setup
To skip an order within the customer portal, your customer can follow the steps below.
Log in to the customer portal.
Click Show details under the subscription that you would like to skip.
Click Manage upcoming orders.
Click Skip shipment next to the upcoming order that you would like to skip.
If a subscription has an order that was skipped that needs to be reversed, you can follow steps 1-6 and select Recover shipment to reverse the change that was made earlier.
Add a product to a subscription (one-time or recurring)
Alert
Products added to existing prepaid subscriptions are charged when the next subscription order is set to recur. However, customers are not charged shipping on the added product until the prepaid subscription renews.
This feature is not available for customers who have purchased their subscription in a currency that is different from your store's base currency.
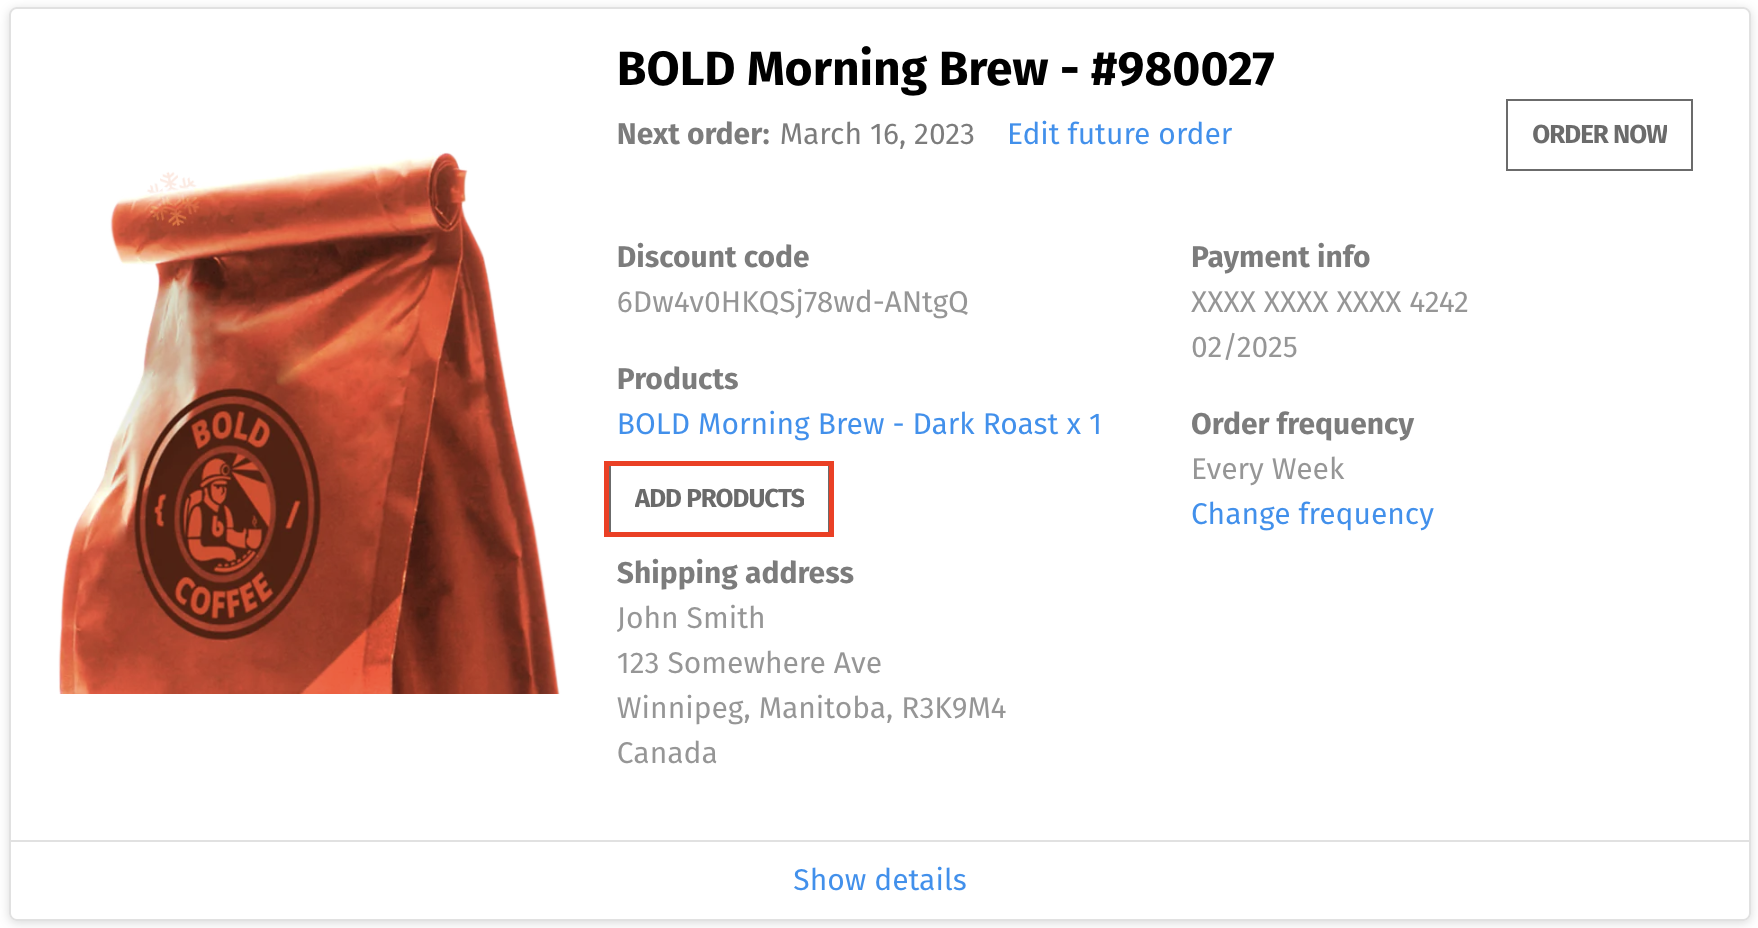
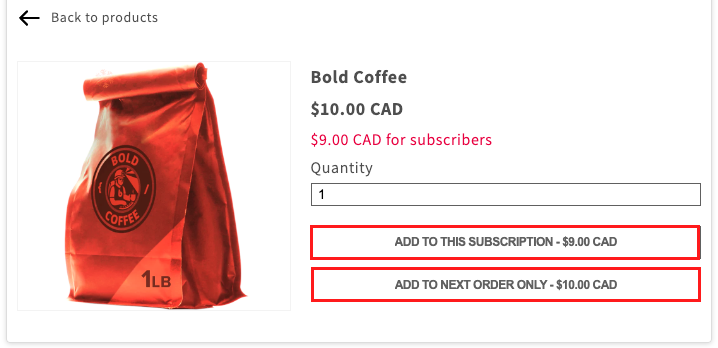
When this feature is enabled, your customers can add a product to one of their active subscriptions from within the customer portal. The options available are as follows:
Add to this subscription. This adds the product as a recurring order along with the existing subscription.
Add to next order only. This adds the product to the next subscription order as a one-time purchase only. It will not recur.
The options available to your customers depend on the options you’ve made available for the product on your storefront. These are as follows:
If the product is available as a subscription only, your customer will only see the option to Add to this subscription.
If the product is available as a one-time purchase only, your customer will see the option to Add to next order only.
If the product is available for subscription as well as one-time purchase, your customers will see both Add to this subscription and Add to next order only.
A new shipping rate is calculated at the time the new product is added.
Discounts on added products
If an existing subscription product is added to a subscription, it will receive the discount associated with the group it is in. If the added product has a dynamic discount, the initial discount will be applied to all recurring orders. If the group does not have a discount, then a discount will not be applied. If the added product is in more than one subscription group, it will inherit the discount from the group it was most recently added to.
Video Walkthrough
Setup
To allow your customers to add a new product to their existing subscription, please enable the settings as shown below.
Caution: When this setting is enabled, customers are able to add any product regardless of the available inventory. Our team is working to update this feature to match your Shopify inventory settings for the near future.
From within Bold Subscriptions, navigate to Settings > Customer portal.
Enable the toggle next to Customer can add products to their existing subscriptions.
To add a product to an existing subscription, your customer can follow the steps below.
Log in to the customer portal.
Within the active subscription overview, click Add Products.
Select the desired product.
If applicable, select the size and quantity.
Choose an available option.
Remove a product from a subscription
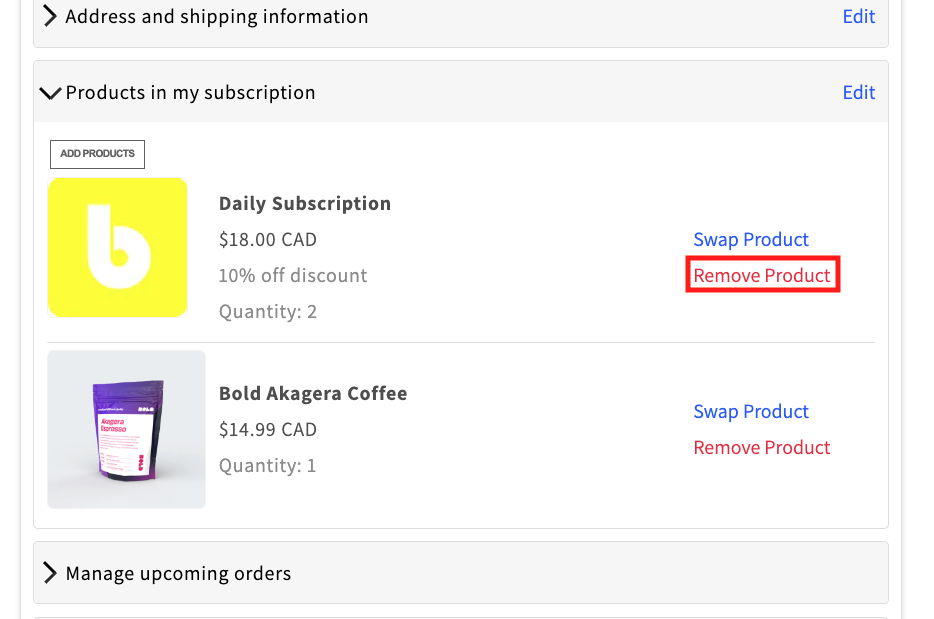
If a customer has multiple products in an existing subscription, they might consider removing a product temporarily and adding it back later, replacing it with another product altogether or simply removing an unwanted product.
Note: Removing a product is only possible if the customer has more than one item in their subscription.
Setup
To remove a product from a subscription, your customers can follow the steps below.
Log in to the customer portal.
Click Products in my subscription.
Click Remove product next to the product you would like to remove.
Click OK in the browser popup confirmation.
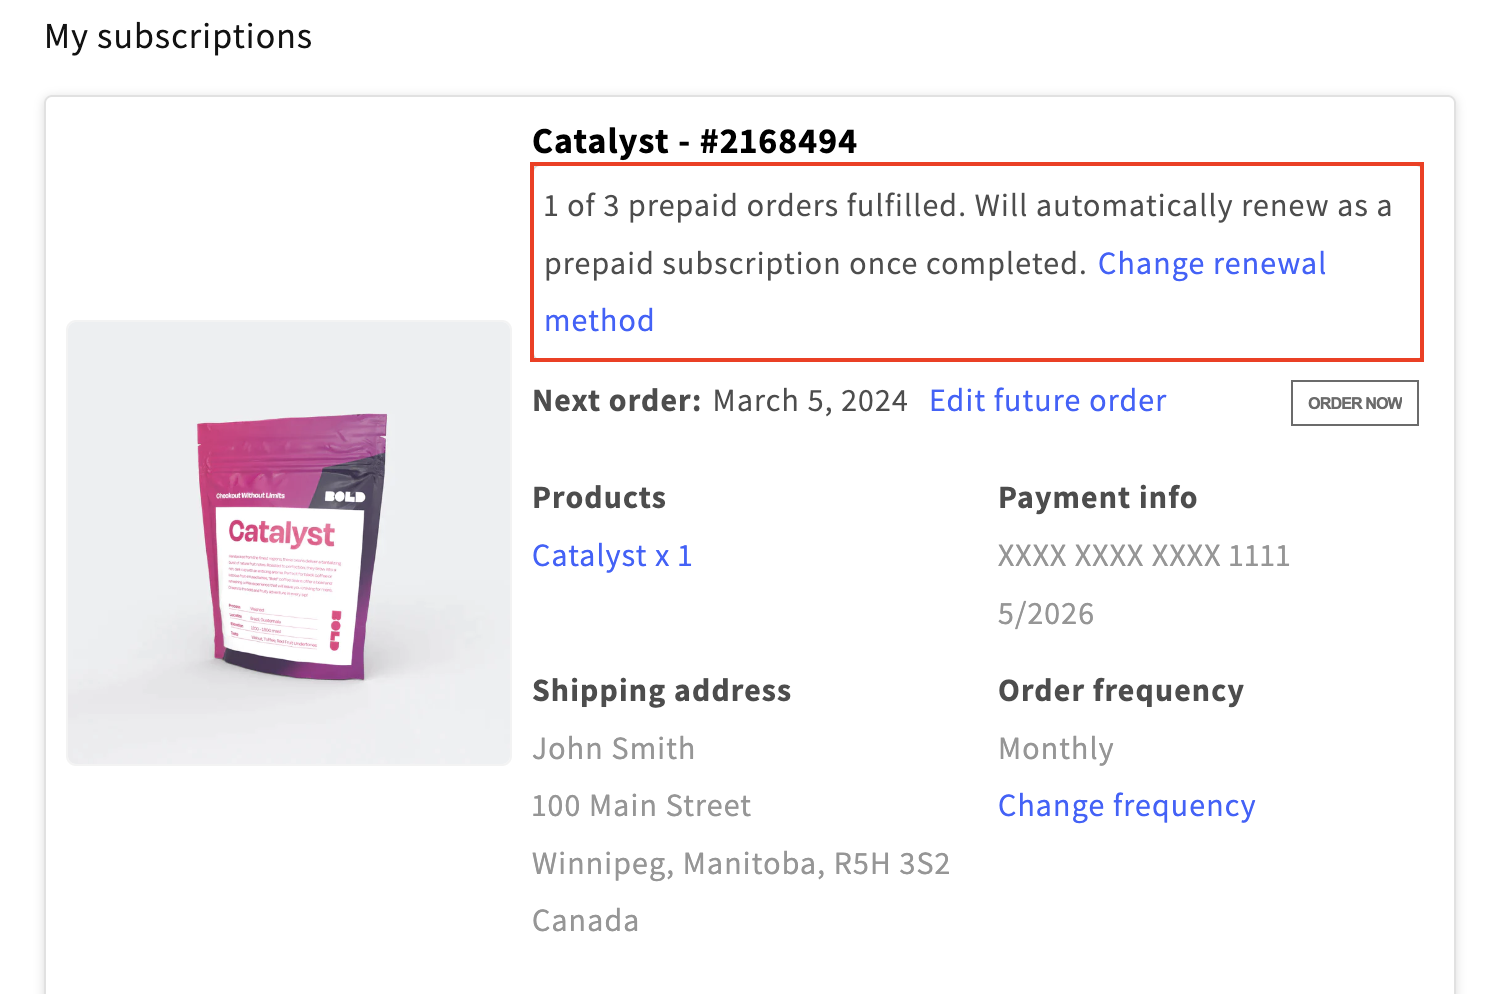
Change prepaid subscription renewal method
To allow your customer to change the renewal method on their prepaid subscription, please follow the steps below.
From within Bold Subscriptions, navigate to Settings > Customer portal.
Enable the Customer can change their prepaid renewal method setting by moving the toggle to the right.
To adjust the renewal method, your customers can follow the steps below.
Log in to the customer portal.
Locate the prepaid subscription.
Click Change renewal method.
Select a new renewal method from the dropdown menu.
Click Save changes.